Intro
Have you ever tried something so bright, sweet, and fun that it instantly takes you back to childhood? That is Blue Raspberry Syrup Recipe does to me– every chance I get.
One swallow and I am ten years old once more, standing in line at the snow cone stand on a hot summer day and having the electric blue syrup drip down on shaved ice.
Something special about the tangy-sweet taste–the way it tickles your tongue, the fruitiness of its tartness, and the sweetness of candy. And when you find it is so easy to prepare Blue Raspberry Syrup at home, oh, you will never buy it again.
It is a very easy, fast, and amazingly strong blue raspberry slap that we all know in secret how good it is. Whatever you are making, be it snow cones, Italian sodas, mocktails, or even drizzling it over the pancakes, kids or not; then this homemade syrup will brighten anything you have made.
What is Blue Raspberry Syrup?
Funny thing, though, there is no blue raspberry in the wild. Shocking, right? The taste of blue raspberry is a wonderful creation a combination of raspberry tangles with a tincture of citrus and a feel of something vaguely tropical. It is livelier than pure raspberry and the taste was made to be noticeable in color as well as taste.
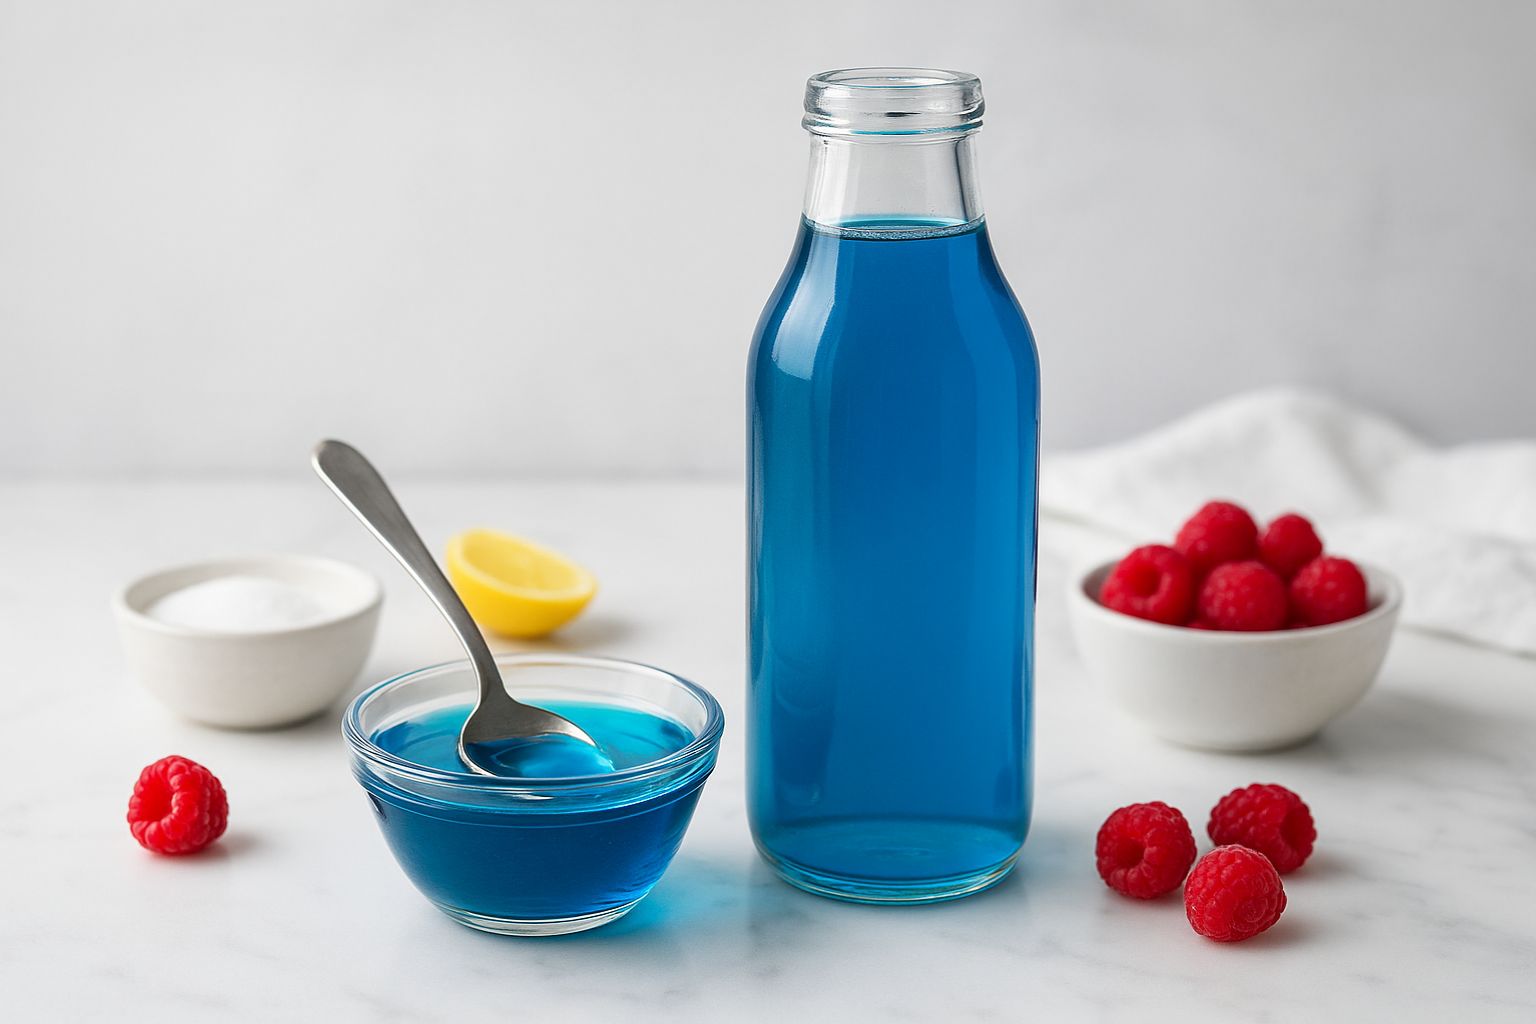
Blue Raspberry Syrup: This is the electric-blue syrup that is used in snow cones, slushies, and beverages. Historically, it is prepared using sugar, water, citric acid and either artificial or natural raspberry flavoring, and coloured with the well-known bright blue colour that is synonymous with summer fun.
But homemade? Oh, it’s so much better. When you prepare your own Blue Raspberry Syrup Recipe, you can regulate the sugar content, reduce the acidity and even select the shade of coloration you want. It is not simply about taste, but it is about happiness in a jar.
The Account of My Finding of this.
I had not tried blue raspberry syrup at an expensive cocktail bar or restaurant the first time. No, no, no, it was at a little country fair, on a melting snow cone.
I recall how that brilliant blue melted into my hands, and stained the ends of my fingertips, and how that sweet-tart zing was making me giggle. It was pure happiness.
A few decades (and a few culinary degrees on) later, I was pursuing the same nostalgia of flavor. I desired that sweet elixir– but without the artificial taste and inimitable ingredients. Thus I began doing the testing in my kitchen.
Dip, dip, dip a sugar here, a slice of lemon there, splash raspberry extract,… ow. I nailed it. The ideal, time-worn Blue Raspberry Syrup Recipe – the kind that causes all slushies to gleam and all beverages to taste like summer.
Equipment List
This syrup is very simple to prepare, and you need only simple kitchen equipment:
- Medium saucepan – to reduce the syrup.
- Whisk or spoon – for stirring.
- Fine mesh strainer – in case you use real raspberries.
- Spoons and cups – to maintain the ideal balance.
- Glass bottle or jar – to keep that beautiful blue syrup.
- Small funnel (Optional) – to pour with ease and in a nice way.
That is all. You are halfway to blue raspberry bliss.
Ingredients
The following will make the best Blue Raspberry Syrup Recipe:
- 1 cup granulated sugar
- 1 cup water
- 1 teaspoon citric acid (or 1 Tab lemon juice)
- 1 teaspoon raspberry extract (or raspberry extract mixed with lemon extract)
- A drop or two of blue food coloring (according to the intensity wanted)
- Optional: 1/4 cup fresh or frozen Raspberries to add a hint of natural fruitiness.
It takes six ingredients, one pot, and a taste of pure happiness.
Instructions
Step 1: Start the Simple Syrup
Add the sugar and water to a saucepan and boil on medium heat. Bring to a boil until all the sugar is dissolved, and the mixture starts to slightly simmer.
Step 2: Add the Flavor
Take off the heat and add the citric acid (or lemon juice) and whisk. Add raspberry extract, and stir until fragrant. In case you are using actual raspberries, now add them and leave them to steep for 10 minutes and then put them through a strainer.
Step 3: Add the Magic (Color)
A tiny bit of blue food coloring, just to get that bright, electric color. Blend thoroughly until brown.
Step 4: Cool and Store
Allow the syrup to cool. Refrigerate in a clean glass jar or bottle. It will last beautifully for a maximum of 2 weeks.
Blue Raspberry Syrup Usage.
Now the fun begins! This syrup is so multicolored that it is multifunctional.
Snow cones & shaved ice: The traditional! Pour and pour and pour like a blue waterfall.
Soda or sparkling water: Combine 2-3 tablespoons and club soda and ice to make a refreshing mocktail.
Cocktails: Have a drizzle in margaritas, daiquiris, or drinks that are made of lemonade.
Desserts: Vanilla ice cream, cheesecake or pancakes should be drizzled over making it look like a fun game.
Milkshakes/smoothies: Shake it in vanilla or berry shake to create such a beautiful contrast of color.
In essence, if it is sweet, this syrup can make it even sweeter and cooler.
Homemade vs. Store-Bought
Ready-made blue raspberry syrups are easy to use, I will admit. However, they are usually too sweet, have some chemical sharpness, and have unneeded additives.
You can use real sugar (not high-fructose corn syrup) when making Blue Raspberry Syrup at home, and you can customize the flavors and even omit the preservatives. Also, your kitchen will smell great, fruity, candy-like, and slightly citrusy.
Homemade syrup is more balanced, clean and fresher. And best of all? You are also able to regulate that color intensity. Prefer it bright electric blue on children? Add a few extra drops. Want cocktails in a lighter, sky-blue tone? Go subtle. It’s all you.
Why It’s So Addictive
Something is interesting about the taste of blue raspberry. It is not fresh fruit, it is fantasy fruit. There was a mixture of raspberry, citrus and nearly floral. It’s salsa on the tongue, a normal raspberry does not.
By using your own Blue Raspberry Syrup Recipe, you get to add to that the tang, the sweetness and the zing. That little pucker on your lips that makes them smile even when you do not mean to is provided by the citric acid. It is candy, nostalgia, and delight in a bottle.
How to make the Perfect Blue Raspberry Syrup.
- Don’t overcook it. As soon as the sugar is dissolved and the syrup becomes a little thicker, it is ready. Excessive cooking causes excessive stickiness.
- Apply citric acid to be genuinely authentic. It is what makes it have that blue raspberry tart bite.
- Color gradually. Drop in a coloring of food – it has a kick!
- Add natural fruit. One or two raspberries or a splash of blueberry juice will make the flavor beautiful.
- Keep it clean. Keep in sterilized glass bottles as fresh as possible.
Flavor Variations
Here’s where you can play:
Blue Raspberry Lemonade Syrup: Add an additional tablespoon of lemon juice to make it on the zee.
Blue Coconut Raspberry Syrup: Add one teaspoon of coconut extract to add a tropical flavor.
Spicy Blue Raspberry: Pinna chili powder or cayenne to give your cocktail an insane, fun base.
Berry Mix: Add some strawberry or blueberry extract to add a more fruity note.
Home-made syrups are playgrounds – be creative!
Storage and Shelf Life
Keep your own Blue Raspberry Syrup refrigerated, in a bottle or a jar. It will last up to 2 weeks but you can also keep it up to a month by pouring 1tablespoon vodka in it (which is a natural preservative).
You can even freeze it in ice cube trays in case you want to prepare it in a large quantity during the summer days, and then you need not carry two or three big ice cubes, one big ice cube serves a glass of sparkling water or lemonade.
Serving Ideas
Want to get some imaginative concepts besides the snow cones? Try these:
Blue Raspberry Italian Soda: Combine 2tbsp syrup, ice, sparkling water, and a drop of cream. Heaven.
Blue Raspberry Lemonade: 2 tbsp syrup will give homemade lemonade a sweet-sour flavor.
Frosted Rim: Wet the rim of your glass with the syrup, then with sugar – pretty to look at!
Layered Drinks: Add red strawberry syrup and white soda and have a patriotic summer drink.
Dessert Drizzle: Cheesecake or panna cotta can be enhanced with a few drops of this to make it look and taste sweet.
FAQs
Q1: Is it possible to prepare this syrup without food coloring?
Yes! It will not be blue, of course, but you can make a natural pinkish raspberry syrup with the help of the actual raspberry.
Q2: Is it safe for kids?
Totally. You have control of ingredients – it has no artificial preservatives, it just has fun color and flavor.
Q3: Can this be used in alcoholic beverages?
Absolutely. It is unbelievable in vodka sodas, margaritas and even blue raspberry mojitos.
Q4: What is the thickness of the syrup to be?
A bit less than honey–just enough to stick to a spoon and pour.
Q5: Is it possible to replace raspberries with extract?
Yes! Combine the syrup base with 1/2 cup raspberries, then strain the color. It adds real fruit flavor.
Final Thoughts
The process of creating Blue Raspberry Syrup at the house is similar to a small-scale science project – though the end results are all the more tasty and colorful.
You feel like you are surrounded by the smell of raspberry candy, and when you taste the syrup on your spoon, there is no use denying that it makes you smile.
It is fast, personalizable, and much more fulfilling than twisting one in the store. Each lot is its own, your color, your tang, your sweetness.
And pouring it over ice, or some bright-blue snow cone to a smiling child… it is pure joy. That is what this syrup is all about, plain old nostalgia made at home.
More Recipes:
Blue Raspberry Syrup Recipe
Equipment
- Medium saucepan
- Whisk or spoon
- Fine mesh strainer
- Spoons and cups
- Glass bottle or jar
- Small funnel (Optional)
Ingredients
- 1 cup granulated sugar
- 1 cup water
- 1 teaspoon citric acid or 1 Tab lemon juice
- 1 teaspoon raspberry extract or raspberry extract mixed with lemon extract
- A drop or two of blue food coloring according to the intensity wanted
- Optional: 1/4 cup fresh or frozen Raspberries to add a hint of natural fruitiness.
Instructions
Step 1: Start the Simple Syrup
- Add the sugar and water to a saucepan and boil on medium heat. Bring to a boil until all the sugar is dissolved, and the mixture starts to slightly simmer.
Step 2: Add the Flavor
- Take off the heat and add the citric acid (or lemon juice) and whisk. Add raspberry extract, and stir until fragrant. In case you are using actual raspberries, now add them and leave them to steep for 10 minutes and then put them through a strainer.
Step 3: Add the Magic (Color)
- A tiny bit of blue food coloring, just to get that bright, electric color. Blend thoroughly until brown.
Step 4: Cool and Store
- Allow the syrup to cool. Refrigerate in a clean glass jar or bottle. It will last beautifully for a maximum of 2 weeks.

Hi, I’m Olivia Brooks! Cooking is my passion, and I love turning everyday ingredients into meals that bring joy to the table. On CulinaryPearl, I share simple recipes, helpful kitchen tips, and inspiration for food lovers everywhere