
Intro
There are certain cookies that instantly take me back to childhood, to flour-dusted countertops and the smell of something sweet baking in the oven. This Hershey Kiss Cookies Recipe is one of those treasures.
The moment those soft peanut butter cookies come out of the oven and you gently press a chocolate kiss into the center, something magical happens.
The chocolate softens, the cookie cracks slightly around the edges, and suddenly your kitchen smells like comfort.
As a female chef who has baked thousands of cookies in both professional and home kitchens, I can tell you this: simple recipes are often the most powerful. This Hershey Kiss Cookies Recipe is not complicated.
It uses pantry staples like peanut butter, sugar, butter, eggs, and flour. But when they come together, they create a cookie that feels festive, nostalgic, and completely irresistible.
These cookies show up during holidays, cookie swaps, bake sales, and cozy winter weekends. But honestly? I make them year-round. Because chocolate and peanut butter never go out of season.
Today, I’m walking you through my personal method, with all my small baking secrets included.
What is Hershey Kiss Cookies Recipe?
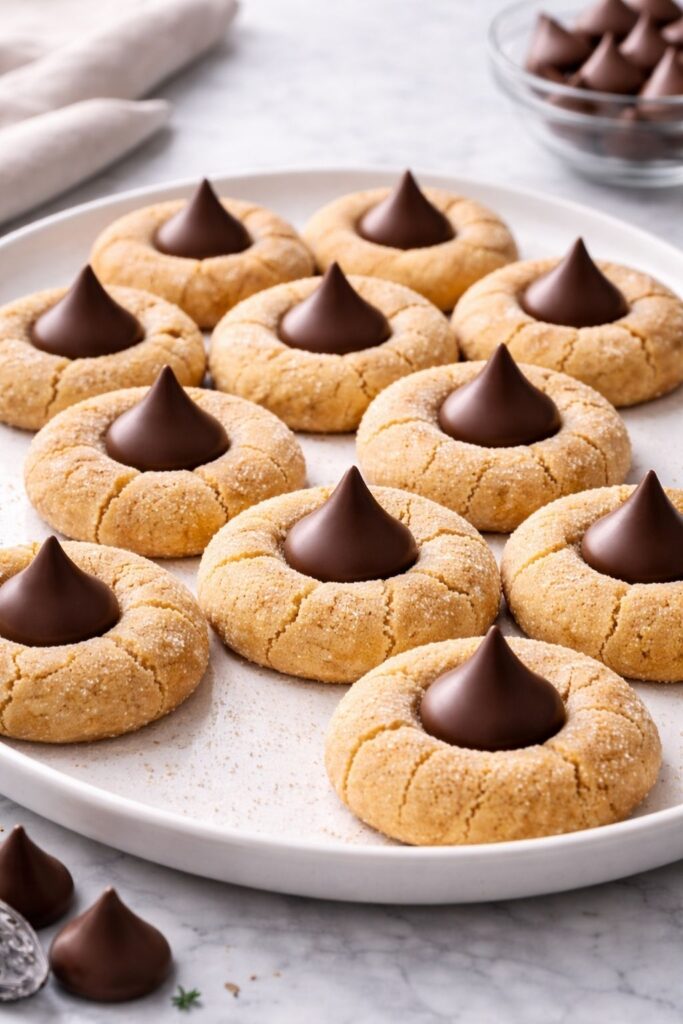
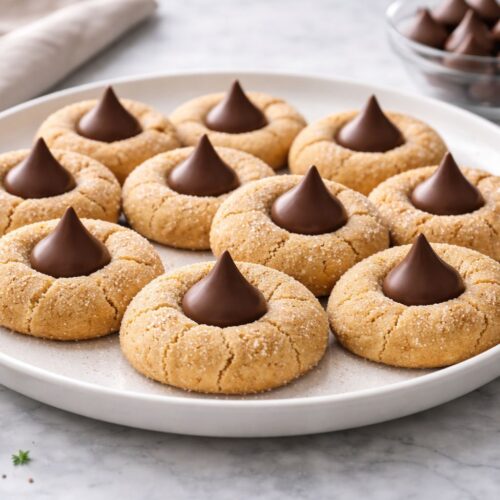
Hershey Kiss cookies—often called peanut butter blossom cookies—are soft peanut butter cookies topped with a classic chocolate kiss pressed into the center while the cookie is still warm.
The base is a rich, slightly chewy peanut butter dough rolled in sugar before baking. As the cookies bake, they puff up gently and develop tiny cracks across the surface.
The moment they come out of the oven, a chocolate kiss is pressed right into the center. The heat softens the chocolate without completely melting it, so once cooled, you get a tender cookie with a creamy chocolate center.
What makes this cookie so special is the balance of flavors. The peanut butter brings a salty, nutty richness. The sugar adds sweetness and texture. The chocolate kiss melts slightly and adds smooth cocoa flavor. Together, they create the perfect bite—soft, sweet, slightly salty, and chocolatey.
Equipment List
Before we begin, gather your baking tools:
- Mixing bowls (one large, one medium)
- Electric hand mixer or stand mixer
- Measuring cups and spoons
- Rubber spatula
- Baking sheet
- Parchment paper or silicone baking mat
- Cookie scoop (optional but helpful)
- Cooling rack
No fancy pastry equipment required. Just simple tools and a little love.
Recipe Card Info
Prep Time: 15 minutes
Chill Time: 30 minutes (optional but recommended)
Cook Time: 10–12 minutes
Total Time: About 1 hour
Serves: 24 cookies
Cuisine: American
Course: Dessert
Calories: Approximately 150–170 per cookie
Ingredients
- 1/2 cup unsalted butter, softened
- 1/2 cup creamy peanut butter
- 1/2 cup granulated sugar
- 1/2 cup light brown sugar, packed
- 1 large egg
- 1 teaspoon pure vanilla extract
- 1 1/4 cups all-purpose flour
- 1/2 teaspoon baking soda
- 1/4 teaspoon salt
- 1/4 cup extra granulated sugar (for rolling)
- 24 Hershey’s chocolate kisses, unwrapped
Instructions (Step by Step)
Step 1: Cream the Butter and Sugars
In a large mixing bowl, beat the softened butter, peanut butter, granulated sugar, and brown sugar together until light and fluffy. This takes about 2–3 minutes. Don’t rush this step—it creates air in the dough, which keeps the cookies soft.
Step 2: Add Egg and Vanilla
Beat in the egg and vanilla extract until fully combined. Scrape down the sides of the bowl to make sure everything is evenly mixed.
Step 3: Combine Dry Ingredients
In a separate bowl, whisk together flour, baking soda, and salt.
Gradually add the dry mixture into the wet ingredients. Mix just until combined. The dough will be soft but not sticky.
Step 4: Chill the Dough (Optional but Recommended)
Cover the bowl and refrigerate for 30 minutes. This helps control spreading and enhances flavor.
Step 5: Shape the Cookies
Preheat oven to 350°F (175°C). Line a baking sheet with parchment paper.
Scoop tablespoon-sized portions of dough and roll into smooth balls. Roll each ball in granulated sugar for a sparkly coating.
Place cookies about 2 inches apart on the baking sheet.
Step 6: Bake
Bake for 10–12 minutes, until edges are set and tops show light cracking. The centers should still look slightly soft.
Step 7: Add the Chocolate Kiss
Immediately after removing from the oven, gently press one chocolate kiss into the center of each cookie. The cookie will crack slightly around the edges—that’s perfectly normal and beautiful.
Step 8: Cool Completely
Allow cookies to cool on the baking sheet for 5 minutes, then transfer to a cooling rack. Let them cool completely so the chocolate sets.
The Flavor and Texture Experience
When you bite into one of these cookies, the outside is lightly crisp from the sugar coating. The inside is soft and tender with that unmistakable peanut butter richness. Then you hit the chocolate center—smooth, creamy, and slightly melted.
The contrast in textures is what makes this Hershey Kiss Cookies Recipe so addictive. You get soft cookie, creamy chocolate, and just a little sugary crunch all in one bite.
Why Chilling the Dough Matters
Chilling does three important things:
- Prevents excessive spreading.
- Deepens the peanut butter flavor.
- Improves texture.
If you’re short on time, you can skip it. But when I want bakery-quality results, I always chill.
Choosing the Right Peanut Butter
Use creamy, shelf-stable peanut butter for best results. Natural peanut butter can separate and cause greasy cookies.
The smooth texture gives the cookie structure while still delivering strong peanut flavor.
Can You Use Different Chocolate?
Absolutely.
While classic milk chocolate kisses are traditional, you can experiment with:
- Dark chocolate kisses
- Caramel-filled kisses
- Cookies and cream kisses
- Mini peanut butter cups
Each variation gives the cookie a slightly different personality while keeping the same base recipe.
Make Them Extra Special
Want to elevate this cookie for a holiday tray?
Drizzle melted dark chocolate over the tops. Sprinkle flaky sea salt on the warm chocolate. Roll the dough balls in colored sugar for festive sparkle.
Small details make homemade cookies feel bakery-worthy.
Common Mistakes to Avoid
Overbaking: The cookies continue to cook on the tray after removing from the oven. Take them out when slightly soft.
Pressing the kiss too hard: A gentle press is enough.
Using cold butter: It won’t cream properly and affects texture.
Storage Tips
Store cookies in an airtight container at room temperature for up to 5 days.
For longer storage, freeze the baked cookies for up to 2 months. Let them thaw at room temperature before serving.
You can also freeze the dough balls (without sugar coating) and bake fresh whenever needed.
Why I Love This Recipe So Much
This Hershey Kiss Cookies Recipe holds a special place in my heart. It’s the kind of cookie you make when you want to share something sweet without spending hours in the kitchen.
It’s simple but impressive. Classic but never boring. Every time I press that chocolate kiss into the warm cookie, I feel like I’m finishing a tiny edible gift.
And honestly, baking cookies like these reminds me why I fell in love with cooking in the first place. It’s not just about technique. It’s about joy. It’s about creating something that makes people smile.
Frequently Asked Questions
Can I make these ahead of time?
Yes. Bake them a day in advance and store in an airtight container.
Can I double the recipe?
Absolutely. This recipe doubles beautifully for parties and holidays.
Why did my cookies spread too much?
Your butter may have been too soft, or the dough wasn’t chilled.
Final Thoughts
If you’re looking for a foolproof, crowd-pleasing cookie that combines peanut butter and chocolate in the most comforting way possible, this Hershey Kiss Cookies Recipe is it.
Soft centers. Sweet sugar coating. Creamy chocolate tops. Every bite feels familiar and warm.
So tie on your apron, preheat that oven, and unwrap those chocolate kisses. Your kitchen is about to smell incredible—and trust me, these cookies won’t last long.
Hershey Kiss Cookies Recipe
Equipment
- Mixing bowls (one large, one medium)
- Electric hand mixer or stand mixer
- Measuring cups and spoons.
- Rubber spatula
- Baking sheet
- Parchment paper or silicone baking mat
- Cookie scoop (optional but helpful)
- Cooling rack
Ingredients
- 1/2 cup unsalted butter softened
- 1/2 cup creamy peanut butter
- 1/2 cup granulated sugar
- 1/2 cup light brown sugar packed
- 1 large egg
- 1 teaspoon pure vanilla extract
- 1 1/4 cups all-purpose flour
- 1/2 teaspoon baking soda
- 1/4 teaspoon salt
- 1/4 cup extra granulated sugar for rolling
- 24 Hershey’s chocolate kisses unwrapped
Instructions
Step 1: Cream the Butter and Sugars
- In a large mixing bowl, beat the softened butter, peanut butter, granulated sugar, and brown sugar together until light and fluffy. This takes about 2–3 minutes. Don’t rush this step—it creates air in the dough, which keeps the cookies soft.
Step 2: Add Egg and Vanilla
- Beat in the egg and vanilla extract until fully combined. Scrape down the sides of the bowl to make sure everything is evenly mixed.
Step 3: Combine Dry Ingredients
- In a separate bowl, whisk together flour, baking soda, and salt.
- Gradually add the dry mixture into the wet ingredients. Mix just until combined. The dough will be soft but not sticky.
Step 4: Chill the Dough (Optional but Recommended)
- Cover the bowl and refrigerate for 30 minutes. This helps control spreading and enhances flavor.
Step 5: Shape the Cookies
- Preheat oven to 350°F (175°C). Line a baking sheet with parchment paper.
- Scoop tablespoon-sized portions of dough and roll into smooth balls. Roll each ball in granulated sugar for a sparkly coating.
- Place cookies about 2 inches apart on the baking sheet.
Step 6: Bake
- Bake for 10–12 minutes, until edges are set and tops show light cracking. The centers should still look slightly soft.
Step 7: Add the Chocolate Kiss
- Immediately after removing from the oven, gently press one chocolate kiss into the center of each cookie. The cookie will crack slightly around the edges—that’s perfectly normal and beautiful.
Step 8: Cool Completely
- Allow cookies to cool on the baking sheet for 5 minutes, then transfer to a cooling rack. Let them cool completely so the chocolate sets.

Hi, I’m Olivia Brooks! Cooking is my passion, and I love turning everyday ingredients into meals that bring joy to the table. On CulinaryPearl, I share simple recipes, helpful kitchen tips, and inspiration for food lovers everywhere