Intro
There are desserts that feel fancy, and then there are desserts that feel like a secret you’re almost reluctant to share. This Nigella Chocolate Pots Recipe sits beautifully in the second category. It’s rich, silky, deeply chocolatey, and somehow both elegant and comforting at the same time.
The first time I made it, I remember thinking it was too simple to be this good. Just cream, chocolate, and a few supporting ingredients—nothing complicated, nothing intimidating.
But when I took that first spoonful, I actually paused. It was smooth like velvet, intense like dark cocoa, and just sweet enough to feel indulgent without being heavy.
As a female chef who loves desserts that feel honest rather than overworked, this recipe speaks to me. It doesn’t try to impress you with technique. It impresses you with texture and flavor.
The Nigella Chocolate Pots Recipe is exactly what I reach for when I want something small but powerful—something that feels like a quiet luxury at the end of a long day.
And honestly, once you make it at home, you’ll understand why it’s one of those desserts people never forget.
What is Nigella Chocolate Pots Recipe?
This dessert is a classic no-bake chocolate cream dessert inspired by the style of Nigella Lawson, known for her rich, indulgent, and unfussy approach to cooking.
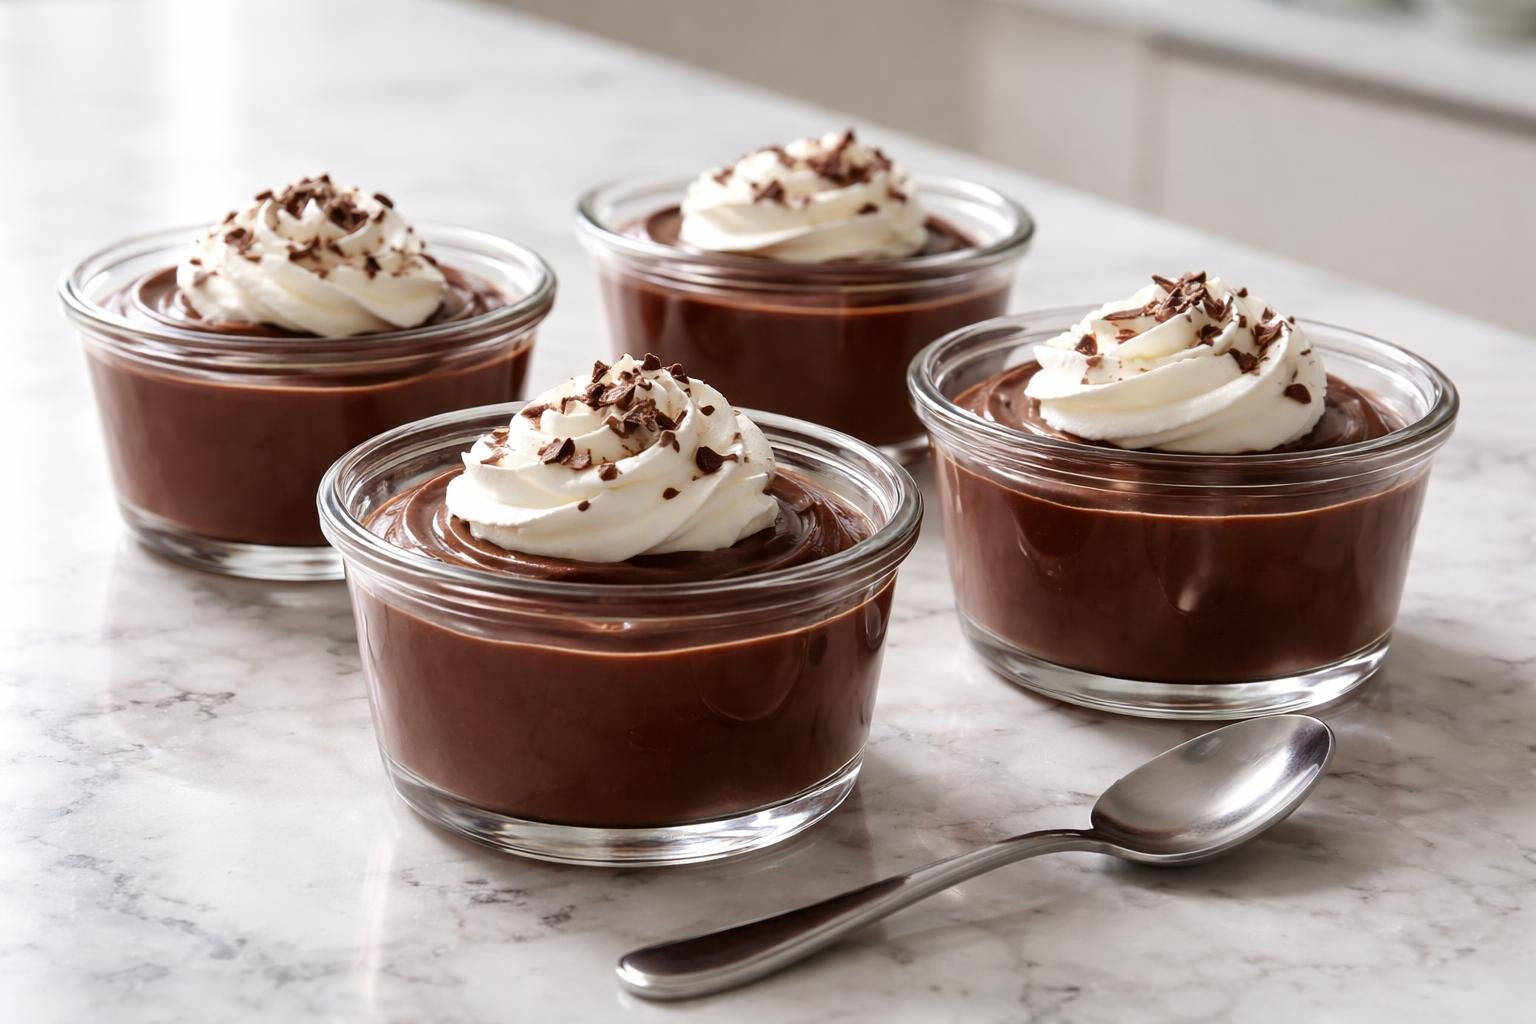
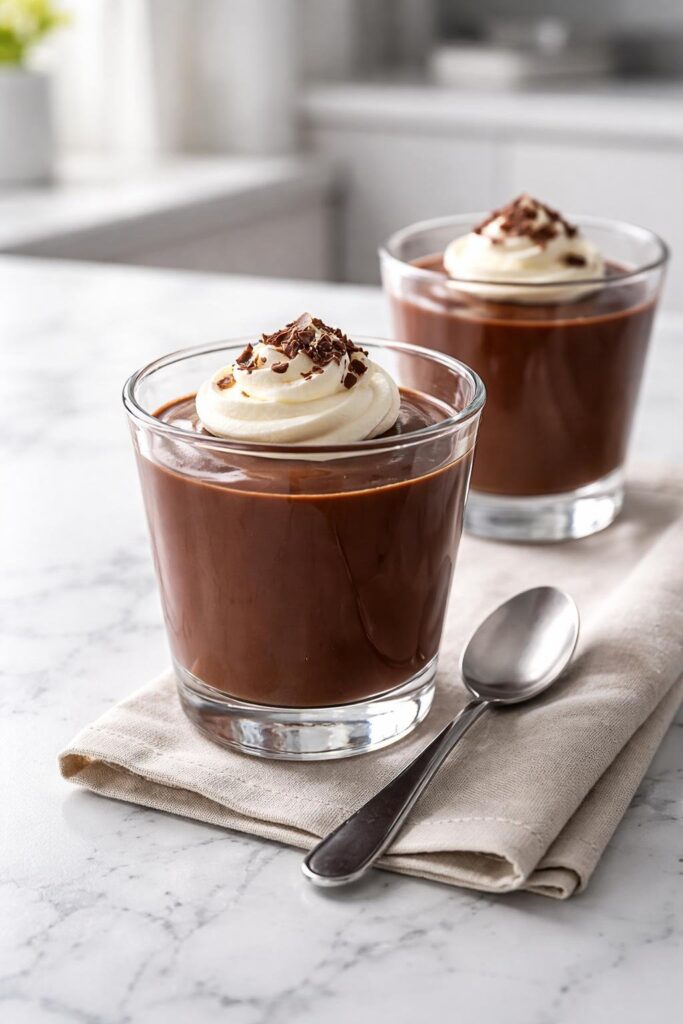
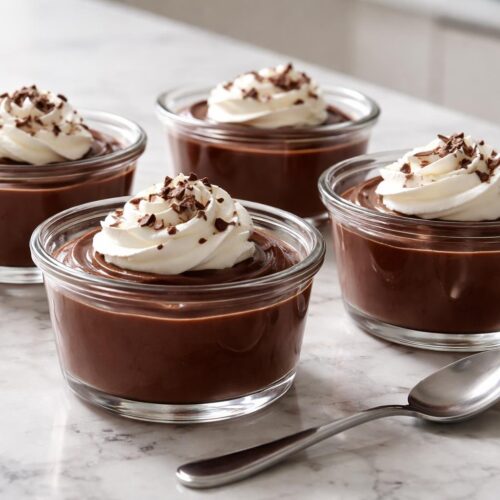
At its core, the Nigella Chocolate Pots Recipe is a chilled chocolate dessert made from melted chocolate folded into cream, sometimes enriched with egg yolks or a touch of liqueur, then set in small pots or ramekins.
It sits somewhere between a mousse and a ganache. It’s not as airy as mousse, and not as firm as truffles—it’s softer, silkier, and more spoonable.
What makes it special is the texture. It’s dense but smooth. Rich but not overwhelming. Sweet but still deeply cocoa-forward.
Each spoonful melts slowly on the tongue, releasing layers of chocolate flavor that feel almost luxurious in their simplicity.
Why This Recipe Works So Well
The beauty of this dessert lies in its minimalism.
You are not relying on flour, baking, or complicated methods. Instead, you are working with chocolate at its most expressive form.
Here’s why it works so beautifully:
- Chocolate provides depth and intensity
- Cream adds smoothness and softness
- Gentle chilling creates structure without stiffness
- Optional flavorings (vanilla, coffee, liqueur) enhance complexity
When combined, these elements create a dessert that feels far more sophisticated than its ingredient list suggests.
The Nigella Chocolate Pots Recipe also works because it respects chocolate. It doesn’t overpower it or dilute it. It simply supports it.
Equipment List
You don’t need much for this recipe, which is part of its charm:
- Heatproof mixing bowl
- Saucepan
- Whisk
- Spatula
- Measuring cups and spoons
- Small ramekins or glass pots
- Fridge for chilling
Simple tools. Big results.
Recipe Card Info
- Prep Time: 15 minutes
- Cook Time: 5 minutes
- Chilling Time: 3–4 hours
- Total Time: 4 hours 20 minutes
- Serves: 4–6 small pots
- Cuisine: British-inspired
- Course: Dessert
- Calories: 420 kcal per serving
Ingredients
Chocolate Base
- 200g dark chocolate (70% cocoa recommended)
- 250ml heavy cream
- 2 egg yolks (optional but recommended for richness)
- 2 tablespoons sugar
- 1 teaspoon vanilla extract
- Pinch of salt
Optional Add-ins
- Espresso powder (½ teaspoon for depth)
- Orange zest (for brightness)
- 1 tablespoon liqueur (Baileys, rum, or Grand Marnier)
- Whipped cream for topping
- Chocolate shavings for garnish
Instructions (Step-by-Step)
Step 1: Melt the Chocolate
Break the dark chocolate into small pieces and place it in a heatproof bowl.
Gently melt it over a saucepan of simmering water (double boiler method), stirring occasionally until smooth and glossy.
Set aside to cool slightly.
Step 2: Warm the Cream
In a saucepan, gently heat the cream until it is warm but not boiling. You should see small steam rising, not bubbling.
This step helps the chocolate blend smoothly later.
Step 3: Whisk Egg Yolks (Optional Step)
If using egg yolks, whisk them with sugar until pale and slightly thick.
This adds extra richness and a slightly custard-like depth to the Nigella Chocolate Pots Recipe.
Step 4: Combine Chocolate and Cream
Slowly pour the warm cream into the melted chocolate while stirring constantly.
The mixture will turn silky and smooth almost instantly.
If using egg yolks, temper them first by adding a little chocolate mixture into them, then combine everything together.
Step 5: Add Flavor Enhancers
Stir in vanilla extract, salt, and any optional add-ins like espresso powder or liqueur.
This is where the dessert starts to develop personality.
Step 6: Pour into Pots
Divide the mixture evenly into small ramekins or glass pots.
Tap lightly to remove air bubbles.
Step 7: Chill
Refrigerate for at least 3–4 hours until set.
The texture should be thick, spoonable, and silky.
Step 8: Serve
Top with whipped cream, chocolate shavings, or a light dusting of cocoa powder.
Serve chilled for the best texture experience.
Flavor Profile and Texture Experience
This dessert is all about richness without heaviness.
The texture is smooth, almost like a thick chocolate silk. It doesn’t feel airy or fluffy—it feels grounded, intense, and luxurious.
The flavor is deep cocoa with subtle sweetness. If you add espresso, it becomes more complex. If you add orange zest, it becomes brighter. If you add liqueur, it becomes warmer and more indulgent.
Every spoonful melts slowly, leaving a lingering chocolate finish that feels satisfying without being overwhelming.
My Kitchen Experience with This Recipe
The first time I made the Nigella Chocolate Pots Recipe, I didn’t expect to fall in love with it.
I thought it would be “just another chocolate dessert.” But when I tasted it straight from the ramekin after chilling, I realized how wrong I was.
It wasn’t just rich—it was layered. The kind of richness that doesn’t hit you all at once, but unfolds slowly.
I remember sitting at my kitchen counter with a spoon, thinking how something so simple could feel so luxurious.
That’s the magic of recipes like this. They don’t shout. They whisper.
And somehow, that makes them more memorable.
Tips from My Kitchen
- Use high-quality dark chocolate (this is essential)
- Do not boil the cream—keep it gentle
- Cool melted chocolate slightly before mixing
- Chill long enough for proper set
- Serve slightly soft, not frozen solid
These small choices make a huge difference in texture.
Serving Suggestions
This dessert works beautifully on its own, but you can elevate it with:
- Fresh raspberries or strawberries
- Whipped cream swirl
- Chocolate curls or shavings
- Sea salt flakes for contrast
- Biscotti or shortbread on the side
It also pairs beautifully with coffee after dinner.
Variations You Can Try
Once you master the base Nigella Chocolate Pots Recipe, try these variations:
- White chocolate version with vanilla bean
- Orange chocolate pots with zest
- Mocha chocolate pots with espresso
- Salted caramel swirl version
- Spiced chocolate with cinnamon or chili
Each version changes the mood completely.
Common Mistakes to Avoid
- Overheating chocolate (causes graininess)
- Using low-quality chocolate (affects flavor dramatically)
- Skipping chilling time
- Overwhipping cream (if adding separately)
- Adding cold cream directly to chocolate
Avoid these, and your dessert will stay silky and smooth.
Storage Tips
- Store in fridge for up to 3 days
- Cover with cling film to prevent skin forming
- Do not freeze (affects texture)
- Serve chilled but not ice-cold
Why You’ll Love This Recipe
The Nigella Chocolate Pots Recipe is:
- Rich and luxurious
- No-bake and simple
- Perfect for dinner parties
- Easily customizable
- Deeply chocolate-forward
It’s the kind of dessert that makes people assume you worked much harder than you actually did.
FAQs
Can I make it without eggs?
Yes, it still works perfectly without egg yolks.
Can I use milk chocolate?
Yes, but it will be sweeter and less intense.
Can I make it ahead?
Yes, it’s ideal for making a day in advance.
Why is my texture grainy?
The chocolate may have overheated or seized.
Can I serve it warm?
It is best served chilled for proper texture.
Final Thoughts
This Nigella Chocolate Pots Recipe proves something I always come back to in my kitchen—simplicity is powerful when you treat ingredients with respect.
It doesn’t need decoration or complexity. It just needs good chocolate, gentle handling, and a little patience.
And when you finally take that first spoonful, smooth and cold and rich, you realize something very simple:
Sometimes the quietest desserts leave the strongest impression.
More Delicious Desserts:
- Best Spring Cookies Recipe
- Brown Butter Rice Krispie Treats Recipe
- Carrot & Orange Dream Cake Recipe
Nigella Chocolate Pots Recipe
Equipment
- Heatproof mixing bowl
- Saucepan
- Whisk
- Spatula
- Measuring cups and spoons.
- Small ramekins or glass pots
- Fridge for chilling
Ingredients
Chocolate Base
- 200 g dark chocolate 70% cocoa recommended
- 250 ml heavy cream
- 2 egg yolks optional but recommended for richness
- 2 tablespoons sugar
- 1 teaspoon vanilla extract
- Pinch of salt
Optional Add-ins
- Espresso powder ½ teaspoon for depth
- Orange zest for brightness
- 1 tablespoon liqueur Baileys, rum, or Grand Marnier
- Whipped cream for topping
- Chocolate shavings for garnish
Instructions
Step 1: Melt the Chocolate
- Break the dark chocolate into small pieces and place it in a heatproof bowl.
- Gently melt it over a saucepan of simmering water (double boiler method), stirring occasionally until smooth and glossy.
- Set aside to cool slightly.
Step 2: Warm the Cream
- In a saucepan, gently heat the cream until it is warm but not boiling. You should see small steam rising, not bubbling.
- This step helps the chocolate blend smoothly later.
Step 3: Whisk Egg Yolks (Optional Step)
- If using egg yolks, whisk them with sugar until pale and slightly thick.
- This adds extra richness and a slightly custard-like depth to the Nigella Chocolate Pots Recipe.
Step 4: Combine Chocolate and Cream
- Slowly pour the warm cream into the melted chocolate while stirring constantly.
- The mixture will turn silky and smooth almost instantly.
- If using egg yolks, temper them first by adding a little chocolate mixture into them, then combine everything together.
Step 5: Add Flavor Enhancers
- Stir in vanilla extract, salt, and any optional add-ins like espresso powder or liqueur.
- This is where the dessert starts to develop personality.
Step 6: Pour into Pots
- Divide the mixture evenly into small ramekins or glass pots.
- Tap lightly to remove air bubbles.
Step 7: Chill
- Refrigerate for at least 3–4 hours until set.
- The texture should be thick, spoonable, and silky.
Step 8: Serve
- Top with whipped cream, chocolate shavings, or a light dusting of cocoa powder.
- Serve chilled for the best texture experience.
Notes
- Use high-quality dark chocolate (this is essential)
- Do not boil the cream—keep it gentle
- Cool melted chocolate slightly before mixing
- Chill long enough for proper set
- Serve slightly soft, not frozen solid

Hi, I’m Olivia Brooks! Cooking is my passion, and I love turning everyday ingredients into meals that bring joy to the table. On CulinaryPearl, I share simple recipes, helpful kitchen tips, and inspiration for food lovers everywhere