Intro
There is something magical about pulling a golden, crackly loaf of bread out of a hot Dutch oven. The sound alone—the gentle crackle as the crust cools—is enough to make my heart happy.
The first time I made No Knead Cheddar Bread in the Dutch Oven, I remember standing in my kitchen, flour on my hands, wondering if something so simple could really taste that good. And oh, it did.
As a home cook who loves bold, comforting flavors, I always come back to bread. Bread feels grounding.
Honest. When you add sharp cheddar cheese to a rustic, no-knead dough and bake it in a heavy pot that traps steam, you get a loaf that is crispy on the outside and tender and cheesy on the inside. It smells like a cozy afternoon. It tastes like comfort.
What I love most about this bread is how little effort it needs. No stand mixer. No complicated steps. Just flour, yeast, salt, water, and a generous handful of cheddar. The dough rests quietly while you live your life. Then your oven does the rest of the work.
If you have ever felt nervous about baking bread, this recipe is your gentle introduction. If you already love baking, this loaf will quickly become one of your favorites.
What is No Knead Cheddar Bread in the Dutch Oven?
No Knead Cheddar Bread in the Dutch Oven is a rustic artisan-style loaf that requires no traditional kneading. Instead of working the dough with your hands to develop gluten, time does that for you. The dough rests for several hours, slowly building structure and flavor.
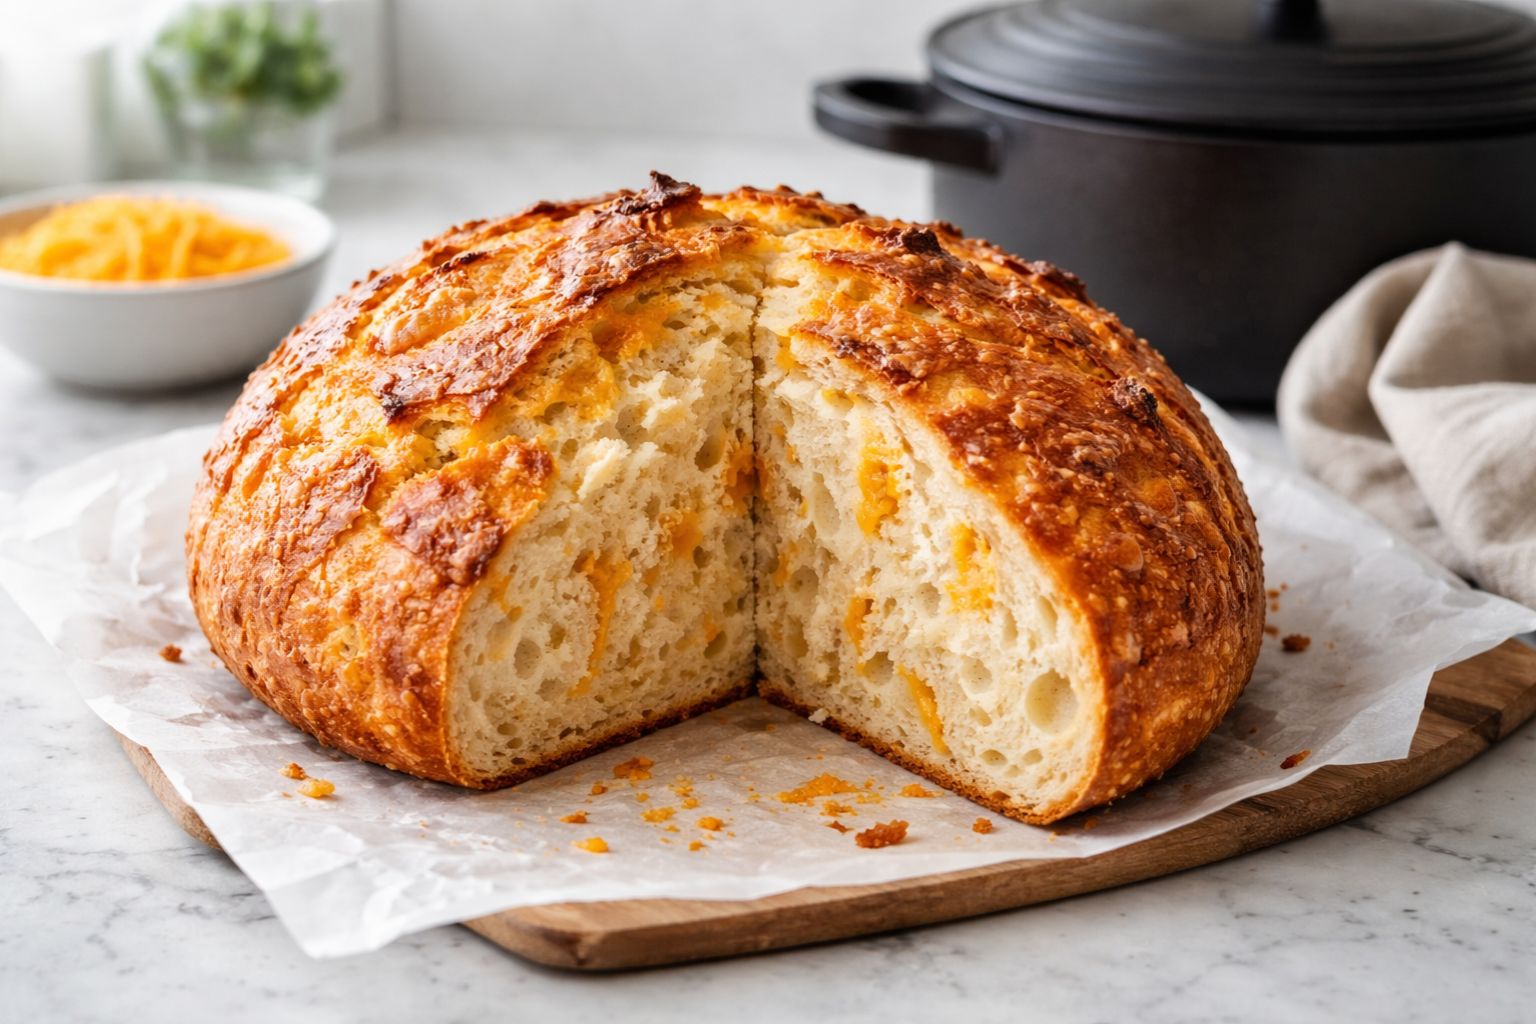
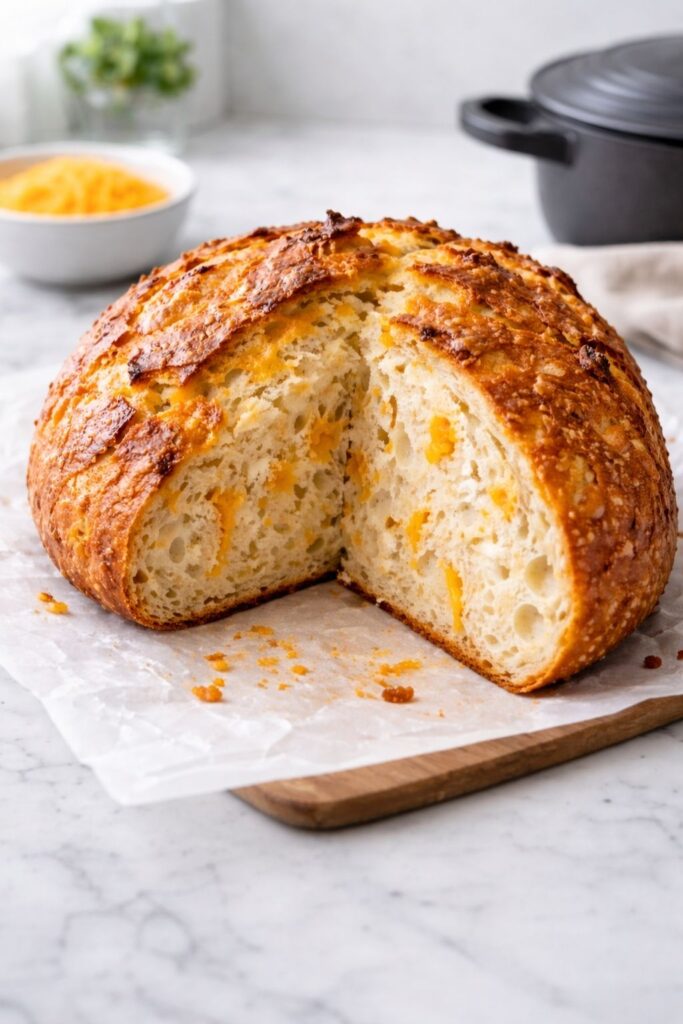
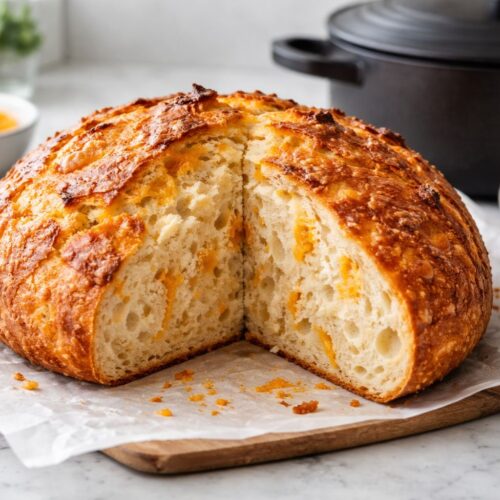
The cheddar melts into pockets throughout the loaf. Some pieces disappear into the crumb, making it soft and rich. Other bits melt and create little golden edges near the crust. Every slice is slightly different, which makes it feel special and homemade.
Baking the bread inside a preheated Dutch oven creates steam. That steam is the secret to a bakery-style crust. It keeps the surface moist during the first part of baking, allowing the loaf to rise fully before the crust sets. The result? A beautiful round loaf with a deep golden crust and a soft, chewy center.
It is simple bread with bold flavor. Perfect with soup. Wonderful toasted with butter. Incredible with a bowl of chili or a plate of scrambled eggs.
Equipment List
You do not need much, which is part of the charm. Here is what I use in my kitchen:
- Large mixing bowl
- Wooden spoon or sturdy spatula
- Measuring cups and spoons
- Plastic wrap or clean kitchen towel
- Parchment paper
- Sharp knife or bread lame (for scoring)
- Dutch oven with lid (5–6 quart size works best)
- Cooling rack
A heavy Dutch oven is important. It holds heat beautifully and creates the steam environment that gives the bread its signature crust.
Recipe Card Info
Prep Time: 15 minutes (plus 8–12 hours rise time)
Cook Time: 45–50 minutes
Total Time: About 9–13 hours (mostly hands-off)
Serves: 8 slices
Cuisine: American
Course: Bread
Calories: Approximately 220 calories per slice
Ingredients
- 3 cups all-purpose flour (360 grams)
- 1 ½ cups shredded sharp cheddar cheese (about 150 grams)
- 1 ¼ teaspoons salt
- ½ teaspoon active dry yeast
- 1 ½ cups warm water (not hot)
- Optional: ½ teaspoon garlic powder or 1 tablespoon chopped fresh chives
I always recommend shredding your own cheddar. Pre-shredded cheese often has anti-caking agents that affect melting. Freshly grated sharp cheddar gives the bread a stronger, richer flavor.
Instructions
Step 1: Mix the Dough
In a large bowl, combine the flour, salt, and yeast. Stir gently to distribute everything evenly. Add the shredded cheddar and toss it lightly in the flour so it does not clump together.
Pour in the warm water. Using a wooden spoon, mix until no dry flour remains. The dough will look shaggy and sticky. That is exactly what you want. Do not worry about making it smooth.
Step 2: Let It Rest
Cover the bowl with plastic wrap or a clean towel. Leave it at room temperature for 8 to 12 hours. I usually mix mine at night and bake it the next morning.
During this time, the dough will rise and bubble. It may double in size. The surface will look airy and slightly sticky.
Step 3: Shape the Dough
Lightly flour your work surface. Gently turn the dough out onto the counter. It will be soft and a little loose. Fold the edges toward the center a few times to form a round shape.
Do not overwork it. Just a few gentle folds are enough.
Place the dough seam-side down onto a piece of parchment paper. Cover loosely and let it rest for about 30 minutes while your oven heats.
Step 4: Preheat the Dutch Oven
Place your Dutch oven with the lid on inside the oven. Preheat to 450°F (230°C). Let the pot heat for at least 30 minutes.
This step is important. A hot pot gives you that beautiful oven spring.
Step 5: Score and Bake
Carefully remove the hot Dutch oven. Lift the dough using the parchment paper and place it into the pot. Use a sharp knife to score a small slash on top.
Cover with the lid and bake for 30 minutes.
After 30 minutes, remove the lid and bake for another 15–20 minutes until the crust is deep golden brown.
Step 6: Cool Before Slicing
Remove the bread from the pot and let it cool on a rack for at least 30 minutes. I know it is tempting, but cutting too soon can make the inside gummy.
Then slice, serve, and enjoy.
The Flavor Story: What to Expect
This bread smells incredible while baking. The cheddar melts and blends with the yeast aroma, creating a warm, nutty scent that fills the kitchen.
The crust is crisp and slightly blistered. When you tap the bottom of the loaf, it sounds hollow. Inside, the crumb is soft but structured. You will see little tunnels from fermentation and pockets of melted cheese.
The flavor is savory and slightly salty from the cheddar. If you add garlic powder, you get a gentle warmth. If you use chives, the bread feels fresh and herbaceous.
Toasted, the edges become even crispier and the cheese flavor deepens. With butter melting into each slice, it becomes irresistible.
Why the No-Knead Method Works
Traditional bread relies on kneading to develop gluten. In this recipe, time replaces effort. The long rest allows gluten strands to form naturally. The dough becomes elastic without you having to push and fold it for minutes.
This slow fermentation also improves flavor. The yeast works gradually, producing subtle complexity. That is why this loaf tastes more interesting than quick bread recipes.
It feels almost like magic, but it is really just patience.
Tips for Perfect Results
Measure accurately. Too much flour can make the bread dense. Spoon flour into your measuring cup and level it off.
Do not rush the rise. If your kitchen is cool, let it rest longer.
Use sharp cheddar. Mild cheddar gets lost in the dough.
Preheat properly. A fully heated Dutch oven gives the best rise.
Let it cool. This is hard, but important.
Variations to Try
Once you master the basic No Knead Cheddar Bread in the Dutch Oven, you can play with flavors.
- Add cooked crumbled bacon for a smoky twist.
- Mix in chopped jalapeños for heat.
- Try a blend of cheddar and mozzarella for extra meltiness.
- Sprinkle flaky sea salt on top before baking for added texture.
Each version feels like a new recipe, even though the base stays the same.
Serving Ideas
This bread shines next to soups. Tomato soup and cheddar bread are a perfect pair. It also works beautifully with creamy potato soup or beef stew.
Slice it thick for grilled cheese sandwiches. Toast it and top with avocado and a fried egg. Serve it alongside a fresh salad for lunch.
When I make No Knead Cheddar Bread in the Dutch Oven for guests, I simply place the whole loaf on a wooden board and let everyone tear pieces. It feels rustic and welcoming.
Storage and Reheating
Store the bread at room temperature in a paper bag or loosely wrapped in foil for up to two days. Avoid plastic, which softens the crust.
To reheat, place slices in a 350°F oven for about 5–7 minutes. The crust crisps up again beautifully.
You can also freeze slices. Wrap them tightly and freeze for up to two months. Toast directly from frozen.
Common Mistakes to Avoid
- Adding too much flour during shaping.
- Skipping the long rest time.
- Not preheating the Dutch oven.
- Cutting into the bread too early.
Bread baking rewards patience.
Final Thoughts
Baking bread at home feels deeply satisfying. It connects you to simple ingredients and old traditions. This No Knead Cheddar Bread in the Dutch Oven is one of those recipes that reminds me why I love cooking.
It is easy. It is forgiving. And it tastes like something from a cozy bakery, even though you made it in your own kitchen.
As a woman who spends hours experimenting with flavors, I can tell you this loaf never disappoints. It fills the house with warmth. It brings people to the table. It makes an ordinary day feel special.
So mix the dough tonight. Let time do its quiet work. Tomorrow, you will slice into a golden loaf and smile, knowing you made it from scratch.
No Knead Cheddar Bread in the Dutch Oven
Equipment
- Large mixing bowl
- Wooden spoon or sturdy spatula
- Measuring cups and spoons.
- Plastic wrap or clean kitchen towel
- Parchment paper
- Sharp knife or bread lame (for scoring)
- Dutch oven with lid (5–6 quart size works best)
- Cooling rack
Ingredients
- 3 cups all-purpose flour 360 grams
- 1 ½ cups shredded sharp cheddar cheese about 150 grams
- 1 ¼ teaspoons salt
- ½ teaspoon active dry yeast
- 1 ½ cups warm water not hot
- Optional: ½ teaspoon garlic powder or 1 tablespoon chopped fresh chives
Instructions
Step 1: Mix the Dough
- In a large bowl, combine the flour, salt, and yeast. Stir gently to distribute everything evenly. Add the shredded cheddar and toss it lightly in the flour so it does not clump together.
- Pour in the warm water. Using a wooden spoon, mix until no dry flour remains. The dough will look shaggy and sticky. That is exactly what you want. Do not worry about making it smooth.
Step 2: Let It Rest
- Cover the bowl with plastic wrap or a clean towel. Leave it at room temperature for 8 to 12 hours. I usually mix mine at night and bake it the next morning.
- During this time, the dough will rise and bubble. It may double in size. The surface will look airy and slightly sticky.
Step 3: Shape the Dough
- Lightly flour your work surface. Gently turn the dough out onto the counter. It will be soft and a little loose. Fold the edges toward the center a few times to form a round shape.
- Do not overwork it. Just a few gentle folds are enough.
- Place the dough seam-side down onto a piece of parchment paper. Cover loosely and let it rest for about 30 minutes while your oven heats.
Step 4: Preheat the Dutch Oven
- Place your Dutch oven with the lid on inside the oven. Preheat to 450°F (230°C). Let the pot heat for at least 30 minutes.
- This step is important. A hot pot gives you that beautiful oven spring.
Step 5: Score and Bake
- Carefully remove the hot Dutch oven. Lift the dough using the parchment paper and place it into the pot. Use a sharp knife to score a small slash on top.
- Cover with the lid and bake for 30 minutes.
- After 30 minutes, remove the lid and bake for another 15–20 minutes until the crust is deep golden brown.
Step 6: Cool Before Slicing
- Remove the bread from the pot and let it cool on a rack for at least 30 minutes. I know it is tempting, but cutting too soon can make the inside gummy.
- Then slice, serve, and enjoy.

Hi, I’m Olivia Brooks! Cooking is my passion, and I love turning everyday ingredients into meals that bring joy to the table. On CulinaryPearl, I share simple recipes, helpful kitchen tips, and inspiration for food lovers everywhere