Intro
There’s something deeply comforting about the warm, spiced sweetness of Biscoff. It instantly takes me back to cozy evenings in my kitchen, experimenting with flavors that feel indulgent yet nourishing.
One of my favorite creations that came out of those little experiments is this Biscoff Cheesecake Protein Balls Recipe—a treat that tastes like dessert but fuels your body like a snack.
As a home cook, I’ve always believed that healthy eating should never feel like a punishment. Food should feel exciting, a little indulgent, and full of personality. These protein balls are exactly that. They’re creamy, slightly tangy like cheesecake, rich with caramelized biscuit flavor, and just sweet enough to satisfy cravings without going overboard.
What I love most is how easy they are to make. No baking, no complicated steps—just a handful of ingredients and a little bit of patience while they chill. Whether I’m prepping snacks for the week or craving something sweet after dinner, this recipe always comes through.
What is Biscoff Cheesecake Protein Balls Recipe?
If you’ve never tried something like this before, let me paint the picture for you. Imagine the creamy richness of cheesecake, the caramel-spiced magic of Biscoff biscuits, and the satisfying texture of a bite-sized snack—all rolled into one perfect little ball.
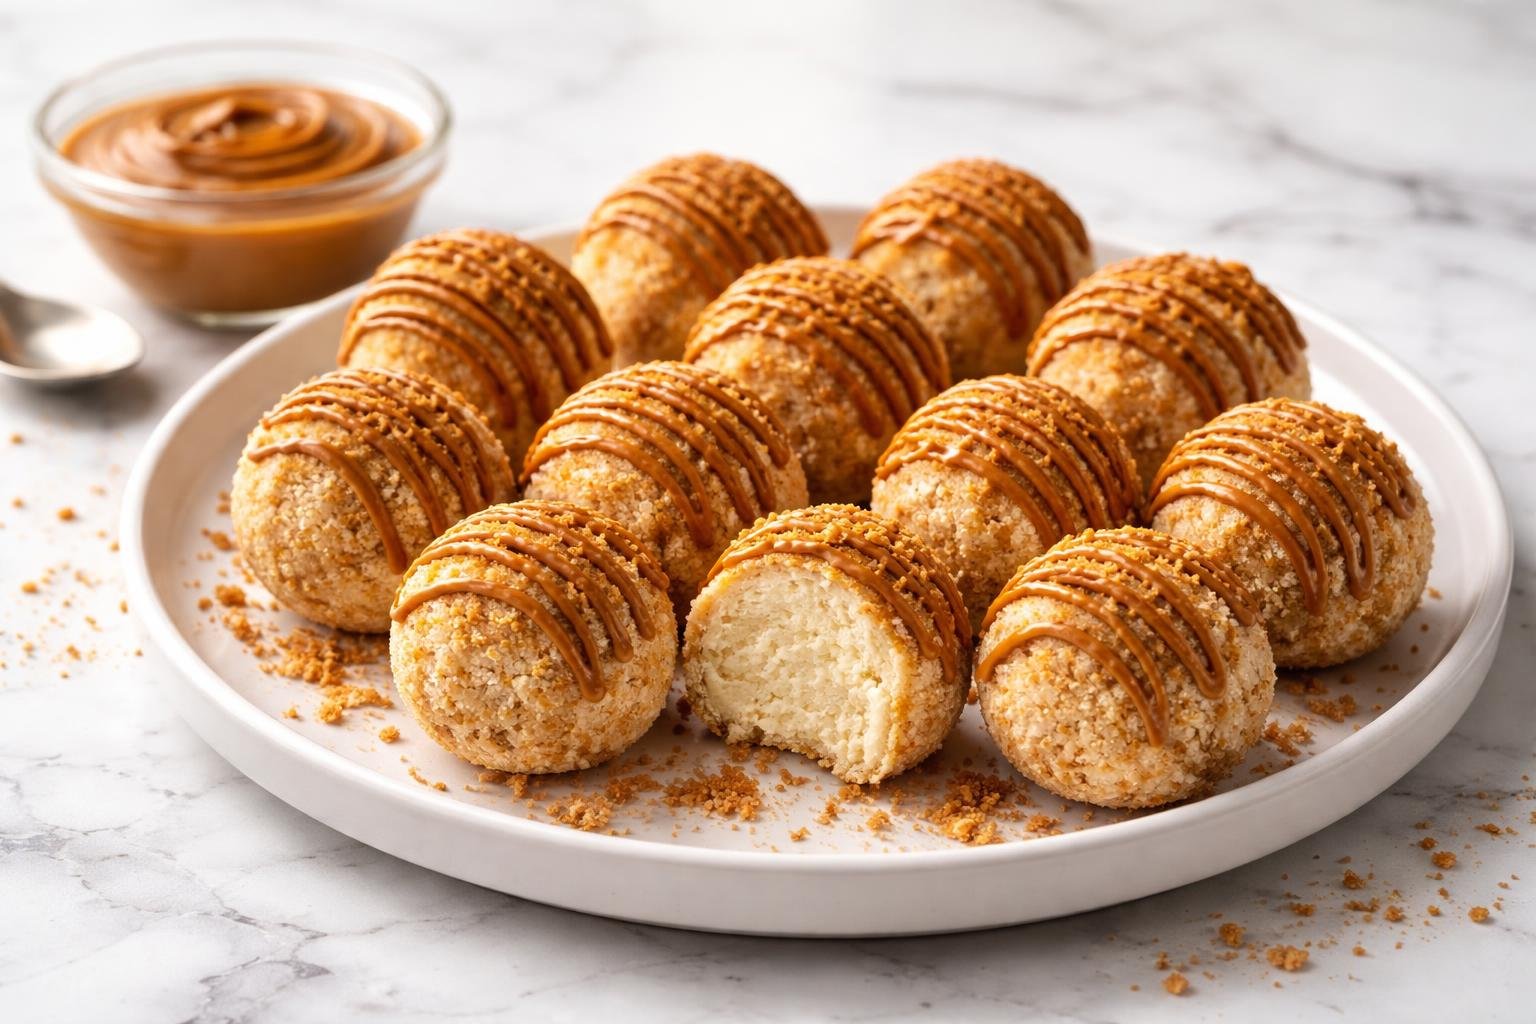
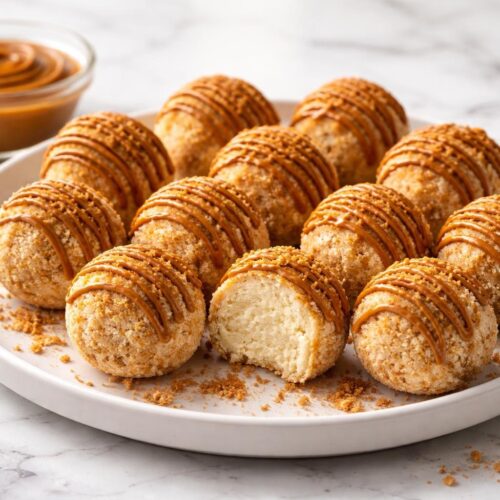
The Biscoff Cheesecake Protein Balls Recipe is essentially a no-bake, high-protein snack made using crushed biscuits, protein powder, cream cheese (or a lighter alternative), and Biscoff spread. The mixture is shaped into small balls and chilled until firm.
The result? A soft, melt-in-your-mouth center with a slightly firm exterior. Every bite feels like a mini dessert, but with the added bonus of protein to keep you full and energized.
I often describe them as “guilt-free cheesecake bites,” but honestly, they’re more than that. They’re comforting, satisfying, and incredibly versatile.
Equipment List
You don’t need anything fancy to make this recipe, which is one of the reasons I love it so much. Here’s what I usually grab from my kitchen:
- Mixing bowl (medium to large)
- Food processor or blender (for crushing biscuits)
- Spoon or spatula
- Measuring cups and spoons
- Small cookie scoop (optional, but helpful)
- Baking tray or plate
- Parchment paper
- Refrigerator
That’s it. Simple tools, simple process, big flavor.
Recipe Card Info
- Prep Time: 15 minutes
- Cook Time: 0 minutes
- Chill Time: 30 minutes
- Total Time: 45 minutes
- Serves: 12 balls
- Cuisine: American
- Course: Snack
- Calories: 120 kcal per ball
Ingredients
Here’s everything you’ll need to bring this Biscoff Cheesecake Protein Balls Recipe to life:
- 1 cup crushed Biscoff biscuits (about 10–12 biscuits)
- 1/2 cup cream cheese (softened)
- 1/4 cup Biscoff spread
- 1/2 cup vanilla protein powder
- 2 tablespoons honey or maple syrup
- 1 teaspoon vanilla extract
- 2–3 tablespoons milk (as needed for consistency)
- Pinch of salt
Optional toppings:
- Melted Biscoff spread for drizzling
- Crushed biscuits for coating
- White or dark chocolate drizzle
Instructions (Step-by-Step)
Step 1: Crush the Biscuits
Start by crushing the Biscoff biscuits into fine crumbs. I usually use a food processor for this, but if you don’t have one, a ziplock bag and rolling pin work just as well. You want a texture that’s almost like sand—fine but still slightly crumbly.
Step 2: Mix the Base
In a mixing bowl, combine the crushed biscuits, protein powder, and a pinch of salt. Give it a quick stir so everything is evenly distributed.
Step 3: Add the Creamy Ingredients
Now add the softened cream cheese, Biscoff spread, honey, and vanilla extract. This is where the magic begins. As you mix, you’ll notice the texture becoming rich and creamy.
Step 4: Adjust the Texture
Add milk one tablespoon at a time until the mixture comes together into a soft dough. It should be easy to roll without sticking too much to your hands.
Step 5: Shape into Balls
Scoop out small portions and roll them between your palms to form smooth balls. I like to keep them bite-sized—it makes them feel more like little treats.
Step 6: Chill
Place the balls on a lined tray and refrigerate for at least 30 minutes. This helps them firm up and enhances the flavor.
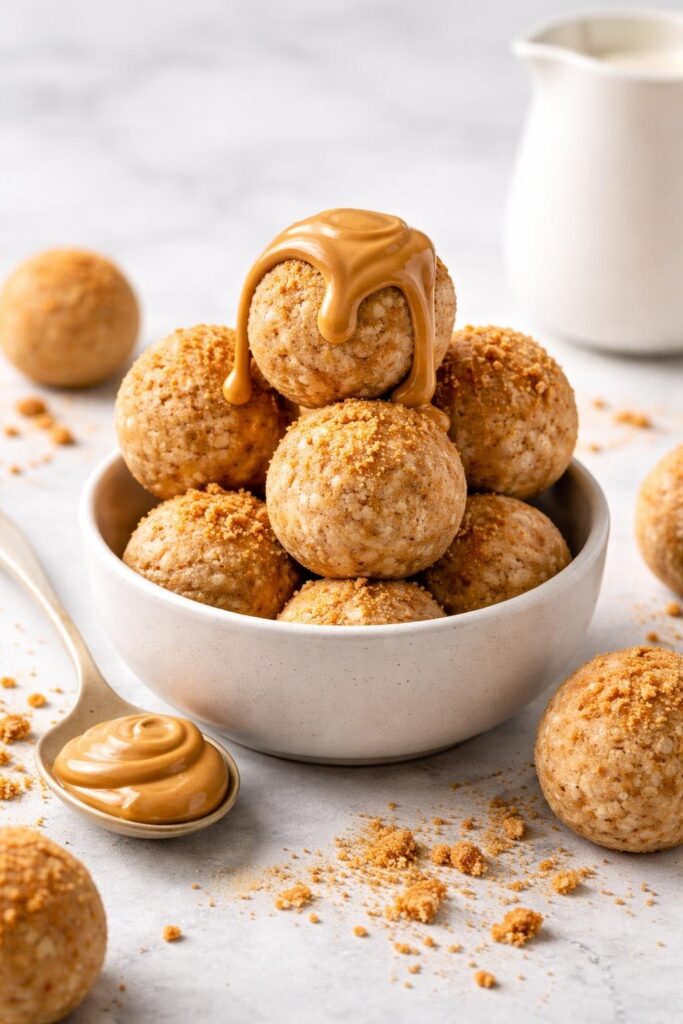
Step 7: Add Finishing Touches
Once chilled, drizzle with melted Biscoff or chocolate, or roll them in crushed biscuits for extra texture.
Flavor Profile and Texture
One bite into these protein balls, and you’ll understand why I’m obsessed. The first thing you notice is the creamy cheesecake-like center. It’s smooth, slightly tangy, and perfectly balanced with sweetness.
Then comes the Biscoff flavor—warm, caramelized, and just a little spiced. It wraps around the creaminess beautifully, giving each bite depth.
The outer layer has a gentle firmness, especially if you coat it with biscuit crumbs or let it chill properly. It creates a contrast that makes every bite interesting.
Why You’ll Love This Recipe
There are so many reasons this recipe has become a staple in my kitchen:
- No baking required
- Quick and easy to prepare
- Perfect for meal prep
- High in protein
- Satisfies sweet cravings
- Customizable with different flavors
Most importantly, it feels like a treat—not a compromise.
Tips for Perfect Protein Balls
Over time, I’ve picked up a few little tricks that make a big difference:
- Use softened cream cheese for smoother mixing
- Don’t skip the chilling time—it’s essential
- Adjust sweetness based on your taste
- If the mixture is too dry, add milk slowly
- If it’s too sticky, add a bit more protein powder
Variations You Can Try
One of the best things about this Biscoff Cheesecake Protein Balls Recipe is how easy it is to adapt.
Chocolate Biscoff Version
Add cocoa powder or chocolate protein powder for a richer flavor.
Vegan Option
Use dairy-free cream cheese and plant-based protein powder.
Nutty Twist
Mix in crushed almonds or peanut butter for extra texture.
Storage and Shelf Life
These protein balls store beautifully, which makes them perfect for busy days.
- Refrigerator: Up to 5 days in an airtight container
- Freezer: Up to 2 months
I personally love eating them slightly chilled—it enhances the cheesecake texture.
When to Serve
These little bites fit into so many moments:
- Post-workout snack
- Afternoon energy boost
- Dessert after dinner
- Party platter addition
They’re small, but they make a big impression.
FAQs
Can I make this without protein powder?
Yes, you can replace it with oat flour or almond flour, but the protein content will be lower.
Why is my mixture too sticky?
It usually means there’s too much moisture. Add a bit more crushed biscuits or protein powder.
Can I freeze them?
Absolutely. Just thaw for a few minutes before eating.
Can I use another biscuit?
Yes, but Biscoff gives a unique flavor that’s hard to replicate.
Final Thoughts
This Biscoff Cheesecake Protein Balls Recipe is one of those recipes that feels special every time I make it. It’s simple, comforting, and packed with flavor.
As a chef and a home cook, I always look for that balance between indulgence and nourishment—and this recipe delivers both beautifully. Whether you’re making it for yourself or sharing it with loved ones, I promise it will become a favorite.
So go ahead, roll up your sleeves, and treat yourself to something deliciously satisfying.
Biscoff Cheesecake Protein Balls Recipe
Equipment
- Mixing bowl (medium to large)
- Food processor or blender (for crushing biscuits)
- Spoon or spatula
- Measuring cups and spoons.
- Small cookie scoop (optional, but helpful)
- Baking tray or plate
- Parchment paper
- Refrigerator
Ingredients
- 1 cup crushed Biscoff biscuits about 10–12 biscuits
- 1/2 cup cream cheese softened
- 1/4 cup Biscoff spread
- 1/2 cup vanilla protein powder
- 2 tablespoons honey or maple syrup
- 1 teaspoon vanilla extract
- 2 –3 tablespoons milk as needed for consistency
- Pinch of salt
Optional toppings:
- Melted Biscoff spread for drizzling
- Crushed biscuits for coating
- White or dark chocolate drizzle
Instructions
Step 1: Crush the Biscuits
- Start by crushing the Biscoff biscuits into fine crumbs. I usually use a food processor for this, but if you don’t have one, a ziplock bag and rolling pin work just as well. You want a texture that’s almost like sand—fine but still slightly crumbly.
Step 2: Mix the Base
- In a mixing bowl, combine the crushed biscuits, protein powder, and a pinch of salt. Give it a quick stir so everything is evenly distributed.
Step 3: Add the Creamy Ingredients
- Now add the softened cream cheese, Biscoff spread, honey, and vanilla extract. This is where the magic begins. As you mix, you’ll notice the texture becoming rich and creamy.
Step 4: Adjust the Texture
- Add milk one tablespoon at a time until the mixture comes together into a soft dough. It should be easy to roll without sticking too much to your hands.
Step 5: Shape into Balls
- Scoop out small portions and roll them between your palms to form smooth balls. I like to keep them bite-sized—it makes them feel more like little treats.
Step 6: Chill
- Place the balls on a lined tray and refrigerate for at least 30 minutes. This helps them firm up and enhances the flavor.
Step 7: Add Finishing Touches
- Once chilled, drizzle with melted Biscoff or chocolate, or roll them in crushed biscuits for extra texture.
Notes
- Use softened cream cheese for smoother mixing
- Don’t skip the chilling time—it’s essential
- Adjust sweetness based on your taste
- If the mixture is too dry, add milk slowly
- If it’s too sticky, add a bit more protein powder

Hi, I’m Olivia Brooks! Cooking is my passion, and I love turning everyday ingredients into meals that bring joy to the table. On CulinaryPearl, I share simple recipes, helpful kitchen tips, and inspiration for food lovers everywhere