Introduction
There’s something undeniably magical about the combination of crispy cereal and gooey marshmallows. But let me tell you, once you brown the butter before adding it to your Rice Krispies, you unlock a whole new level of flavor.
Today, I’m sharing my personal take on the classic dessert: Brown Butter Rice Krispie Treats Recipe. These treats are not just ordinary—they’re rich, nutty, and have this subtle caramel undertone from the brown butter that makes them downright irresistible. Trust me, the moment you take a bite, you’ll understand why this simple twist makes all the difference.
As a home cook, I’ve spent countless afternoons experimenting with Rice Krispie treats. The secret isn’t just in the technique, though that’s important—it’s in the ingredients, the love, and a tiny bit of patience. I like to think of these treats as comfort in every bite, a little hug from the kitchen.
What is Brown Butter Rice Krispie Treats?
So, you might be wondering, what exactly are Brown Butter Rice Krispie Treats? At their core, they’re an elevated version of the classic Rice Krispie treats you grew up with.
Traditionally, Rice Krispie treats are made by melting butter and marshmallows together, then folding in crisped rice cereal. But when you brown the butter first, it adds a deep, nutty flavor that transforms the dessert from simple to sophisticated without losing that nostalgic charm.
Brown butter, or beurre noisette as the French call it, is butter cooked gently until the milk solids turn golden brown and release a warm, nutty aroma. When this golden liquid meets sticky marshmallows, it creates a rich base that clings to every crunchy bit of cereal.
The result? Sweet, buttery, slightly caramelized treats with a perfect chewy texture. And the smell—oh, the smell alone is enough to make the whole house come alive.
Equipment List
Before we dive into the recipe, let’s talk about the tools you’ll need. You don’t need a fancy kitchen, just some essentials:
- Large saucepan
- Wooden spoon or silicone spatula
- 9×13-inch baking dish (or any similar-sized pan)
- Parchment paper or non-stick spray
- Measuring cups and spoons
- Microwave-safe bowl (optional, if you want to melt marshmallows separately)
Having the right equipment ensures your treats come out perfect every time. Trust me, I’ve learned the hard way that a sticky spatula or a too-small pan can make the process way messier than it needs to be!
Recipe Card Info
- Prep Time: 15 minutes
- Cook Time: 10 minutes
- Total Time: 25 minutes
- Serves: 12
- Cuisine: American
- Course: Dessert
- Calories: 210 per serving
Ingredients
Here’s what you’ll need for this rich, buttery treat:
- 1 cup (2 sticks) unsalted butter
- 1 (10 oz) bag marshmallows (or about 4 cups mini marshmallows)
- 6 cups Rice Krispies cereal
- 1 teaspoon pure vanilla extract
- Pinch of salt (optional but recommended for balance)
Optional mix-ins for a twist:
- ½ cup mini chocolate chips
- ½ cup chopped nuts (pecans or walnuts work beautifully)
- Sprinkles or sea salt flakes for topping
Instructions
Here’s the step-by-step guide to making these irresistible treats:
Step 1: Prepare your pan
Line a 9×13-inch baking dish with parchment paper, or lightly grease it with non-stick spray. This ensures your treats will come out easily and maintain their shape.
Step 2: Brown the butter
Place the butter in a large saucepan over medium heat. Allow it to melt, then continue cooking while stirring frequently. You’ll notice it foaming and then gradually turning a light golden brown. The smell will become nutty and toasty—this is your signal that the butter is ready. Be careful not to burn it; remove it from the heat immediately once it reaches that perfect color.
Step 3: Add marshmallows
Reduce the heat to low and add the marshmallows to the brown butter. Stir continuously until they are fully melted and combined into a smooth, glossy mixture. The combination of brown butter and marshmallows is the heart of what makes these treats extra special.
Step 4: Stir in vanilla and salt
Add the vanilla extract and a pinch of salt to the mixture. This step elevates the flavor, balancing the sweetness and adding depth.
Step 5: Add Rice Krispies cereal
Gradually fold in the Rice Krispies cereal. Stir gently but thoroughly, ensuring every piece of cereal is coated with the buttery marshmallow mixture.
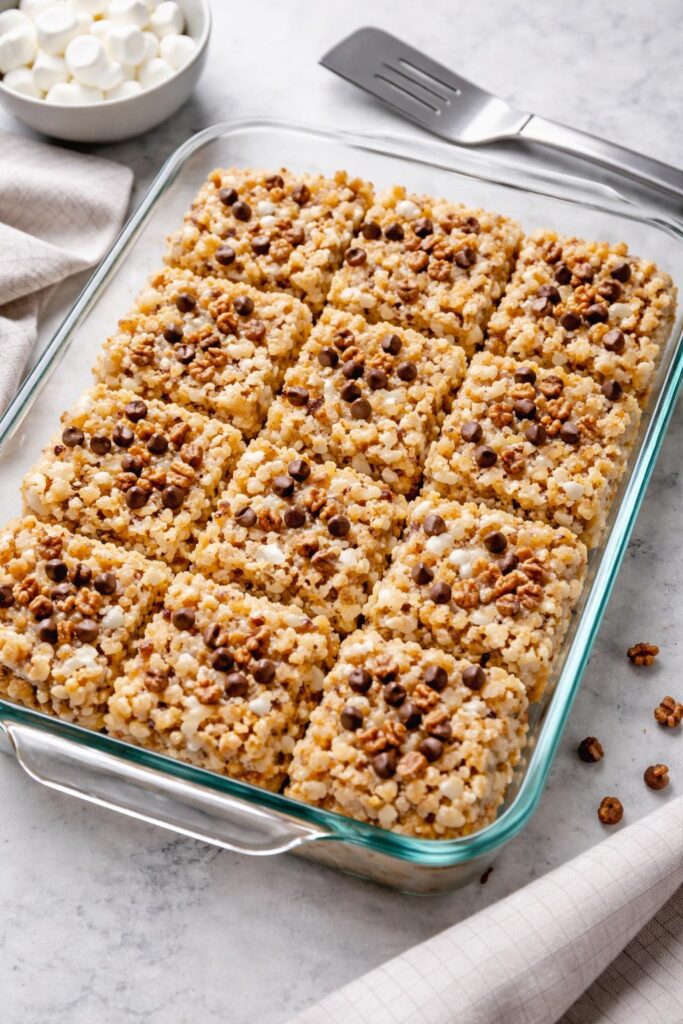
Step 6: Press into pan
Transfer the mixture into your prepared pan. Using a spatula or lightly greased hands, press the mixture evenly into the pan. Avoid pressing too hard, as you want the treats to remain light and chewy.
Step 7: Let them set
Allow the treats to cool at room temperature for at least 30 minutes. If you’re impatient like me, you can pop them in the fridge for 15–20 minutes to speed things up, but I personally love letting them settle naturally.
Step 8: Cut and serve
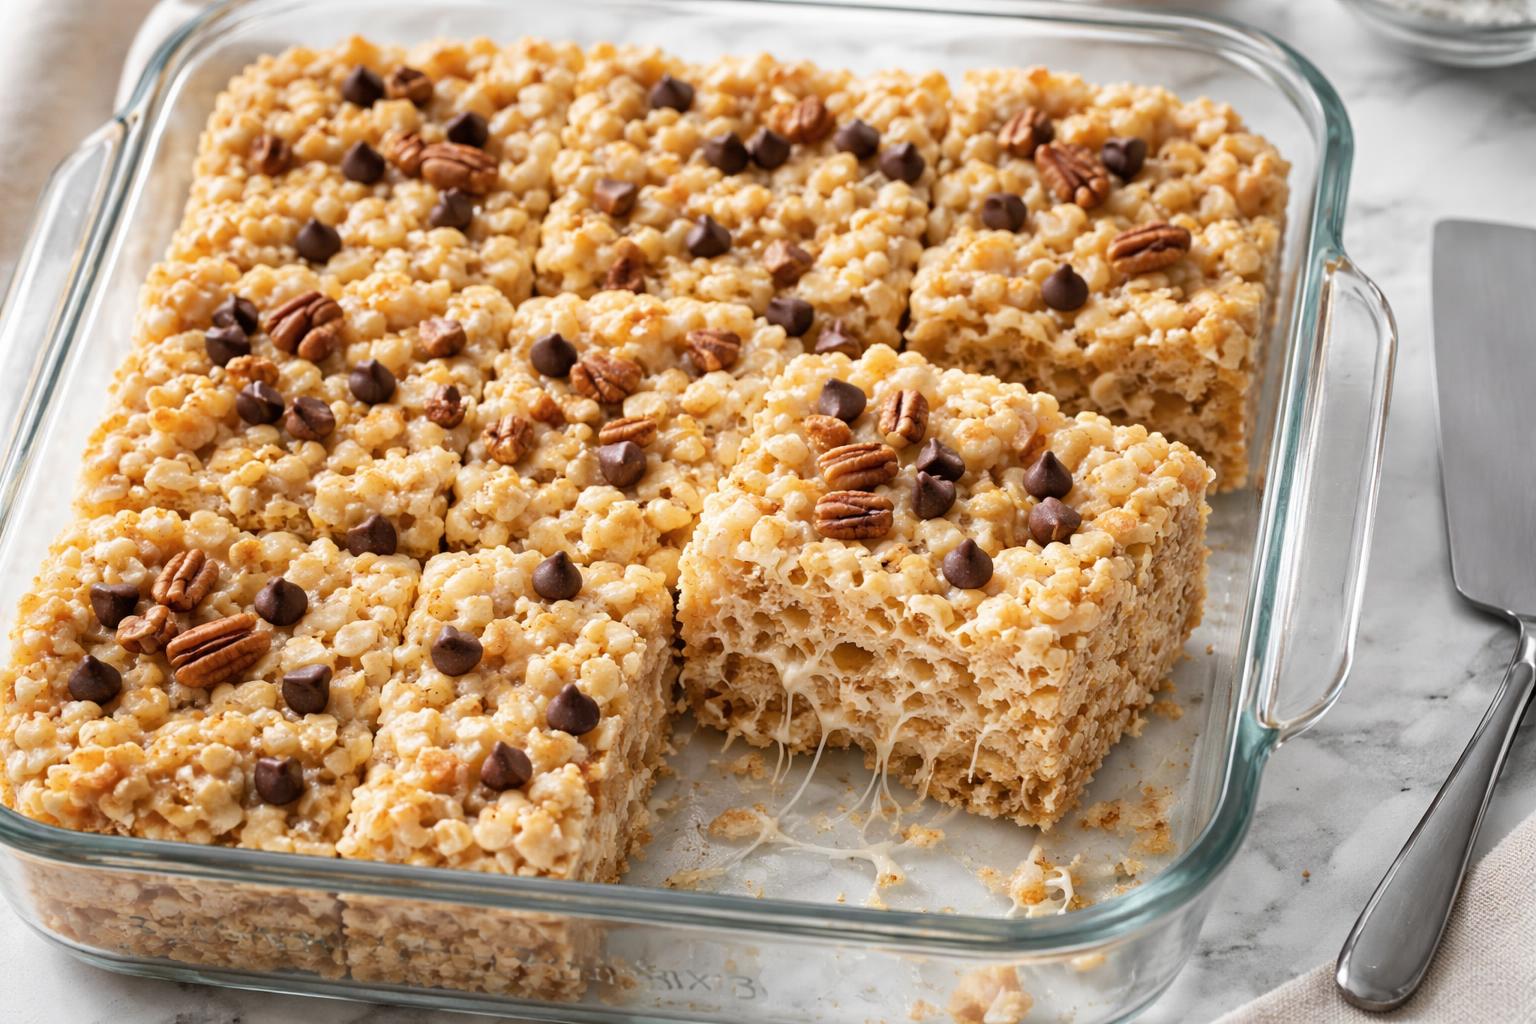
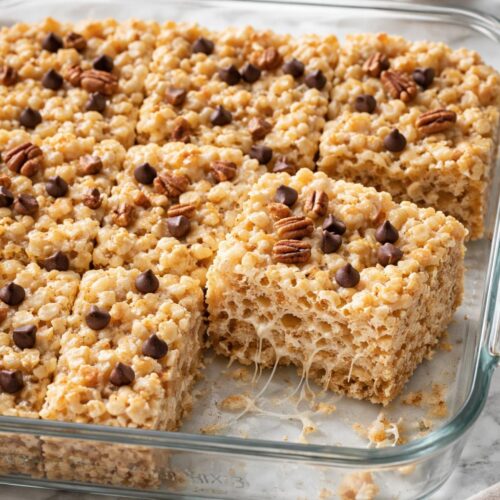
Once set, lift the treats from the pan using the parchment paper and cut into squares or rectangles. Optional: sprinkle a few flakes of sea salt or some mini chocolate chips on top for an added layer of indulgence.
Tips for the Perfect Brown Butter Rice Krispie Treats
Making Rice Krispie treats seems simple, but a few key tricks can make all the difference:
- Monitor the butter closely – Brown butter can go from perfect to burnt in seconds. Keep the heat medium and stir constantly.
- Use fresh marshmallows – Old or stale marshmallows won’t melt smoothly and can create a grainy texture.
- Gentle folding – When mixing in the cereal, be gentle to avoid crushing the Rice Krispies and losing their signature crunch.
- Customize mix-ins – Chocolate chips, nuts, or even dried fruits can be added after the cereal is folded in. Just don’t overload; you still want the texture to shine.
- Storage – Store in an airtight container at room temperature for up to a week. If you like them softer, slightly warm them in the microwave before serving.
Why Brown Butter Makes a Difference
You might wonder why anyone would go through the trouble of browning butter for a simple dessert. Here’s the thing: the flavor transformation is extraordinary. Regular butter provides fat and richness, sure, but brown butter introduces a nutty, almost caramel-like complexity.
When paired with the sweetness of marshmallows and the crunch of Rice Krispies, it elevates what is otherwise a childhood snack to something that feels gourmet. It’s the same concept behind using browned butter in cookies or cakes—it adds depth without overwhelming the base flavor.
Flavor Variations
Once you’ve mastered the classic brown butter Rice Krispie treat, you can start experimenting:
- Chocolate Lovers’ Version: Stir in ½ cup chocolate chips or drizzle melted chocolate over the top.
- Nutty Delight: Add chopped pecans, walnuts, or almonds to the mix.
- Caramel Crunch: Add a swirl of caramel sauce on top for a gooey finish.
- Sea Salt Twist: Sprinkle flaky sea salt on top for a sweet-salty balance that’s addictive.
Each variation highlights the buttery, toasty foundation of the brown butter while allowing you to tailor the treat to your taste.
Perfect Occasions for Brown Butter Rice Krispie Treats
These treats are incredibly versatile. Here’s when I find them most irresistible:
- Family Gatherings: Easy to make in large batches and a hit with both kids and adults.
- Holiday Treats: Dress them up with seasonal sprinkles or drizzle chocolate for festive flair.
- Bake Sales or School Events: They’re simple, portable, and always disappear fast.
- Movie Nights or Afternoon Snacks: A homemade treat that feels indulgent but doesn’t require a full dessert.
They are basically the ultimate anytime treat—comforting, nostalgic, and slightly fancy thanks to the brown butter.
FAQs
Q: Can I use salted butter instead of unsalted?
A: You can, but I recommend reducing or skipping the added pinch of salt. Unsalted butter gives you more control over the flavor balance.
Q: Can I make them ahead of time?
A: Absolutely! Store them in an airtight container at room temperature for up to a week. They actually taste even better after a few hours as the flavors meld.
Q: Can I make mini versions or bars?
A: Yes! You can use smaller pans or muffin tins to create individual portions. Just adjust the pressing time to keep the treats light and airy.
Q: Can I use other cereals?
A: Rice Krispies are classic because of their light, airy crunch, but you could try puffed wheat or cornflakes. Just know the texture and flavor will change slightly.
Q: Can I freeze them?
A: Yes, wrap individual squares in plastic wrap and store them in a freezer-safe bag. They keep well for up to 2 months. Thaw at room temperature before serving.
Final Thoughts
Making Brown Butter Rice Krispie Treats is one of those kitchen adventures that’s simple, quick, and incredibly rewarding. The process is fun, the aroma fills your home with warmth, and the result is a dessert that takes a childhood favorite to a whole new level.
Every bite is a combination of crunch, chewiness, and that rich, nutty depth from the brown butter. It’s the kind of treat you’ll find yourself sneaking late at night or sharing proudly with friends and family.
What I love most is that it’s approachable for any home cook. You don’t need fancy ingredients or techniques—just a little patience and care. Browning the butter is the game-changer here. Once you experience that golden, fragrant butter melding with marshmallows and crisped rice, you’ll never go back to plain Rice Krispie treats.
So grab your butter, your marshmallows, and a big bowl of Rice Krispies. Let’s turn this simple snack into an unforgettable dessert experience. Brown Butter Rice Krispie Treats are more than a treat—they’re a celebration of flavor, texture, and a little bit of kitchen magic that everyone will love.
More Delightful Recipes:
- Carrot & Orange Dream Cake Recipe
- Mushroom and Spinach Lasagna Recipe
- Creamy Tomato Tortellini Soup Recipe
Brown Butter Rice Krispie Treats Recipe
Equipment
- Large saucepan
- Wooden spoon or silicone spatula
- 9×13-inch baking dish (or any similar-sized pan)
- Parchment paper or non-stick spray
- Measuring cups and spoons.
- Microwave-safe bowl (optional, if you want to melt marshmallows separately)
Ingredients
- 1 cup 2 sticks unsalted butter
- 1 10 oz bag marshmallows (or about 4 cups mini marshmallows)
- 6 cups Rice Krispies cereal
- 1 teaspoon pure vanilla extract
- Pinch of salt optional but recommended for balance
Optional mix-ins for a twist:
- ½ cup mini chocolate chips
- ½ cup chopped nuts pecans or walnuts work beautifully
- Sprinkles or sea salt flakes for topping
Instructions
Step 1: Prepare your pan
- Line a 9×13-inch baking dish with parchment paper, or lightly grease it with non-stick spray. This ensures your treats will come out easily and maintain their shape.
Step 2: Brown the butter
- Place the butter in a large saucepan over medium heat. Allow it to melt, then continue cooking while stirring frequently. You’ll notice it foaming and then gradually turning a light golden brown. The smell will become nutty and toasty—this is your signal that the butter is ready. Be careful not to burn it; remove it from the heat immediately once it reaches that perfect color.
Step 3: Add marshmallows
- Reduce the heat to low and add the marshmallows to the brown butter. Stir continuously until they are fully melted and combined into a smooth, glossy mixture. The combination of brown butter and marshmallows is the heart of what makes these treats extra special.
Step 4: Stir in vanilla and salt
- Add the vanilla extract and a pinch of salt to the mixture. This step elevates the flavor, balancing the sweetness and adding depth.
Step 5: Add Rice Krispies cereal
- Gradually fold in the Rice Krispies cereal. Stir gently but thoroughly, ensuring every piece of cereal is coated with the buttery marshmallow mixture.
Step 6: Press into pan
- Transfer the mixture into your prepared pan. Using a spatula or lightly greased hands, press the mixture evenly into the pan. Avoid pressing too hard, as you want the treats to remain light and chewy.
Step 7: Let them set
- Allow the treats to cool at room temperature for at least 30 minutes. If you’re impatient like me, you can pop them in the fridge for 15–20 minutes to speed things up, but I personally love letting them settle naturally.
Step 8: Cut and serve
- Once set, lift the treats from the pan using the parchment paper and cut into squares or rectangles. Optional: sprinkle a few flakes of sea salt or some mini chocolate chips on top for an added layer of indulgence.

Hi, I’m Olivia Brooks! Cooking is my passion, and I love turning everyday ingredients into meals that bring joy to the table. On CulinaryPearl, I share simple recipes, helpful kitchen tips, and inspiration for food lovers everywhere