Intro
There’s something magical about pulling a tray of golden, melty, perfectly toasted sliders out of the oven. The first time I made this Cheeseburger Sliders Recipe, it was for a last-minute family gathering.
I remember standing in my kitchen, hair pulled into a messy bun, apron dusted with flour, wondering if something so simple could really impress a hungry crowd. But the moment I brushed those soft slider buns with buttery glaze and the smell of seasoned beef and bubbling cheese filled the air, I knew we were in for something special.
As a chef, I’ve cooked elegant dinners and plated delicate entrées, but there’s something deeply satisfying about comfort food done right.
This homemade Cheeseburger Sliders Recipe delivers all the classic burger flavor we love—savory beef, gooey cheese, soft buns, and just the right touch of tangy sauce—but in a fun, shareable, crowd-pleasing form.
Every time I make this easy Cheeseburger Sliders Recipe, people hover near the oven like they’re waiting for treasure.
Let me walk you through it like we’re cooking side by side.
What is Cheeseburger Sliders Recipe?
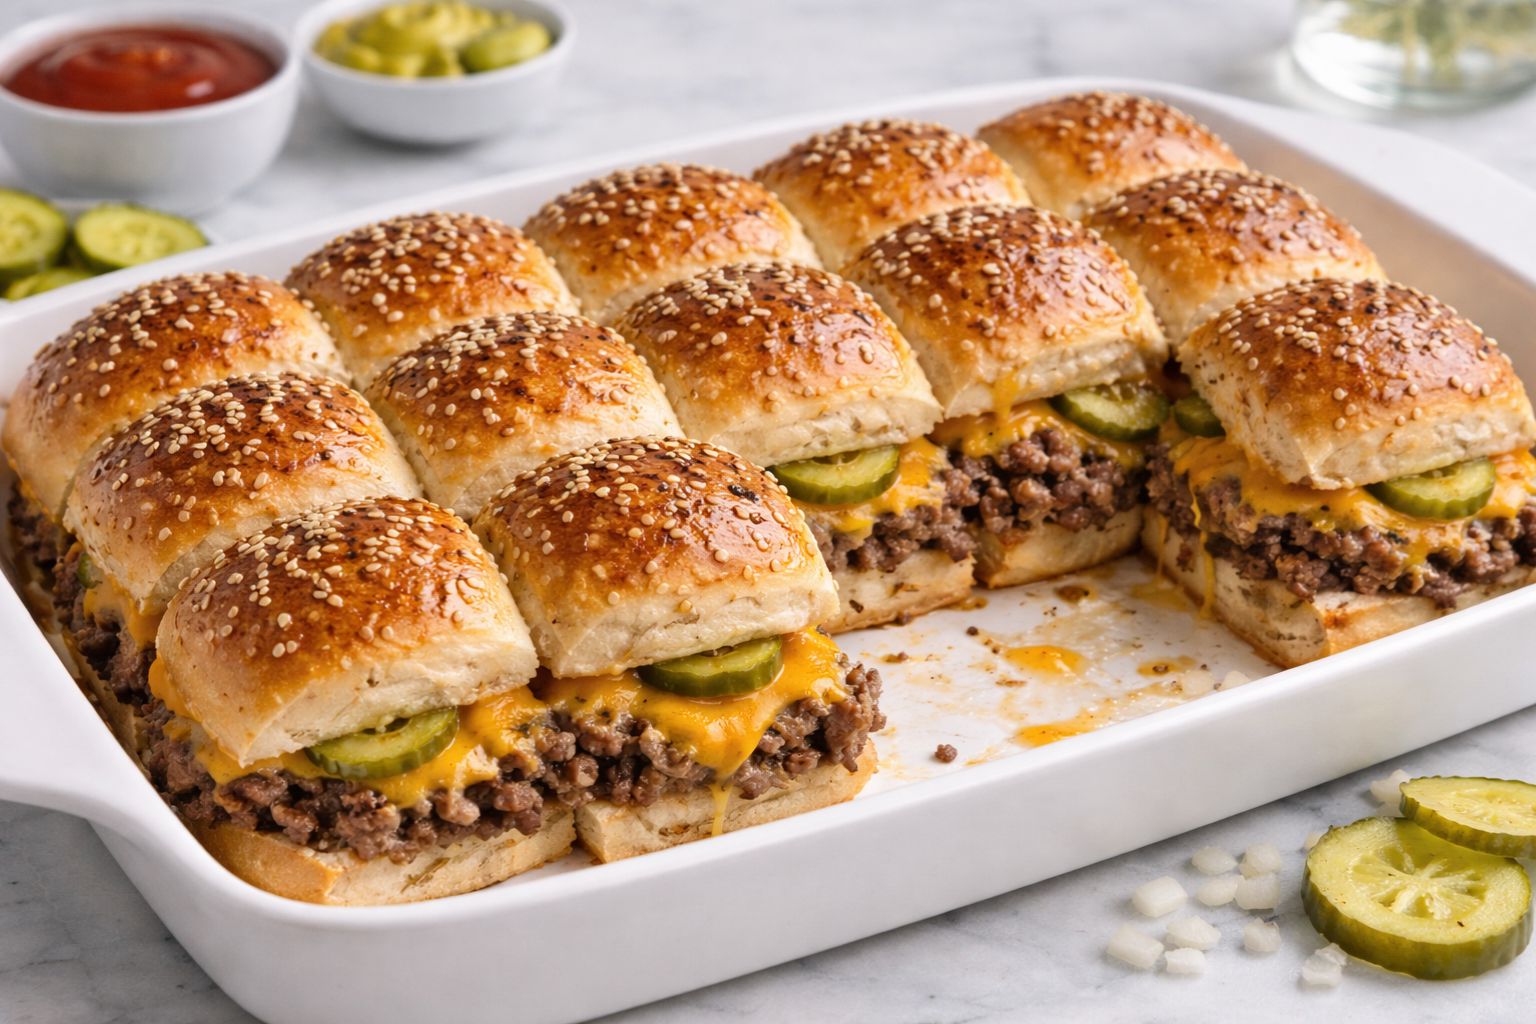
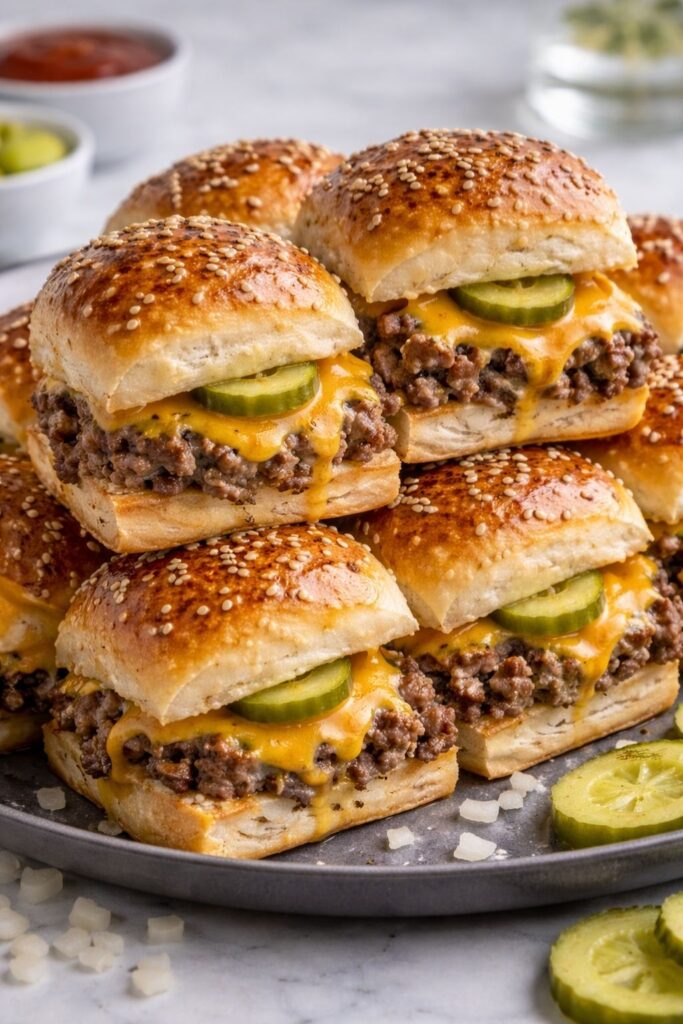
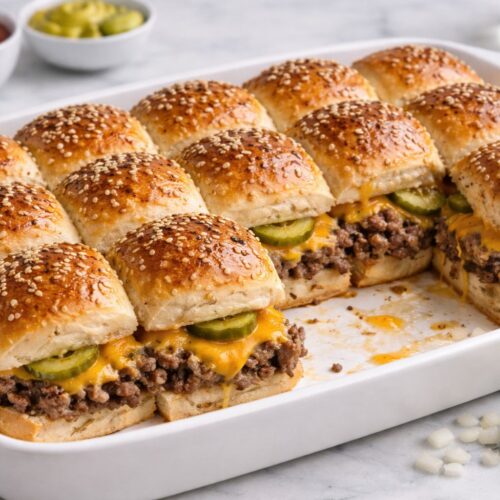
At its heart, this Cheeseburger Sliders Recipe is everything you adore about a traditional cheeseburger, just scaled down into soft, pull-apart mini sandwiches. Instead of shaping individual patties, we cook seasoned ground beef in one layer, top it generously with cheese, and sandwich it all inside fluffy slider buns before baking until golden.
The flavor profile is pure comfort: savory beef seasoned simply with salt, pepper, onion, and a whisper of garlic; creamy, melty cheddar cheese; buttery toasted buns; and a subtle tang from mustard or pickles if you choose to add them. The top becomes lightly crisp and glossy, while the inside stays soft and tender.
What makes this classic Cheeseburger Sliders Recipe special is its balance. The beef is juicy but not greasy. The cheese melts into every crevice. The buns soak up flavor without falling apart. It’s casual, nostalgic, and completely irresistible.
Why I Love Making Sliders
As a woman who has cooked for everything from dinner parties to busy weeknights, I adore recipes that feel joyful and unfussy.
Here’s why this homemade Cheeseburger Sliders Recipe is always on repeat in my kitchen:
- It feeds a crowd effortlessly.
- It’s perfect for game days, birthdays, or cozy movie nights.
- You can prep it ahead of time.
- Kids and adults both devour it.
- The aroma alone makes your kitchen feel alive.
There’s something about the buttery tops and bubbling cheese that makes people smile before they even take a bite.
Equipment List
To make this recipe smoothly, you’ll need:
- 9×13-inch baking dish
- Large skillet
- Wooden spoon or spatula
- Mixing bowl
- Sharp knife
- Cutting board
- Pastry brush
- Aluminum foil
Ingredients
Here’s everything you’ll need to create these irresistible sliders:
- 1 ½ pounds ground beef (80/20 for best flavor)
- 1 small yellow onion, finely diced
- 2 cloves garlic, minced
- 1 teaspoon salt
- ½ teaspoon black pepper
- 1 tablespoon Worcestershire sauce
- 12 slider buns (Hawaiian rolls work beautifully)
- 8 slices cheddar cheese (or about 2 cups shredded)
- 2 tablespoons ketchup
- 1 tablespoon yellow mustard
- 3 tablespoons unsalted butter, melted
- 1 teaspoon sesame seeds (optional)
- ½ teaspoon garlic powder (for topping)
- ½ teaspoon dried parsley (optional garnish)
- Sliced pickles (optional, for serving)
Each ingredient plays a role, from the savory depth of Worcestershire to the glossy butter brushed over the buns.
Step-by-Step Instructions
Step 1: Sauté the Aromatics
Heat a large skillet over medium heat and add the diced onion. Let it soften and turn translucent, about 3–4 minutes. Add the minced garlic and stir until fragrant. Your kitchen will start smelling warm and savory—like the promise of dinner.
Step 2: Cook the Beef
Add the ground beef to the skillet. Break it apart with a wooden spoon and cook until browned and no longer pink. Stir in salt, pepper, and Worcestershire sauce. The beef should be juicy but not overly greasy; drain excess fat if needed.
Step 3: Prepare the Buns
Without separating the rolls, slice the entire slab of slider buns horizontally. Place the bottom half into your greased baking dish. They should fit snugly, like a soft bread blanket waiting for filling.
Step 4: Layer the Filling
Spread the cooked beef evenly over the bottom buns, pressing gently so every bite gets flavor. Drizzle ketchup and mustard lightly across the beef. Lay the cheddar cheese slices over the top, covering edge to edge.
Step 5: Add the Tops
Place the top half of the buns over the cheese. In a small bowl, mix melted butter with garlic powder and parsley. Brush generously over the tops. Sprinkle sesame seeds if desired.
Step 6: Bake to Golden Perfection
Cover loosely with foil and bake at 350°F for 15 minutes. Remove the foil and bake another 5–7 minutes until the tops are golden and the cheese is melted and bubbling. The smell will be absolutely intoxicating.
Step 7: Slice and Serve
Let the sliders rest for a few minutes. Slice along the roll lines and serve warm. Watch the cheese stretch slightly as you pull one apart—it’s pure comfort food bliss.
The Sensory Experience
When these sliders bake, the butter seeps into the tops of the buns, creating a soft yet slightly crisp texture. The cheese melts into the beef, binding everything together in creamy layers. The beef itself is savory, juicy, and deeply satisfying, while the soft buns provide just the right pillowy contrast.
Every bite delivers warmth, nostalgia, and a little indulgence.
Make It Your Own
One of my favorite things about this easy Cheeseburger Sliders Recipe is how customizable it is.
You can try:
- Pepper jack cheese for heat
- Caramelized onions instead of sautéed
- Crispy cooked bacon layered inside
- A smear of mayonnaise or burger sauce
- Thin tomato slices for freshness
Cooking should feel playful. Don’t be afraid to experiment.
Serving Suggestions
I love pairing these sliders with:
- Crispy oven fries
- Sweet potato wedges
- A fresh coleslaw
- Classic potato salad
- Dill pickle spears
For parties, I arrange them on a large platter with parchment paper and let everyone grab their own. They disappear quickly.
Tips for Perfect Sliders
After making this classic Cheeseburger Sliders Recipe dozens of times, here are my best tips:
- Use 80/20 beef for juicy results.
- Don’t overcook the beef; it will cook more in the oven.
- Slice the rolls carefully to keep them connected.
- Brush butter evenly for that bakery-style finish.
- Let them rest before slicing to keep layers intact.
Storage & Reheating
If you somehow have leftovers:
- Store in an airtight container in the fridge for up to 3 days.
- Reheat in the oven at 325°F until warmed through.
- Avoid microwaving too long—it can make the bread tough.
They’re surprisingly delicious the next day.
When to Make Cheeseburger Sliders
This homemade Cheeseburger Sliders Recipe shines during:
- Game day gatherings
- Birthday parties
- Casual family dinners
- Potlucks
- Holiday appetizers
They feel festive without being complicated.
FAQs
Can I make these ahead of time?
Yes! Assemble the sliders, cover tightly, and refrigerate for up to 24 hours before baking. Add a few extra minutes to the bake time if cold.
Can I freeze them?
You can freeze baked sliders individually wrapped. Reheat in the oven for best texture.
What cheese works best?
Cheddar is classic, but American, Colby Jack, or even Swiss work beautifully.
Can I use ground turkey instead?
Absolutely. Just add a little olive oil to keep it moist since turkey is leaner.
How do I keep them from getting soggy?
Drain excess grease from the beef and avoid overloading with sauces before baking.
A Final Note From My Kitchen
There’s something undeniably comforting about gathering people around food that’s simple, warm, and made with love. This Cheeseburger Sliders Recipe has become one of my most-requested dishes—not because it’s fancy, but because it makes people happy.
As a chef, I’ve learned that the best recipes aren’t always the most complicated ones. Sometimes, it’s the buttery buns, savory beef, and melty cheese that create the biggest smiles.
I hope this easy Cheeseburger Sliders Recipe becomes a staple in your kitchen the way it has in mine. And when you pull that golden tray from the oven and hear the first “mmm” from across the table, you’ll know exactly why I love it so much.
Cheeseburger Sliders Recipe
Equipment
- 9×13-inch baking dish
- Large skillet
- Wooden spoon or spatula
- Mixing bowl
- Sharp knife
- Cutting board
- Pastry brush
- Aluminum foil
Ingredients
- 1 ½ pounds ground beef (80/20)
- 1 small yellow onion, finely diced
- 2 cloves garlic, minced
- 1 teaspoon salt
- ½ teaspoon black pepper
- 1 tablespoon Worcestershire sauce
- 12 slider buns Hawaiian rolls
- 8 slices cheddar cheese or 2 cups shredded
- 2 tablespoons ketchup
- 1 tablespoon yellow mustard
- 3 tablespoons unsalted butter, melted
- 1 teaspoon sesame seeds (optional)
- ½ teaspoon garlic powder (for topping)
- ½ teaspoon dried parsley (optional garnish)
- Sliced pickles (optional) for serving
Instructions
Sauté Aromatics
- Heat a large skillet over medium heat and sauté the diced onion until translucent. Add minced garlic and stir until fragrant, filling your kitchen with aroma.
Cook Beef
- Add ground beef to the skillet and cook until browned, breaking it apart with a spoon. Stir in salt, pepper, and Worcestershire sauce for deep flavor.
Prepare Buns
- Slice the slider buns horizontally without separating them and place the bottom halves in a greased 9×13 baking dish, ready for filling.
Layer Filling
- Spread cooked beef evenly over the bottom buns, drizzle with ketchup and mustard, then top with cheddar slices to cover all edges.
Add Tops and Glaze
- Place the top half of buns over the cheese. Mix melted butter with garlic powder and parsley, then brush evenly on top. Sprinkle sesame seeds if desired.
Bake
- Cover loosely with foil and bake at 350°F for 15 minutes. Remove foil and bake another 5–7 minutes until golden brown and cheese is bubbly.
Slice and Serve
- Let sliders rest for a few minutes, then slice along the roll lines and serve warm. Watch the cheese stretch for ultimate comfort.
Notes

Hi, I’m Olivia Brooks! Cooking is my passion, and I love turning everyday ingredients into meals that bring joy to the table. On CulinaryPearl, I share simple recipes, helpful kitchen tips, and inspiration for food lovers everywhere