Intro: A Dish That Feels Like Spring on a Plate
Some recipes don’t just feed you — they set a mood. This Cherry Blossom Chicken Recipe is one of those dishes for me. I first created it on a quiet afternoon when winter was just beginning to loosen its grip.
The windows were open, the light felt softer, and I wanted something comforting but bright — something that tasted like change.
As a female chef, I often cook based on emotion as much as appetite. That day, I wanted a meal that felt delicate yet deeply satisfying. I had chicken in the fridge, a jar of cherries tucked away from a previous baking project, and fresh herbs begging to be used.
What came out of that pan surprised me — tender chicken glazed in a glossy, lightly sweet cherry sauce, balanced with savory notes and a gentle floral aroma that lingered long after dinner was over.
This Cherry Blossom Chicken Recipe has since become my go-to when I want to cook something elegant without stress. It’s the kind of dish that looks restaurant-worthy but feels cozy and personal.
If you’re craving a homemade Cherry Blossom Chicken Recipe that’s equal parts comforting and fresh, let me walk you through it like we’re cooking together.
What is Cherry Blossom Chicken Recipe?
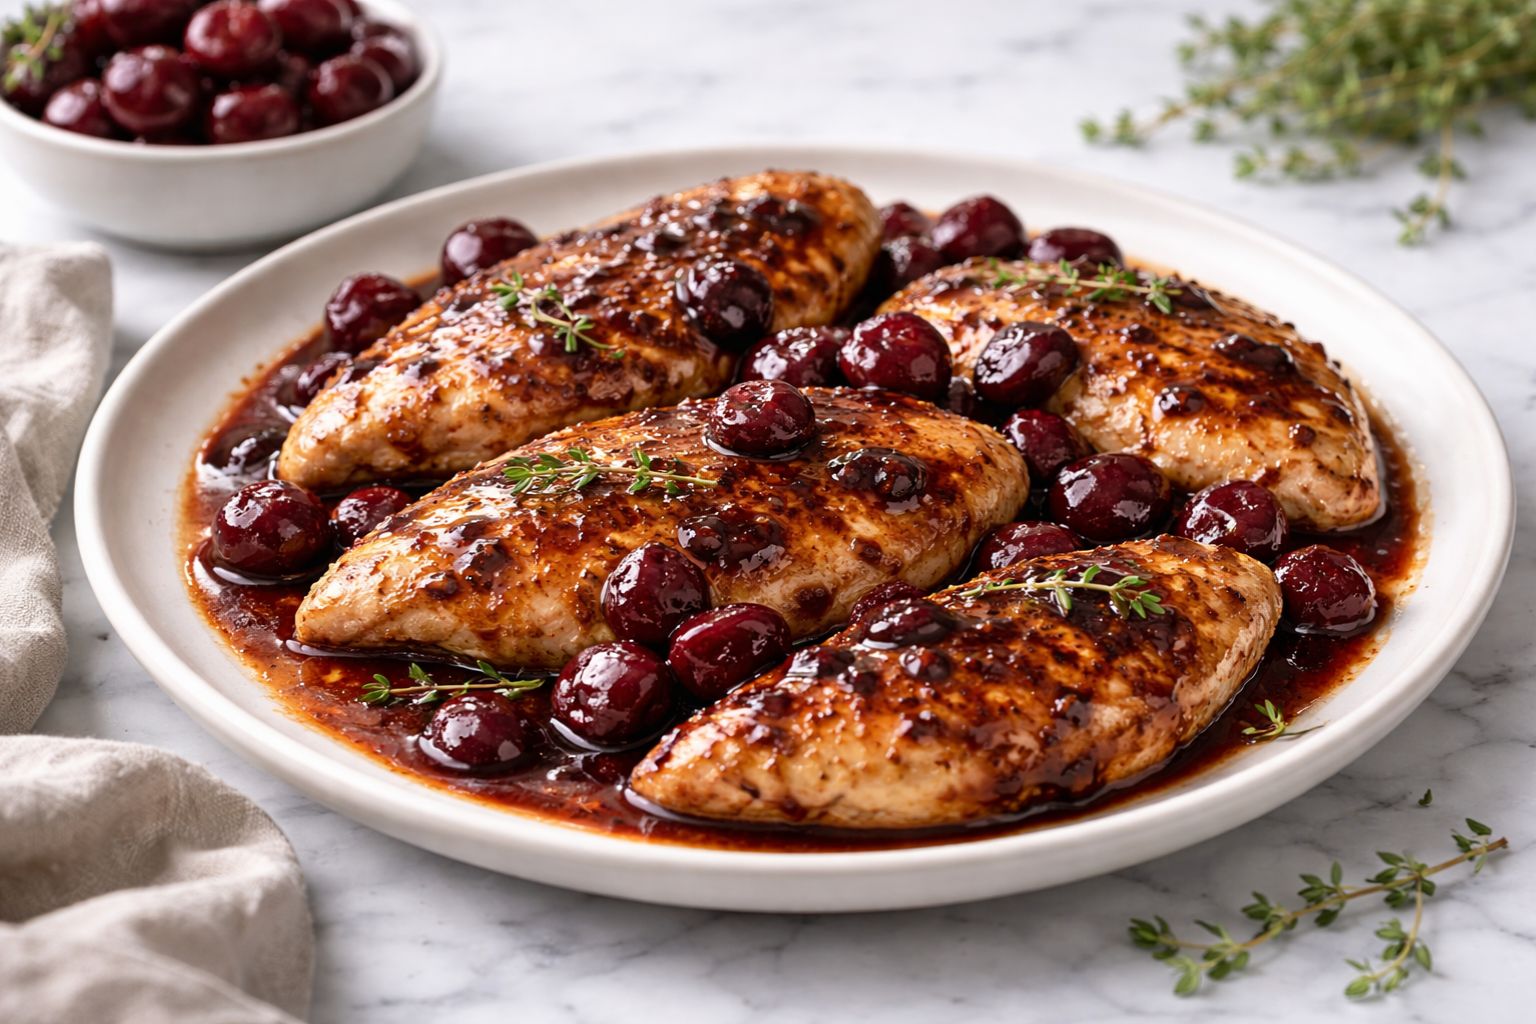
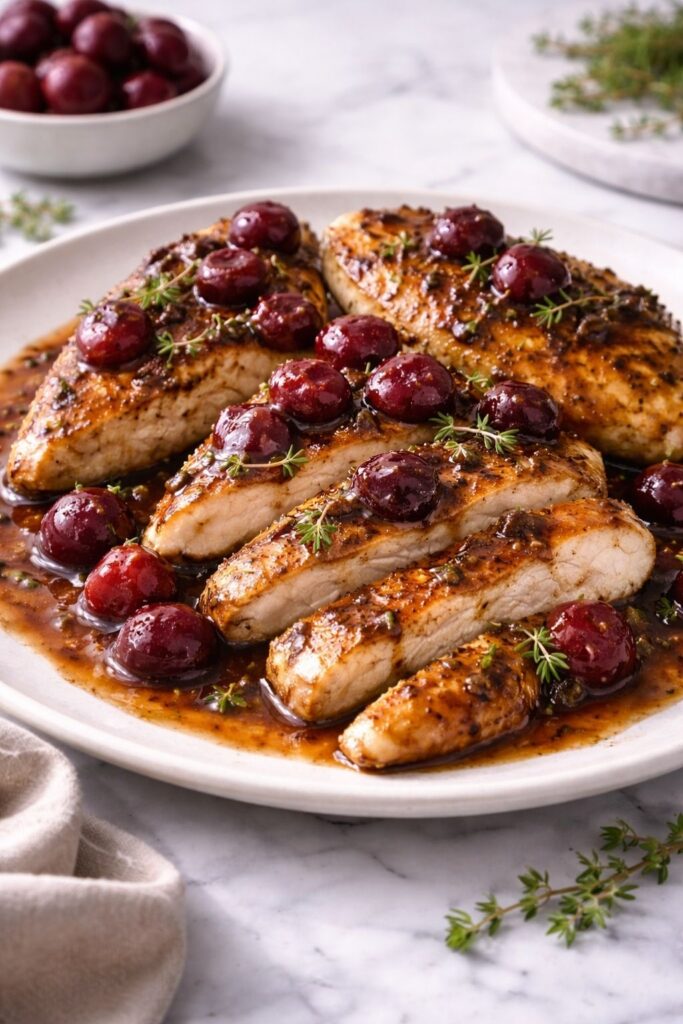
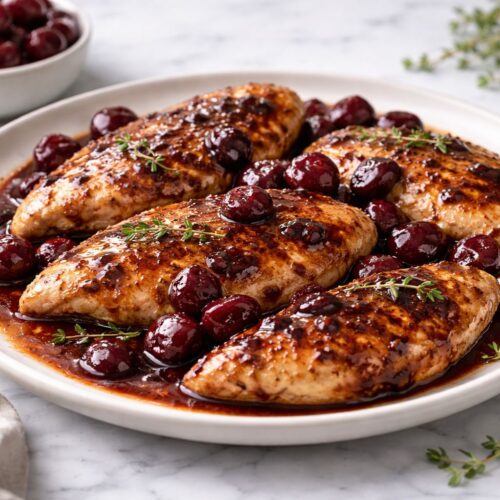
At its core, a Cherry Blossom Chicken Recipe is a savory-sweet chicken dish inspired by the gentle flavors of spring. Juicy chicken is seared until golden, then simmered in a cherry-based sauce that’s lightly tangy, subtly sweet, and beautifully aromatic.
The sauce isn’t sugary or heavy — it’s balanced with garlic, vinegar, and herbs so the cherries enhance rather than overpower.
What makes this a classic Cherry Blossom Chicken is the contrast. You get crisp-edged chicken with tender centers, paired with a silky sauce that coats every bite. The cherries add brightness, while herbs and aromatics ground the dish with warmth.
Best of all, this is an easy Cherry Blossom Chicken Recipe. No complicated techniques, no rare ingredients. Just thoughtful layering of flavors and a little patience at the stove.
Why You’ll Love This Recipe
This recipe earns its place on my table again and again for a few simple reasons:
- It feels elegant but cooks easily on a weeknight
- The cherry sauce is unique yet familiar
- Chicken stays juicy and flavorful
- It pairs beautifully with many sides
It’s also endlessly adaptable, which I love as a chef.
Equipment List
You don’t need much to make this Cherry Blossom Chicken Recipe shine:
- Large skillet or sauté pan
- Tongs
- Cutting board
- Sharp knife
- Measuring cups and spoons
- Wooden spoon or spatula
Ingredients
Everything here works together to create balance and depth.
- 4 boneless, skinless chicken breasts (or thighs)
- 1 tablespoon olive oil
- 1 tablespoon unsalted butter
- 2 cloves garlic, minced
- 1 cup cherries, pitted (fresh or frozen)
- 1/2 cup chicken broth
- 2 tablespoons balsamic vinegar
- 1 tablespoon honey or maple syrup
- 1 teaspoon dried thyme (or 1 tablespoon fresh)
- Salt and black pepper, to taste
Optional Ingredients:
- 1 teaspoon soy sauce (for extra umami)
- Zest of 1 lemon
- Fresh parsley or thyme for garnish
- Red pepper flakes for gentle heat
Instructions
Step 1: Season and Prepare the Chicken
Pat the chicken dry and season generously with salt and black pepper. This step ensures a good sear and locks in flavor right from the start.
Step 2: Sear Until Golden
Heat olive oil and butter in a skillet over medium-high heat. Add the chicken and sear for 4–5 minutes per side until golden brown. Remove and set aside — the chicken will finish cooking later.
Step 3: Build the Cherry Blossom Sauce
Lower the heat to medium and add garlic to the same pan. Stir just until fragrant, then add cherries, chicken broth, balsamic vinegar, and honey. Scrape up the browned bits — that’s pure flavor.
Step 4: Simmer and Reduce
Let the sauce gently simmer for 5–7 minutes until the cherries soften and the liquid thickens slightly. The aroma should be sweet, savory, and lightly tangy.
Step 5: Return Chicken to the Pan
Nestle the chicken back into the sauce. Spoon the glaze over the top, cover, and simmer for another 6–8 minutes until the chicken is cooked through and tender.
Step 6: Finish and Garnish
Taste and adjust seasoning. Add herbs, lemon zest, or chili flakes if using. The sauce should coat the chicken in a glossy, fragrant glaze.
What Makes the Sauce So Special
The magic of this homemade Cherry Blossom Chicken Recipe lies in restraint. The cherries bring natural sweetness and acidity, but it’s the savory elements — garlic, broth, herbs — that keep the dish grounded. I always say a good sauce should whisper, not shout.
If you let it reduce just enough, the sauce becomes silky and clingy without turning syrupy. That’s the sweet spot.
Best Side Dishes to Serve With Cherry Blossom Chicken
This dish plays well with simple sides:
- Steamed jasmine or basmati rice
- Creamy mashed potatoes
- Roasted asparagus or green beans
- Buttered orzo or couscous
For something lighter, a crisp green salad with a citrus vinaigrette is perfect.
Storage and Make-Ahead Tips
This easy Cherry Blossom Chicken Recipe is surprisingly great for leftovers.
- Store in an airtight container for up to 3 days in the fridge
- Reheat gently on the stovetop to preserve the sauce
- Add a splash of broth if the glaze thickens too much
I often make it a day ahead — the flavors deepen overnight.
Common Mistakes to Avoid
- Overcooking the chicken: Remove it early and let it finish in the sauce
- Too much sweetness: Let the cherries shine naturally; don’t overdo honey
- Rushing the sauce: Gentle simmering creates the best texture
FAQs
Can I use frozen cherries?
Yes — just thaw and drain slightly before using.
Can I make this Cherry Blossom Chicken Recipe dairy-free?
Absolutely. Swap butter for more olive oil.
What cut of chicken works best?
Both breasts and thighs work well; thighs stay especially juicy.
Is this recipe very sweet?
No — it’s balanced, with savory notes leading the flavor.
Can I double the sauce?
Yes, and I recommend it if you’re serving rice or pasta.
Final Thoughts From My Kitchen
This Cherry Blossom Chicken Recipe reminds me that cooking doesn’t have to be complicated to feel special. It’s gentle, flavorful, and quietly impressive — the kind of meal that makes people pause after the first bite.
If you’re looking for a classic Cherry Blossom Chicken that feels fresh, comforting, and a little bit poetic, this one deserves a place in your kitchen. Cook it slowly, taste as you go, and enjoy the way it fills your home with warmth — that’s where the real magic lives.
More Delicious Recipes:
Cherry Blossom Chicken Recipe
Equipment
- Large skillet or sauté pan
- Tongs
- Cutting board
- Sharp knife
- Measuring cups and spoons.
- Wooden spoon or spatula
Ingredients
- 4 boneless skinless chicken breasts (or thighs)
- 1 tablespoon olive oil
- 1 tablespoon unsalted butter
- 2 cloves garlic minced
- 1 cup cherries pitted (fresh or frozen)
- 1/2 cup chicken broth
- 2 tablespoons balsamic vinegar
- 1 tablespoon honey or maple syrup
- 1 teaspoon dried thyme or 1 tablespoon fresh
- Salt and black pepper to taste
Optional Ingredients:
- 1 teaspoon soy sauce for extra umami
- Zest of 1 lemon
- Fresh parsley or thyme for garnish
- Red pepper flakes for gentle heat
Instructions
Step 1: Season and Prepare the Chicken
- Pat the chicken dry and season generously with salt and black pepper. This step ensures a good sear and locks in flavor right from the start.
Step 2: Sear Until Golden
- Heat olive oil and butter in a skillet over medium-high heat. Add the chicken and sear for 4–5 minutes per side until golden brown. Remove and set aside — the chicken will finish cooking later.
Step 3: Build the Cherry Blossom Sauce
- Lower the heat to medium and add garlic to the same pan. Stir just until fragrant, then add cherries, chicken broth, balsamic vinegar, and honey. Scrape up the browned bits — that’s pure flavor.
Step 4: Simmer and Reduce
- Let the sauce gently simmer for 5–7 minutes until the cherries soften and the liquid thickens slightly. The aroma should be sweet, savory, and lightly tangy.
Step 5: Return Chicken to the Pan
- Nestle the chicken back into the sauce. Spoon the glaze over the top, cover, and simmer for another 6–8 minutes until the chicken is cooked through and tender.
Step 6: Finish and Garnish
- Taste and adjust seasoning. Add herbs, lemon zest, or chili flakes if using. The sauce should coat the chicken in a glossy, fragrant glaze.

Hi, I’m Olivia Brooks! Cooking is my passion, and I love turning everyday ingredients into meals that bring joy to the table. On CulinaryPearl, I share simple recipes, helpful kitchen tips, and inspiration for food lovers everywhere