Intro
Ice cream lovers, this one’s for you! There’s something magical about a dessert that combines the creamy goodness of ice cream with the crunchy, chocolatey satisfaction of cookies.
This Cookies and Cream Ice Cream Cake Recipe is exactly that—a dreamy, indulgent treat that’s perfect for birthdays, celebrations, or just a fun weekend dessert.
I still remember the first time I tried a cookies and cream ice cream cake at a friend’s party. The combination of chocolate cookie crumbles, layers of creamy ice cream, and a crunchy crust felt like heaven in every bite.
I’ve spent years perfecting my version in my own kitchen, making it not just delicious but also easy to assemble at home. Every layer, every bite, has a story of texture and flavor that makes it unforgettable.
What I love most about this cake is how versatile it is. You can use classic chocolate sandwich cookies, add chocolate drizzle, or even sprinkle some extra cookie crumbs on top for decoration.
The texture is extraordinary—creamy, crunchy, soft, and chocolatey all at once. And the best part? It’s made without needing a fancy ice cream machine!
This recipe also has a nostalgic quality to it. It reminds me of childhood birthday parties, summer evenings, and warm memories of family and friends gathered around the dessert table. That sense of joy and indulgence is exactly what I aim to bring with every homemade ice cream cake.
What is Cookies and Cream Ice Cream Cake?
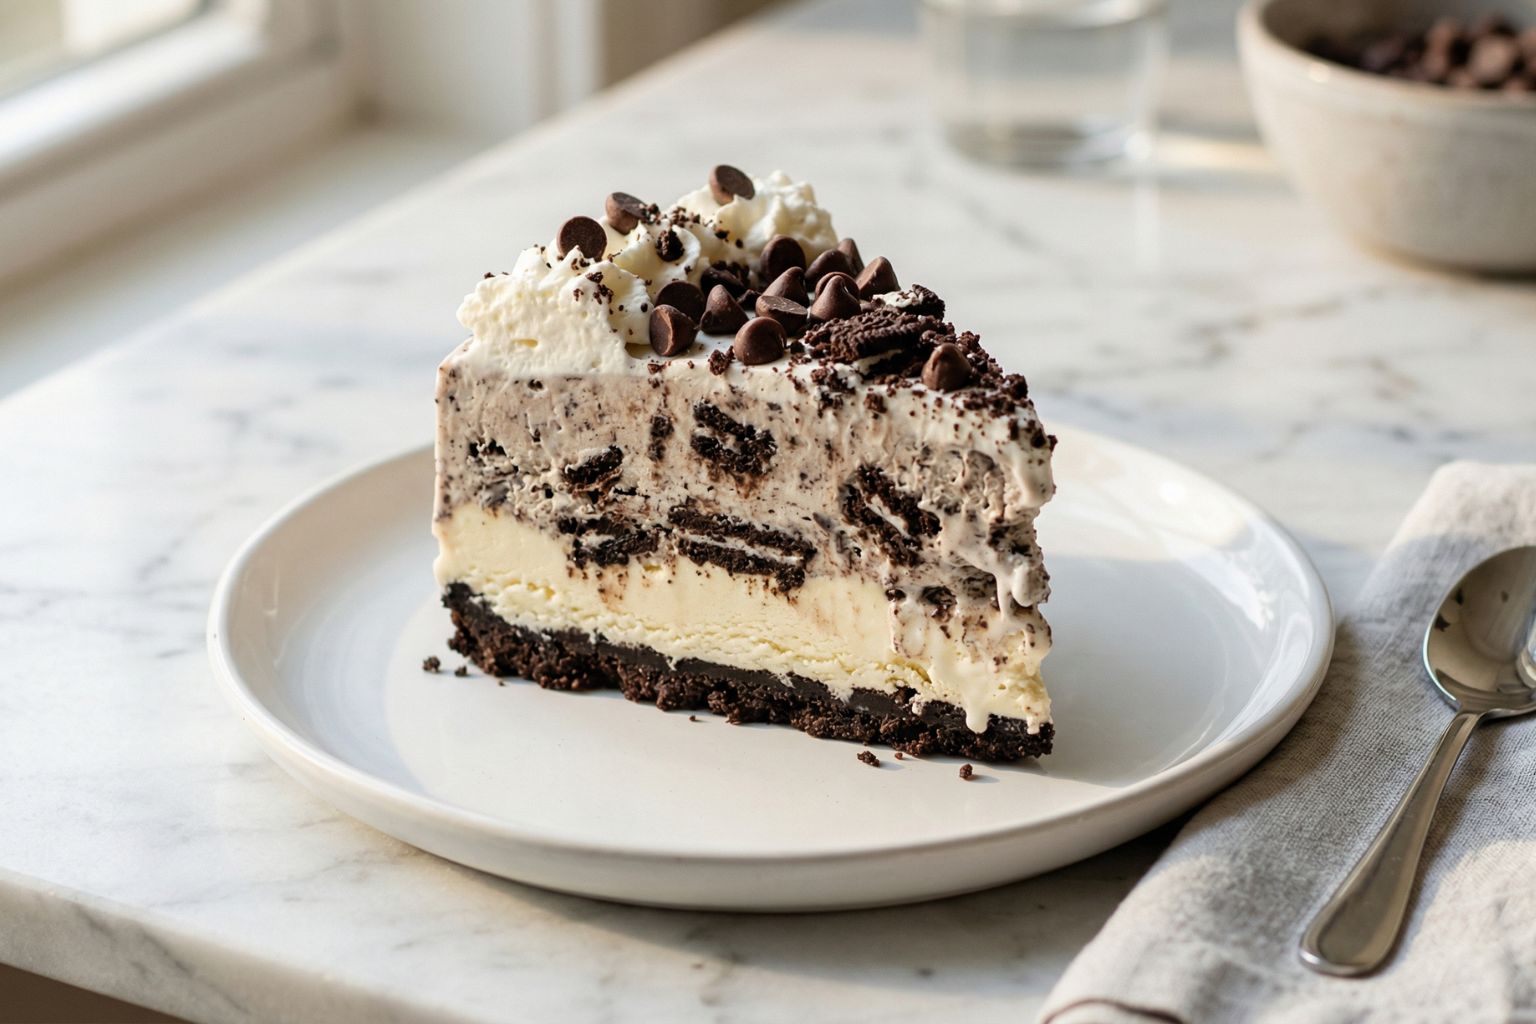
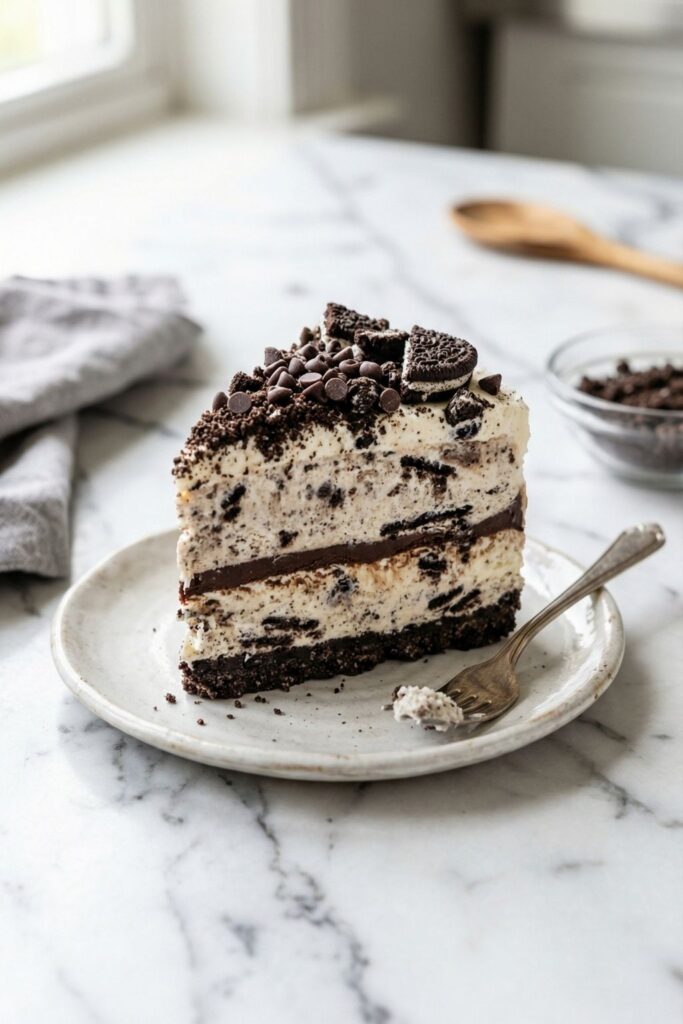
Cookies and Cream Ice Cream Cake is a layered dessert made with crushed chocolate cookies, creamy ice cream, and optional toppings like chocolate chips, cookie crumbs, or chocolate drizzle. The base is often a crunchy cookie crust, topped with softened ice cream and more cookies for added texture and flavor.
Unlike regular ice cream, this cake holds its shape and can be sliced beautifully, making it ideal for parties. Each bite delivers a delightful mix of creamy ice cream and chocolate cookie crunch, with a slight chill that makes it refreshing yet indulgent.
This dessert is as much about texture as it is about flavor—the contrast between the smooth ice cream and the crunch of cookies creates a sensory experience that’s hard to beat.
It’s also a canvas for creativity. You can swap in different ice cream flavors, experiment with cookie types, or even layer in chocolate or caramel sauce. It’s a versatile dessert that can be adapted to fit your mood or the occasion.
Equipment List
To make this Cookies and Cream Ice Cream Cake Recipe perfectly, you’ll need:
- 9-inch springform pan or loaf pan
- Mixing bowls
- Rubber spatula
- Food processor or rolling pin for crushing cookies
- Measuring cups and spoons
- Knife for slicing (after freezing)
- Freezer-safe serving plate
- Plastic wrap or aluminum foil for covering
Having all the equipment ready ensures a smooth assembly and helps the layers stay intact. A springform pan is especially helpful for clean removal of the cake, but a loaf pan or even small individual molds can work if you prefer.
Recipe Card Info
- Prep Time: 20 minutes
- Chill Time: 4–6 hours or overnight
- Total Time: 4 hours 20 minutes (or overnight)
- Servings: 8
- Cuisine: Dessert / American
- Course: Dessert
- Calories: 320 kcal per serving
Ingredients
- 24 chocolate sandwich cookies (like Oreos), divided
- 4 tablespoons unsalted butter, melted
- 1 quart (4 cups) vanilla ice cream, softened
- 1 cup cookies and cream ice cream, softened
- 1/2 cup chocolate chips (optional)
- Whipped cream for topping (optional)
- Extra cookie crumbs for garnish
The ingredients are simple yet deliver an incredible flavor combination of creamy, chocolatey, and slightly crunchy textures. You can also personalize the recipe by using your favorite ice cream flavors, adding caramel swirls, or even incorporating peanut butter chips.
Instructions
Step 1: Prepare the crust
Crush 16 of the chocolate sandwich cookies into fine crumbs using a food processor or by placing them in a ziplock bag and crushing with a rolling pin. Mix the crumbs with melted butter until evenly combined.
Press the mixture firmly into the bottom of a 9-inch springform pan to form an even crust. This forms the foundation of your cake and gives a satisfying crunch with every bite. Place in the freezer for about 10 minutes to firm up.
Step 2: Layer the vanilla ice cream
Scoop the softened vanilla ice cream over the crust and spread it evenly with a spatula. Smooth the top and sprinkle a few crushed cookies over the ice cream for added texture and flavor. The key here is to ensure an even layer so that each slice has the perfect balance of ice cream and cookie crunch.
Step 3: Add the cookies and cream ice cream layer
Scoop the softened cookies and cream ice cream over the vanilla layer. Smooth it gently, being careful not to mix the layers. Sprinkle optional chocolate chips or cookie crumbs on top to enhance texture and create visual appeal.
Step 4: Freeze the cake
Cover the pan with plastic wrap or foil and freeze the cake for at least 4–6 hours, or preferably overnight, until firm. Patience is key here; the longer the cake freezes, the cleaner the slices will be and the better the texture.
Step 5: Decorate and serve
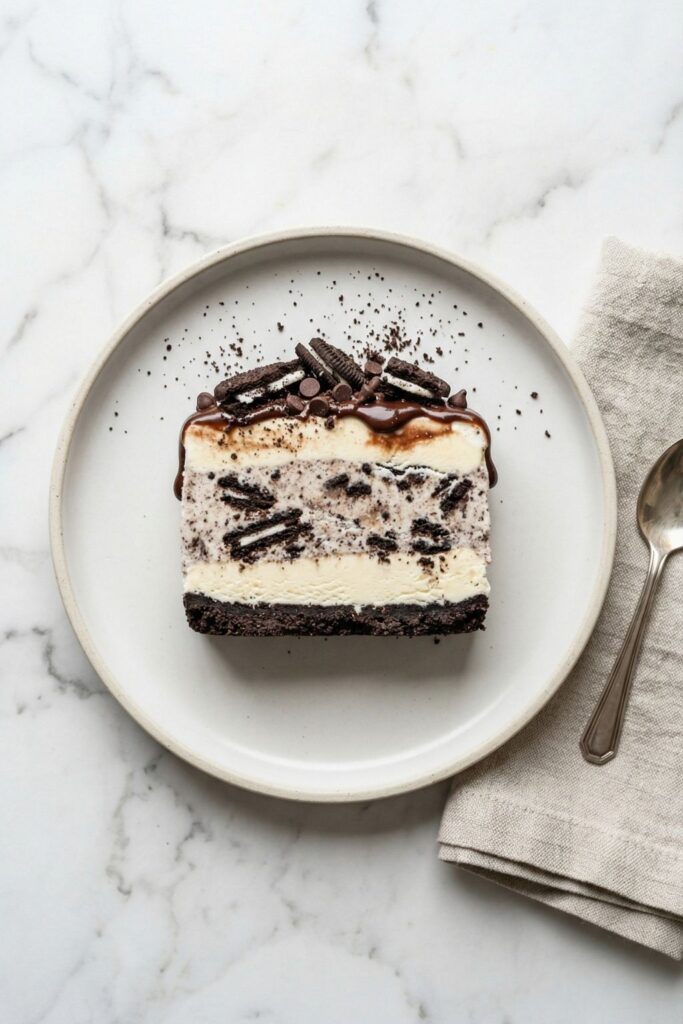
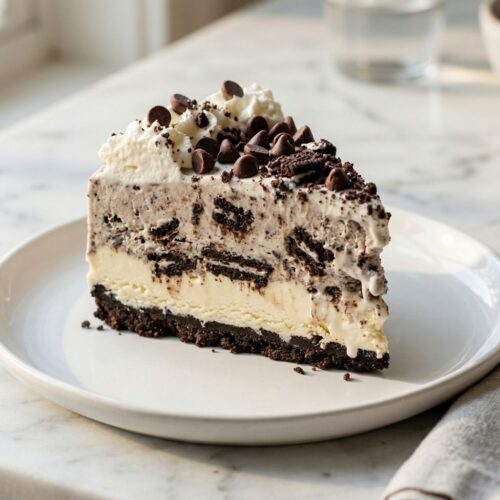
Remove the cake from the pan carefully. Decorate with whipped cream, additional cookie crumbs, or a chocolate drizzle if desired. Slice with a sharp knife and serve immediately. Each slice should reveal the beautiful layers of crust, vanilla ice cream, and cookies and cream ice cream.
Flavor Profile and Texture
This cake is a delightful combination of creamy, cold ice cream and crunchy chocolate cookie layers. The vanilla layer is smooth and mellow, providing a base that highlights the chocolate cookie chunks in the cookies and cream ice cream. The crust adds a buttery crunch, while optional chocolate chips or cookie toppings enhance both texture and flavor.
Every bite has a satisfying contrast between the softness of the ice cream and the crunch of the cookies. The cold temperature makes it refreshing, and the chocolatey flavors make it indulgent. This dessert truly appeals to all senses: sight, taste, and texture.
Tips for the Perfect Ice Cream Cake
- Let the ice cream soften slightly for easier layering.
- Press the crust firmly to prevent it from crumbling.
- Use a springform pan for easy removal and clean edges.
- Freeze overnight for the best slicing results.
- Customize by adding fudge, caramel, or extra cookies between layers.
- Slice with a sharp knife dipped in hot water for clean cuts.
- Serve immediately after removing from the freezer to maintain texture.
Variations to Try
- Use chocolate ice cream as a base for a double chocolate version.
- Add caramel or fudge swirls between layers.
- Mix in peanut butter chips or nuts for extra flavor.
- Create mini versions in a loaf pan or individual cups.
- Top with fresh berries or fruit puree for a fruity twist.
- Drizzle chocolate ganache over the top for an extra indulgent touch.
Storage and Serving Tips
Keep the ice cream cake covered in the freezer until ready to serve. Slice with a sharp knife dipped in hot water for clean pieces. The cake can be stored for up to 1 week in the freezer without losing flavor. To maintain texture and prevent ice crystals, make sure the cake is well-covered with plastic wrap or foil.
Frequently Asked Questions
Can I make this cake without a springform pan?
Yes, a loaf pan works too, but slices may be slightly harder to remove cleanly.
Can I use store-bought ice cream?
Absolutely! Softened store-bought ice cream works perfectly and saves time.
How long should I freeze the cake?
Freeze at least 4–6 hours, but overnight is best for firm slices and clean layers.
Can I add fudge or caramel?
Yes, you can swirl in sauces between layers or drizzle on top before serving.
Can I make individual servings?
Yes, use small cups or silicone molds to create mini ice cream cakes, perfect for portion control or gifts.
Can I add flavor extracts?
Yes! Vanilla, chocolate, or even mint extracts can enhance the ice cream layers.
How do I prevent freezer burn?
Cover the cake tightly with plastic wrap and foil, and keep it in the coldest part of the freezer.
Final Thoughts
This Cookies and Cream Ice Cream Cake Recipe is the ultimate treat for any ice cream lover. Creamy, chocolatey, and fun to make, it’s a dessert that’s sure to impress at parties or cozy nights at home.
With its simple ingredients, easy assembly, and delicious layers, it’s a recipe that brings joy to every bite.
Whether you’re serving it at a birthday, a weekend gathering, or just indulging yourself, this ice cream cake is guaranteed to delight.
The combination of creamy ice cream, crunchy cookie crust, and chocolatey goodness makes it a dessert you’ll want to make again and again. Serve it cold, enjoy the textures and flavors, and savor every slice of this homemade indulgence.
More Recipes:
Cookies and Cream Ice Cream Cake Recipe
Equipment
- 9-inch springform pan or loaf pan
- Mixing bowls
- Rubber spatula
- Food processor or rolling pin for crushing cookies
- Measuring cups and spoons.
- Knife for slicing (after freezing)
- Freezer-safe serving plate
- Plastic wrap or aluminum foil for covering
Ingredients
- 24 chocolate sandwich cookies like Oreos, divided
- 4 tablespoons unsalted butter melted
- 1 quart 4 cups vanilla ice cream, softened
- 1 cup cookies and cream ice cream softened
- 1/2 cup chocolate chips optional
- Whipped cream for topping optional
- Extra cookie crumbs for garnish
Instructions
Step 1: Prepare the crust
- Crush 16 of the chocolate sandwich cookies into fine crumbs using a food processor or by placing them in a ziplock bag and crushing with a rolling pin. Mix the crumbs with melted butter until evenly combined.
- Press the mixture firmly into the bottom of a 9-inch springform pan to form an even crust. This forms the foundation of your cake and gives a satisfying crunch with every bite. Place in the freezer for about 10 minutes to firm up.
Step 2: Layer the vanilla ice cream
- Scoop the softened vanilla ice cream over the crust and spread it evenly with a spatula. Smooth the top and sprinkle a few crushed cookies over the ice cream for added texture and flavor. The key here is to ensure an even layer so that each slice has the perfect balance of ice cream and cookie crunch.
Step 3: Add the cookies and cream ice cream layer
- Scoop the softened cookies and cream ice cream over the vanilla layer. Smooth it gently, being careful not to mix the layers. Sprinkle optional chocolate chips or cookie crumbs on top to enhance texture and create visual appeal.
Step 4: Freeze the cake
- Cover the pan with plastic wrap or foil and freeze the cake for at least 4–6 hours, or preferably overnight, until firm. Patience is key here; the longer the cake freezes, the cleaner the slices will be and the better the texture.
Step 5: Decorate and serve
- Remove the cake from the pan carefully. Decorate with whipped cream, additional cookie crumbs, or a chocolate drizzle if desired. Slice with a sharp knife and serve immediately. Each slice should reveal the beautiful layers of crust, vanilla ice cream, and cookies and cream ice cream.
Notes
- Let the ice cream soften slightly for easier layering.
- Press the crust firmly to prevent it from crumbling.
- Use a springform pan for easy removal and clean edges.
- Freeze overnight for the best slicing results.
- Customize by adding fudge, caramel, or extra cookies between layers.
- Slice with a sharp knife dipped in hot water for clean cuts.
- Serve immediately after removing from the freezer to maintain texture.

Hi, I’m Olivia Brooks! Cooking is my passion, and I love turning everyday ingredients into meals that bring joy to the table. On CulinaryPearl, I share simple recipes, helpful kitchen tips, and inspiration for food lovers everywhere