
Introduction
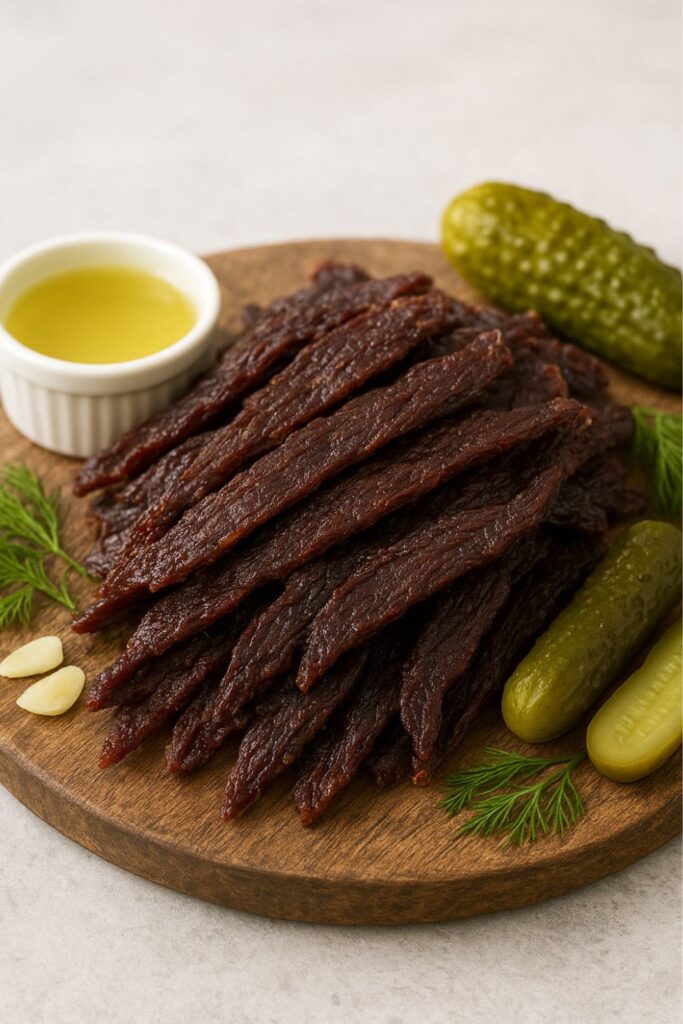
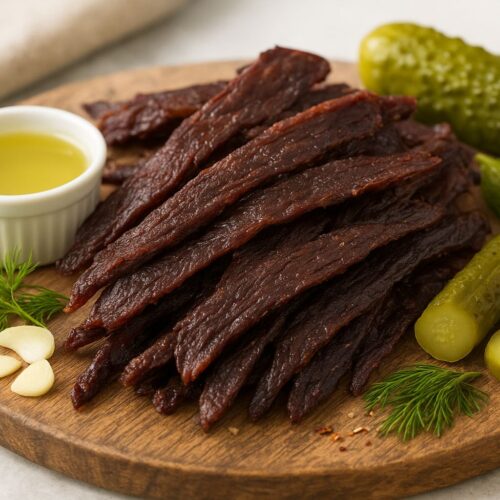
The dill pickles and the beef jerky go together in a way that is undoubtedly some magic. It is the best possible collision of two worlds, snappy, briny taste dribbling into fatty, smoky slices of beef.
You are in luck if you questioned how to create that brilliant idea in your kitchen. I am going to sink my teeth into the Dill Pickle Jerky Recipe today, and believe me, once you taste it, you will never again see jerky in the same way.
It is not just another jerkin. It is spicy, full of character, and highly addictive. Made to be carried on the road, to have between meals at the office, or even to give a fellow pickle lover (we know there are plenty of us out there).
What is Dill Pickle Jerky?
Dill Pickle Jerky Recipe is, in other words, beef jerky that has been marinated in a brine with the added flavor of dill pickles. Rather than just soy-sauce-and-smoke as most people do, this recipe is heavily tilted in the direction of tang, herbs, and garlic, and makes it a bright, zingy jerky unlike any other.
The meat still dries up to the taste of satisfaction of chewy jerky, but each bite is full of the brashness of pickle juice. Imagine your favorite deli sandwich with pickles… but in concentrate, in strips, with protein content. That’s what we’re making here.
The Story of My Discovery of this Jerky.
This is the point at which I must confess: I was not convinced that dill pickle jerky was a product until a few years ago. I came across a bag in a roadside gas station, and the packaging said limited edition. As a snack-crazed (and inquisitive) individual, I picked it. One bite later, I was hooked.
The beef was so heavy, and the tanginess broke through it so well, that I had to keep on snacking. However, here is the punch line: it was costly, and half the ingredients listed on the label sounded like a science experiment. That is when I came up with the idea of just making this at home.
It was not very salty the first time (rookie mistake-I added in too much pickle juice), but in a couple of experiments, I unraveled the secret. It is now a family favorite, particularly when we are thinking of going camping.
Equipment You’ll Need
The best thing about this Dill Pickle Jerky Recipe is that one does not need a lot of fancy equipment. Here’s what I recommend:
- A sharp chef’s knife (to slice the beef evenly and thinly)
- Zip-top bags or a shallow glass dish (to be used in marinating)
- Your oven at low or a dehydrator (the most preferable).
- Racks of wire (in case you are using the oven)
- Paper towels (to blot out some of the marinade)
Ingredients For Dill Pickle Jerky Recipe
The taste-based menu is as follows:
- 2 lbs lean beef (flank steak, sirloin tip, or top round)
- 1 ½ cups dill pickle juice
- 2 tbsp Worcestershire sauce
- 2 tbsp soy sauce
- 1 tbsp brown sugar
- 1 tsp garlic powder
- 1 tsp onion powder
- 1 tsp black pepper
- ½ tsp crushed red pepper flakes (optional)
- 2 tbsp fresh dill, chopped
Step-by-Step Instructions For Dill Pickle Jerky Recipe
Step 1: Prep the Beef
Place your beef in the freezer to harden it; about 1 hour. This makes slicing easier. After which cut into narrow strips, 1/8 to 1/4 inch, crosswise to tenderness.
Step 2: Prepare the Marinade
Combine the pickle juice, Worcestershire sauce, soy sauce, brown sugar, garlic powder, onion powder, black pepper, red pepper flakes, and dill in a large bowl.
Step 3: Marinate
Coat the beef strips in the marinade and stir. Allow to marinate (cover and refrigerate) 12-24 hours, flipping occasionally so that all pieces absorb the pickle goodness.
Step 4: Dry the Beef
Rinse the strips and dry them using paper towels. Place them in a single layer on your dehydrator racks or wire racks.
Step 5: Dehydrate
In case of dehydrator set to 160°F, dry 4-6 hours until the jerky is firm yet it still has some degree of pliability. When using a baking dish, keep it at the lowest possible temperature in the oven and leave the door ajar to allow the moisture to pass through. Bake for 4–6 hours.
Step 6: Cooling and storing
Jerky should be allowed to cool, after which it should be packaged into airtight containers or jars. It will last up to a week at room temperature or even more in the fridge.
The Secret to Perfect Dill Pickle Jerky.
All recipes of jerky possess their magic tricks, and this is not an exception. Here’s what makes it work:
Freeze, leaving the piece: You will have even cuts, which will not make you struggle with the meat.
Blot, blot, blot: An Excessive amount of liquid on the beef will not allow it to dry.
The secret ingredient is fresh dill: This is the ingredient that can be overlooked, but it adds a new dimension and makes it not one-dimensional.
Low and slow: Patience is key. Turning up the heat is just going to cook the beef rather than dry it.
Reasons as to why Dill Pickle Jerky is the Snack you didn’t know you needed.
Jerky is already a wonderful snack; it is portable, rich in protein, and filling. But dill pickle jerky? It’s like jerky leveled up. The tanginess stimulates your taste buds, and it is much lighter compared to the traditional ones.
It is the type of snack that you will desire at 3 p.m. when you feel tired and need to be energized, or when you are going on a long road trip.
And straight to the point–this jerky is a good conversation starter. Give somebody a piece and see their eyebrows fly up in shock (then they go down a few seconds later).
Combining Ideas: Jerky, Meeting Drinks
This is an additional tip that has been picked up over the years: dill pickle jerky is unbelievably good with some beverages.
- Ice-cold beer (a fresh lager or an IPA, in particular)
- Bloody Marys with spice (bloody heaven, he says)
- Cold water and lime (to feel fresh, without feeling guilty)
Eat a snack and have a drink as though it were in the backyard cookout, though you might be sitting at the desk.
Final Thoughts
If you’re looking for a new kitchen project or a snack that’ll blow people’s minds, this Dill Pickle Jerky Recipe is it. It’s bold, it’s fun, and it’s ridiculously satisfying. Once you taste it, you’ll get why I call it my “road trip MVP.”
Take that jar of pickles in your fridge, take some lean beef, and get ready to surprise yourself–and yourself with everybody you share it with. Who was expecting dill pickles and jerky to be the best friends?
More Recipes:
Dill Pickle Jerky Recipe
Equipment
- A sharp chef's knife (to slice the beef evenly and thinly)
- Zip-top bags or a shallow glass dish (to be used in marinating)
- Your oven at low or a dehydrator (the most preferable).
- Racks of wire (in case you are using the oven)
- Paper towels (to blot out some of the marinade)
Ingredients
- 2 lbs lean beef flank steak, sirloin tip, or top round
- 1 ½ cups dill pickle juice
- 2 tbsp Worcestershire sauce
- 2 tbsp soy sauce
- 1 tbsp brown sugar
- 1 tsp garlic powder
- 1 tsp onion powder
- 1 tsp black pepper
- ½ tsp crushed red pepper flakes optional
- 2 tbsp fresh dill chopped
Instructions
Step 1: Prep the Beef
- Place your beef in the freezer to harden it; about 1 hour. This makes slicing easier. After which cut into narrow strips, 1/8 to 1/4 inch, crosswise to tenderness.
Step 2: Prepare the Marinade
- Combine the pickle juice, Worcestershire sauce, soy sauce, brown sugar, garlic powder, onion powder, black pepper, red pepper flakes, and dill in a large bowl.
Step 3: Marinate
- Coat the beef strips in the marinade and stir. Allow to marinate (cover and refrigerate) 12-24 hours, flipping occasionally so that all pieces absorb the pickle goodness.
Step 4: Dry the Beef
- Rinse the strips and dry them using paper towels. Place them in a single layer on your dehydrator racks or wire racks.
Step 5: Dehydrate
- In case of dehydrator set to 160°F, dry 4-6 hours until the jerky is firm yet it still has some degree of pliability. When using a baking dish, keep it at the lowest possible temperature in the oven and leave the door ajar to allow the moisture to pass through. Bake for 4–6 hours.
Step 6: Cooling and storing
- Jerky should be allowed to cool, after which it should be packaged into airtight containers or jars. It will last up to a week at room temperature or even more in the fridge.

Hi, I’m Olivia Brooks! Cooking is my passion, and I love turning everyday ingredients into meals that bring joy to the table. On CulinaryPearl, I share simple recipes, helpful kitchen tips, and inspiration for food lovers everywhere