
Intro
There was a season in my cooking life when bread felt like a guilty pleasure. Between restaurant tastings, recipe testing, and long days on my feet, I started paying closer attention to how food made me feel—not just how it tasted.
That’s when I realized how sneaky sodium can be, especially in store-bought bread. One afternoon, standing in my kitchen with flour on my hands and the smell of yeast blooming in warm water, I decided to create my own Low-Sodium Bread Recipe—one that still tasted like real bread, with a soft crumb and golden crust, but without the salt overload.
As a female chef, bread-making is almost meditative for me. The quiet rhythm of kneading, the gentle rise, the warmth of the oven—it’s grounding. This homemade Low-Sodium Bread Recipe was born out of that calm space.
It’s simple, nourishing, and honest, and it reminds me that food can be both comforting and mindful. If you’ve been searching for an easy Low-Sodium Bread Recipe that doesn’t feel like a compromise, this loaf might just become your new staple.
What is Low-Sodium Bread?
A Low-Sodium Bread Recipe is exactly what it sounds like: a yeast-based bread made with significantly less salt than traditional loaves. But here’s the important part—it’s not flavorless. Instead of relying heavily on salt, this bread builds flavor through proper fermentation, quality flour, and gentle baking.
The result is a loaf that’s soft inside, lightly crisp on the outside, and perfect for everyday use. Toast it, slice it for sandwiches, or enjoy it warm with a swipe of unsalted butter. This is a classic Low-Sodium Bread Recipe in the sense that it respects tradition while adjusting what matters for modern, health-conscious kitchens.
Why I Bake Low-Sodium Bread at Home
Baking bread at home gives you full control. You know exactly what’s going into it, and you can tailor it to your needs. For me, this recipe is about balance—honoring the craft of bread-making while supporting a lifestyle that feels good long-term. Plus, nothing beats the aroma of fresh bread filling your kitchen.
Equipment List
You don’t need professional bakery equipment—just a few basics:
- Large mixing bowl
- Measuring cups and spoons
- Wooden spoon or dough whisk
- Clean kitchen towel
- Loaf pan (9×5-inch)
- Oven
- Wire cooling rack
Ingredients
Simple ingredients, thoughtfully used:
- 3 cups all-purpose flour (or bread flour)
- 1 packet (2 1/4 teaspoons) active dry yeast
- 1 cup warm water (about 110°F)
- 1 tablespoon honey or sugar
- 1 tablespoon olive oil or neutral oil
- 1/4 teaspoon salt (optional but recommended)
Optional additions:
- 1 tablespoon unsalted butter (for brushing)
- 1 teaspoon dried herbs (rosemary or thyme)
Instructions
Step 1: Activate the Yeast
In a large bowl, combine warm water, honey, and yeast. Stir gently and let it sit for 5–10 minutes until foamy. That foam tells you the yeast is alive and ready to work its magic.
Step 2: Mix the Dough
Add olive oil and salt (if using) to the yeast mixture. Gradually stir in the flour until a soft dough forms. It should look shaggy but cohesive.
Step 3: Knead Until Smooth
Turn the dough onto a lightly floured surface and knead for about 8–10 minutes. The dough should become smooth, elastic, and slightly springy to the touch.
Step 4: First Rise
Place the dough in a lightly oiled bowl, cover with a kitchen towel, and let it rise in a warm spot for 60–75 minutes, or until doubled in size.
Step 5: Shape the Loaf
Gently punch down the dough and shape it into a loaf. Place it into a greased loaf pan, cover, and let it rise again for 30–40 minutes.
Step 6: Bake to Golden Perfection
Preheat the oven to 375°F (190°C). Bake the bread for 30–35 minutes, until the top is golden and the loaf sounds hollow when tapped.
Step 7: Cool and Enjoy
Remove from the pan and cool on a wire rack before slicing. This resting time helps set the crumb and improves texture.
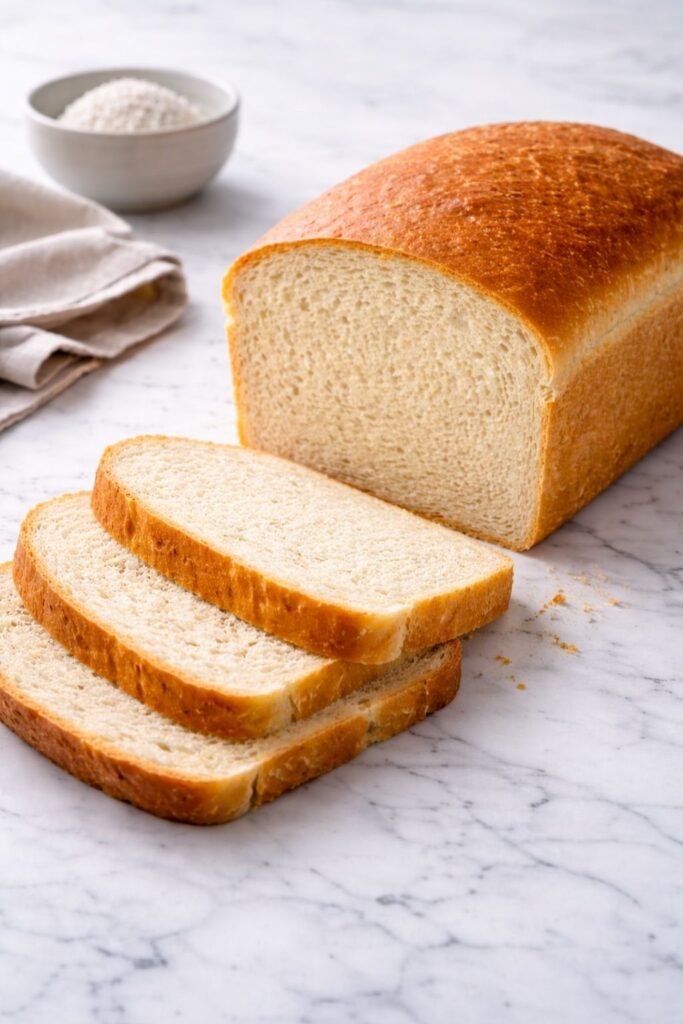
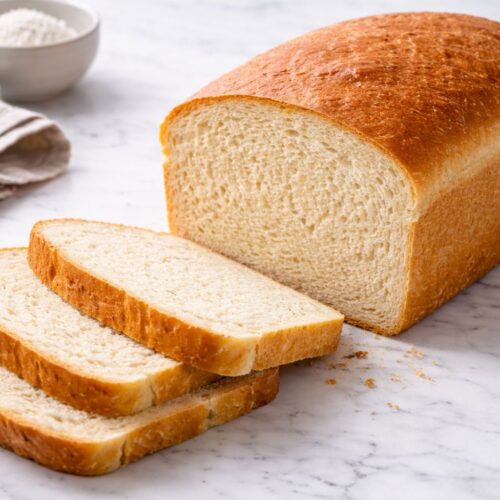
What This Bread Tastes Like
This Low-Sodium Bread Recipe has a clean, wheat-forward flavor with a soft, tender crumb. The crust is lightly crisp without being tough, and the interior stays moist for days. It’s subtle, comforting, and incredibly versatile.
Tips for Flavor Without Salt
- Let the dough rise fully—fermentation builds natural flavor.
- Use high-quality flour for better taste.
- Add herbs or a touch of honey for depth.
Easy Variations
Once you’re comfortable, try these twists:
- Whole wheat version: Replace half the flour with whole wheat flour.
- Seeded loaf: Sprinkle unsalted seeds on top before baking.
- Olive oil bread: Increase olive oil slightly for a richer crumb.
Serving Ideas
This bread is perfect for:
- Toast with jam or nut butter
- Sandwiches and grilled paninis
- Soups and stews
Storage and Freezing
Store the bread at room temperature in a sealed bag for up to 3 days. For longer storage, slice and freeze for up to 2 months. Toast straight from frozen.
FAQs
Is this an easy Low-Sodium Bread Recipe for beginners?
Yes! The steps are straightforward and forgiving.
Can I skip the salt completely?
You can, though a tiny amount helps with flavor and structure.
Why didn’t my bread rise?
Your yeast may be expired, or the water may have been too hot or too cold.
Can I use instant yeast?
Yes—skip the activation step and mix it directly with the dry ingredients.
Is this suitable for a low-sodium diet?
Absolutely. This recipe contains far less sodium than store-bought bread.
Final Thoughts from My Kitchen
This Low-Sodium Bread Recipe is proof that mindful eating doesn’t have to mean giving up comfort. It’s warm, nourishing, and deeply satisfying—the kind of bread you bake once and then keep coming back to. For me, it’s not just about reducing salt; it’s about reconnecting with food in a way that feels thoughtful, intentional, and full of care.
More Delicious Recipes:
Low-Sodium Bread Recipe
Equipment
- Large mixing bowl
- Measuring cups and spoons.
- Wooden spoon or dough whisk
- Clean kitchen towel
- Loaf pan (9×5 inch)
- Oven
- Wire cooling rack
Ingredients
- 3 cups all-purpose flour or bread flour
- 1 packet 2 1/4 teaspoons active dry yeast
- 1 cup warm water about 110°F
- 1 tablespoon honey or sugar
- 1 tablespoon olive oil or neutral oil
- 1/4 teaspoon salt optional but recommended
Optional additions:
- 1 tablespoon unsalted butter for brushing
- 1 teaspoon dried herbs rosemary or thyme
Instructions
Step 1: Activate the Yeast
- In a large bowl, combine warm water, honey, and yeast. Stir gently and let it sit for 5–10 minutes until foamy. That foam tells you the yeast is alive and ready to work its magic.
Step 2: Mix the Dough
- Add olive oil and salt (if using) to the yeast mixture. Gradually stir in the flour until a soft dough forms. It should look shaggy but cohesive.
Step 3: Knead Until Smooth
- Turn the dough onto a lightly floured surface and knead for about 8–10 minutes. The dough should become smooth, elastic, and slightly springy to the touch.
Step 4: First Rise
- Place the dough in a lightly oiled bowl, cover with a kitchen towel, and let it rise in a warm spot for 60–75 minutes, or until doubled in size.
Step 5: Shape the Loaf
- Gently punch down the dough and shape it into a loaf. Place it into a greased loaf pan, cover, and let it rise again for 30–40 minutes.
Step 6: Bake to Golden Perfection
- Preheat the oven to 375°F (190°C). Bake the bread for 30–35 minutes, until the top is golden and the loaf sounds hollow when tapped.
Step 7: Cool and Enjoy
- Remove from the pan and cool on a wire rack before slicing. This resting time helps set the crumb and improves texture.

Hi, I’m Olivia Brooks! Cooking is my passion, and I love turning everyday ingredients into meals that bring joy to the table. On CulinaryPearl, I share simple recipes, helpful kitchen tips, and inspiration for food lovers everywhere