Intro
Some of my favorite recipes didn’t come from cookbooks or culinary school. They came from moments — the kind that happen when you’re standing in the kitchen with a sweet craving and a few simple ingredients on the counter. That’s exactly how this Butterfinger Balls Recipe became one of my most requested treats.
I remember the first time I made them. It was during the holiday season, when the kitchen seems to constantly smell like chocolate, sugar, and warm memories.
I had a bag of crushed Butterfinger candy bars sitting in the pantry and a sudden inspiration to turn them into something bite-sized and irresistible.
Within minutes, peanut butter and crushed candy bars were mixed together in a bowl, and the mixture already smelled amazing — nutty, sweet, and unmistakably Butterfinger. After rolling the mixture into little balls and dipping them in silky melted chocolate, I knew I had created something special.
The first bite was everything you want from a homemade dessert. The chocolate shell gently cracked, revealing a creamy, peanut-buttery center filled with crunchy Butterfinger bits. Sweet, slightly salty, rich, and perfectly satisfying.
Ever since that day, this homemade Butterfinger Balls Recipe has been one of those treats I make whenever I want something easy, fun, and guaranteed to make people smile. If you love peanut butter, chocolate, and that iconic crispy Butterfinger flavor, you’re going to fall in love with this recipe.
And the best part? This easy Butterfinger Balls Recipe requires no baking at all.
What is a Butterfinger Balls Recipe?
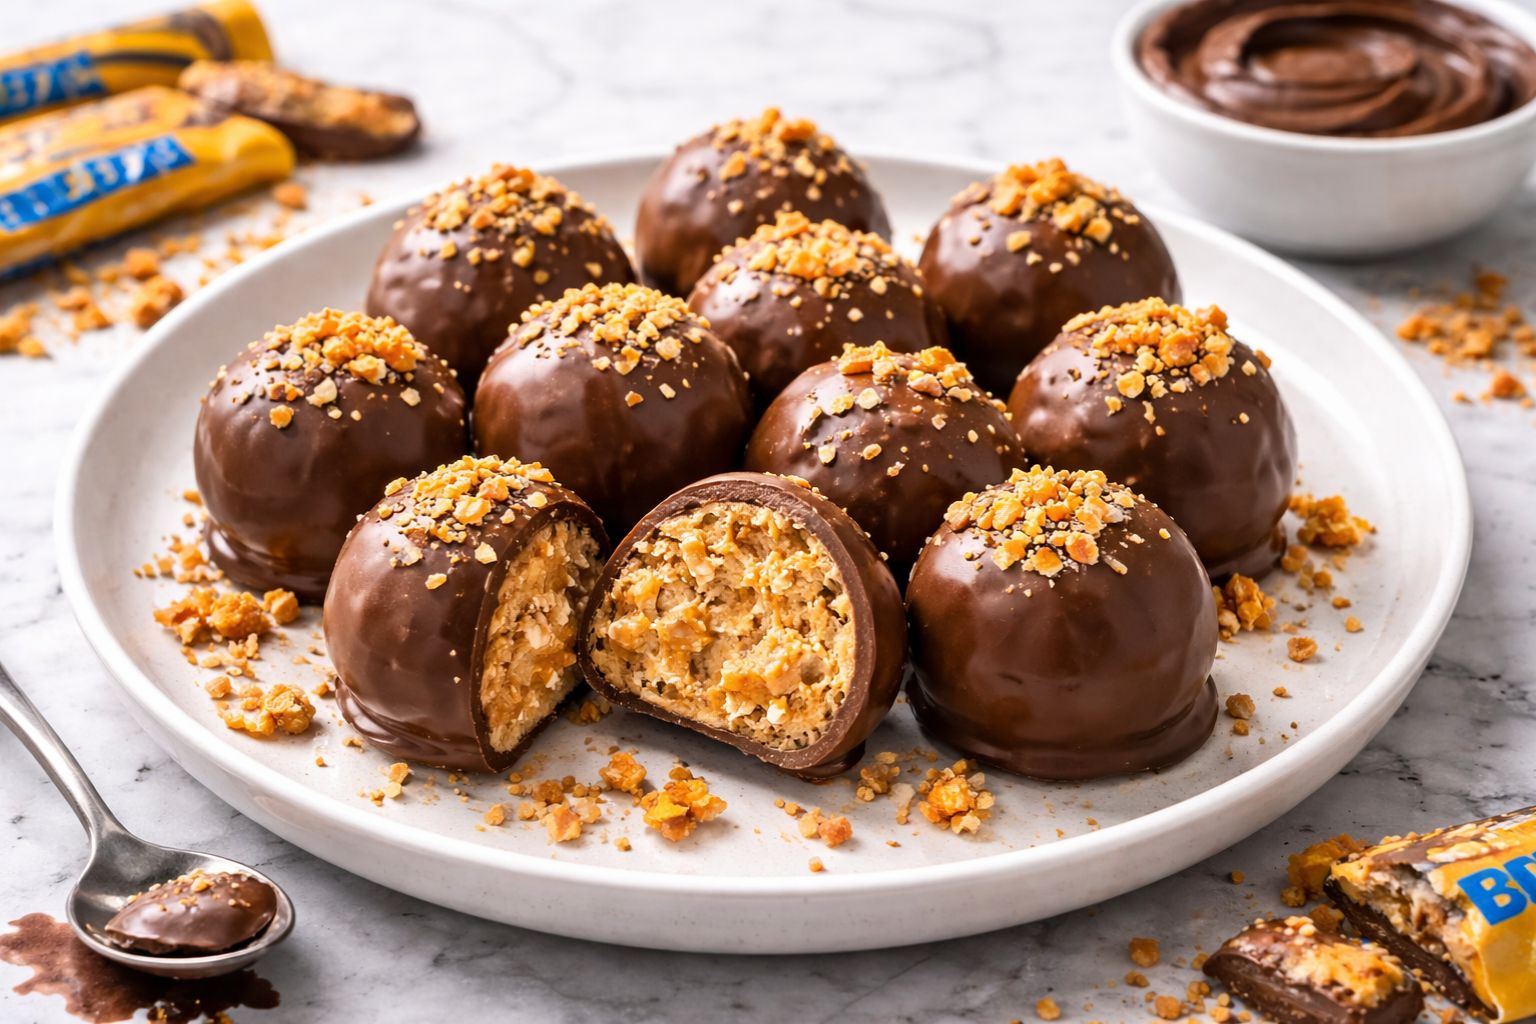
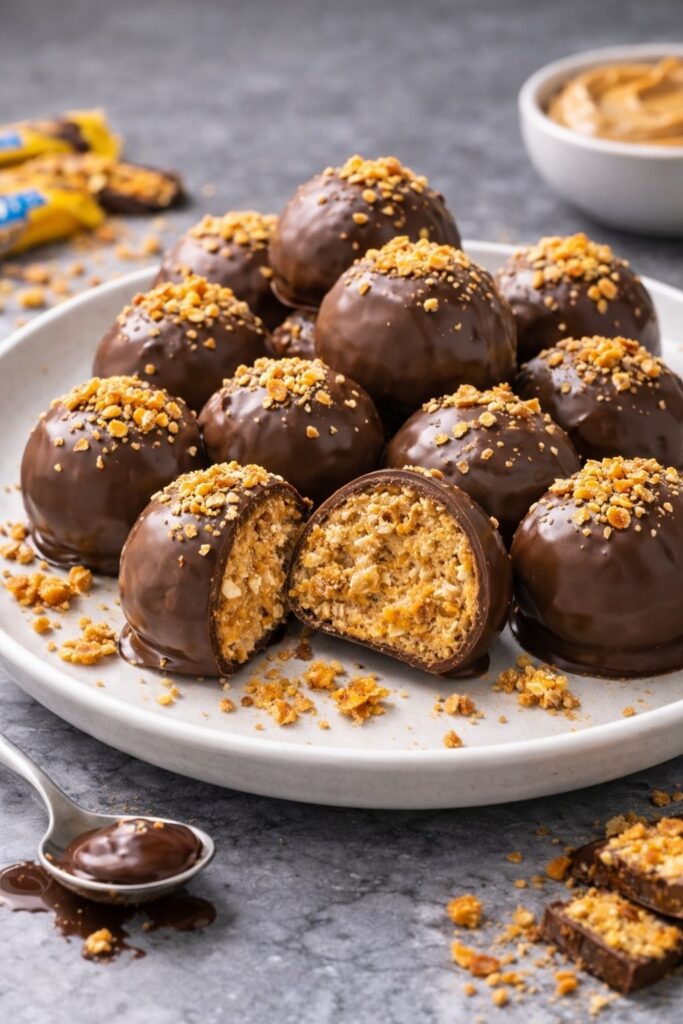
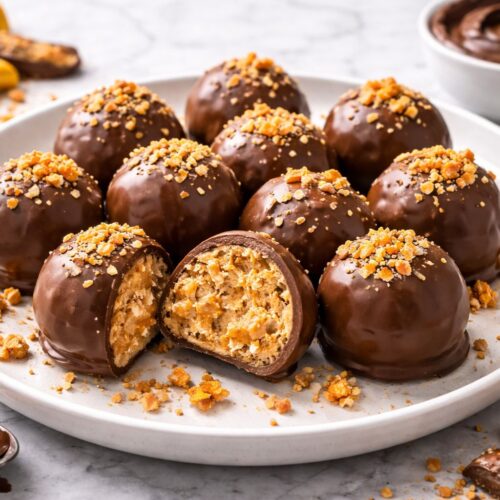
Butterfinger Balls are bite-sized no-bake dessert truffles made from crushed Butterfinger candy bars, creamy peanut butter, and a sweet binder such as powdered sugar or graham crumbs. The mixture is rolled into small balls and then coated in melted chocolate.
The result is a candy-like dessert with layers of texture and flavor. The outside is a smooth chocolate shell, while the inside is soft, creamy, and slightly crunchy thanks to the Butterfinger pieces.
What makes this classic Butterfinger Balls Recipe so popular is its simplicity. The ingredients are easy to find, the preparation is quick, and the flavor combination is almost impossible to resist.
As a chef, I appreciate recipes that deliver big flavor without requiring complicated techniques. This is exactly that kind of treat. It’s the perfect balance of chocolatey richness, peanut butter creaminess, and the unmistakable crunch of Butterfinger candy.
These little dessert bites are perfect for holiday trays, parties, cookie exchanges, or simply keeping in the refrigerator for when a sweet craving strikes.
Equipment List
You only need a few simple kitchen tools to make this easy Butterfinger Balls Recipe:
- Large mixing bowl
- Wooden spoon or rubber spatula
- Baking sheet
- Parchment paper
- Small cookie scoop or tablespoon
- Microwave-safe bowl
- Fork or dipping tool for chocolate
- Refrigerator for chilling
Recipe Card
Recipe Name: Butterfinger Balls Recipe
Prep Time: 20 minutes
Chill Time: 40 minutes
Total Time: 1 hour
Servings: 24 balls
Cuisine: American
Course: Dessert
Calories: 165 calories per ball
Ingredients
Butterfinger Filling
- 1 ½ cups crushed Butterfinger candy bars
- 1 cup creamy peanut butter
- ½ cup unsalted butter, softened
- 2 cups powdered sugar
- 1 teaspoon vanilla extract
Chocolate Coating
- 2 cups semi-sweet chocolate chips
- 1 tablespoon coconut oil or shortening
Optional Toppings
- Extra crushed Butterfinger pieces
- Drizzle of melted white chocolate
- Sprinkles
Instructions
Step 1: Crush the Butterfinger Candy
Place the Butterfinger candy bars into a zip-top bag and gently crush them using a rolling pin. You want small crunchy pieces rather than fine powder so the filling keeps its signature texture.
Step 2: Mix the Creamy Filling
In a large mixing bowl, combine the peanut butter, softened butter, powdered sugar, and vanilla extract. Stir until the mixture becomes smooth and creamy.
The mixture should feel thick but soft — almost like a rich peanut butter frosting.
Step 3: Add the Butterfinger Crunch
Fold the crushed Butterfinger pieces into the peanut butter mixture. As you stir, the filling becomes packed with crunchy bits and that sweet peanut butter aroma becomes irresistible.
Step 4: Roll the Balls
Use a tablespoon or cookie scoop to portion the mixture. Roll each portion between your hands to form smooth balls.
Place them on a parchment-lined baking sheet. Try to keep them similar in size so they chill and coat evenly.
Step 5: Chill the Filling
Place the tray in the refrigerator for about 30–40 minutes. Chilling helps the balls firm up so they hold their shape when dipped in chocolate.
Step 6: Melt the Chocolate
In a microwave-safe bowl, melt the chocolate chips with coconut oil in 30-second intervals, stirring between each round until smooth and glossy.
The coconut oil helps the chocolate coating stay silky and easier to dip.
Step 7: Dip the Butterfinger Balls
Using a fork or dipping tool, lower each chilled ball into the melted chocolate. Roll it gently to coat completely, then lift it out and let the excess chocolate drip off.
Place the coated ball back on the parchment-lined baking sheet.
Step 8: Add Optional Toppings
Before the chocolate sets, sprinkle a few crushed Butterfinger crumbs on top or drizzle with white chocolate for decoration.
Step 9: Let the Chocolate Set
Allow the chocolate coating to set at room temperature or place the tray in the refrigerator for about 10–15 minutes until firm.
Why I Love This Recipe
There are many reasons this classic Butterfinger Balls Recipe remains one of my favorite desserts to make.
- It requires no baking, which makes it perfect year-round.
- The ingredients are simple and easy to find.
- The flavor combination of peanut butter, chocolate, and Butterfinger crunch is irresistible.
- They store well, making them great for parties and holidays.
As someone who spends a lot of time in the kitchen, I truly appreciate recipes that deliver big results with minimal effort. These little dessert bites do exactly that.
Tips for Perfect Butterfinger Balls
A few small tricks will help your homemade Butterfinger Balls Recipe turn out perfectly every time:
- Chill the filling before dipping. This prevents the balls from falling apart in the chocolate.
- Use good quality chocolate. It melts more smoothly and tastes better.
- Don’t crush the Butterfinger too finely. The crunchy pieces are part of the charm.
- Work in batches when dipping. Keep some balls chilled while coating others.
Fun Variations
One of the reasons this easy Butterfinger Balls Recipe is so fun to make is how customizable it can be.
- Add mini chocolate chips to the filling.
- Use dark chocolate for a richer coating.
- Drizzle with peanut butter on top.
- Mix crushed pretzels into the filling for a sweet-and-salty twist.
When to Serve Butterfinger Balls
These little treats fit almost any occasion:
- Holiday dessert trays
- Birthday parties
- Bake sales
- Cookie exchanges
- Movie night snacks
Honestly, they rarely last long enough to make it past the kitchen counter.
Storage Tips
Butterfinger Balls store beautifully, which is another reason I love making them ahead of time.
- Refrigerator: Store in an airtight container for up to 1 week.
- Freezer: Freeze for up to 2 months.
- Serving: Let them sit at room temperature for a few minutes before eating for the best texture.
FAQs
Can I make Butterfinger Balls ahead of time?
Yes! They are actually perfect for making a day or two ahead since the flavors settle and the chocolate sets beautifully.
Can I use crunchy peanut butter?
You can, though creamy peanut butter creates a smoother filling.
Why are my balls too soft to roll?
If the mixture feels too soft, add a little more powdered sugar or chill it briefly before rolling.
Can I use candy melts instead of chocolate chips?
Yes, candy melts work well and are easy for dipping.
Do they need to stay refrigerated?
They hold their shape best when stored in the refrigerator, especially in warmer kitchens.
Final Thoughts
If you love quick desserts that feel homemade and special, this Butterfinger Balls Recipe is one you’ll want to keep in your recipe collection.
Between the creamy peanut butter filling, the crunchy Butterfinger pieces, and the smooth chocolate coating, every bite feels like a little candy shop treat made right in your own kitchen.
For me, recipes like this are the ones that bring people together — the ones that disappear quickly from dessert trays and get requested again and again.
And if your kitchen ends up smelling like chocolate and peanut butter while you make them… well, that’s just part of the magic.
Butterfinger Balls Recipe
Equipment
- Large mixing bowl
- Wooden spoon or rubber spatula.
- Baking sheet
- Parchment paper
- Small cookie scoop or tablespoon
- Microwave-safe bowl
- Fork or dipping tool for chocolate
- Refrigerator for chilling
Ingredients
Butterfinger Filling
- 1 ½ cups crushed Butterfinger candy bars
- 1 cup creamy peanut butter
- ½ cup unsalted butter softened
- 2 cups powdered sugar
- 1 teaspoon vanilla extract
Chocolate Coating
- 2 cups semi-sweet chocolate chips
- 1 tablespoon coconut oil or shortening
Optional Toppings
- Extra crushed Butterfinger pieces
- Drizzle of melted white chocolate
- Sprinkles
Instructions
Step 1: Crush the Butterfinger Candy
- Place the Butterfinger candy bars into a zip-top bag and gently crush them using a rolling pin. You want small crunchy pieces rather than fine powder so the filling keeps its signature texture.
Step 2: Mix the Creamy Filling
- In a large mixing bowl, combine the peanut butter, softened butter, powdered sugar, and vanilla extract. Stir until the mixture becomes smooth and creamy.
- The mixture should feel thick but soft — almost like a rich peanut butter frosting.
Step 3: Add the Butterfinger Crunch
- Fold the crushed Butterfinger pieces into the peanut butter mixture. As you stir, the filling becomes packed with crunchy bits and that sweet peanut butter aroma becomes irresistible.
Step 4: Roll the Balls
- Use a tablespoon or cookie scoop to portion the mixture. Roll each portion between your hands to form smooth balls.
- Place them on a parchment-lined baking sheet. Try to keep them similar in size so they chill and coat evenly.
Step 5: Chill the Filling
- Place the tray in the refrigerator for about 30–40 minutes. Chilling helps the balls firm up so they hold their shape when dipped in chocolate.
Step 6: Melt the Chocolate
- In a microwave-safe bowl, melt the chocolate chips with coconut oil in 30-second intervals, stirring between each round until smooth and glossy.
- The coconut oil helps the chocolate coating stay silky and easier to dip.
Step 7: Dip the Butterfinger Balls
- Using a fork or dipping tool, lower each chilled ball into the melted chocolate. Roll it gently to coat completely, then lift it out and let the excess chocolate drip off.
- Place the coated ball back on the parchment-lined baking sheet.
Step 8: Add Optional Toppings
- Before the chocolate sets, sprinkle a few crushed Butterfinger crumbs on top or drizzle with white chocolate for decoration.
Step 9: Let the Chocolate Set
- Allow the chocolate coating to set at room temperature or place the tray in the refrigerator for about 10–15 minutes until firm.

Hi, I’m Olivia Brooks! Cooking is my passion, and I love turning everyday ingredients into meals that bring joy to the table. On CulinaryPearl, I share simple recipes, helpful kitchen tips, and inspiration for food lovers everywhere