Intro
There are some recipes that instantly make people hover in the kitchen before you even call them to eat. Italian Grinder Sliders Hawaiian Rolls is one of those recipes. The smell alone—warm bread, melted cheese, savory meats, tangy dressing—has everyone asking, “Are those ready yet?” before they even hit the table.
This recipe came from my love of classic Italian grinders and my not-so-secret obsession with Hawaiian rolls. Those soft, slightly sweet rolls are magical. They turn anything into a party sandwich. So one day, instead of making one giant grinder or a bunch of individual subs, I sliced a whole pack of Hawaiian rolls in half, layered them like a deli dream, baked them until melty, and honestly… I never looked back.
These sliders are warm, cheesy, meaty, and just a little messy in the best way. They’re perfect for game days, family gatherings, potlucks, or nights when you want comfort food without a lot of effort. And trust me—once you make them, they’ll become your thing.
What Are Italian Grinder Sliders Hawaiian Rolls?
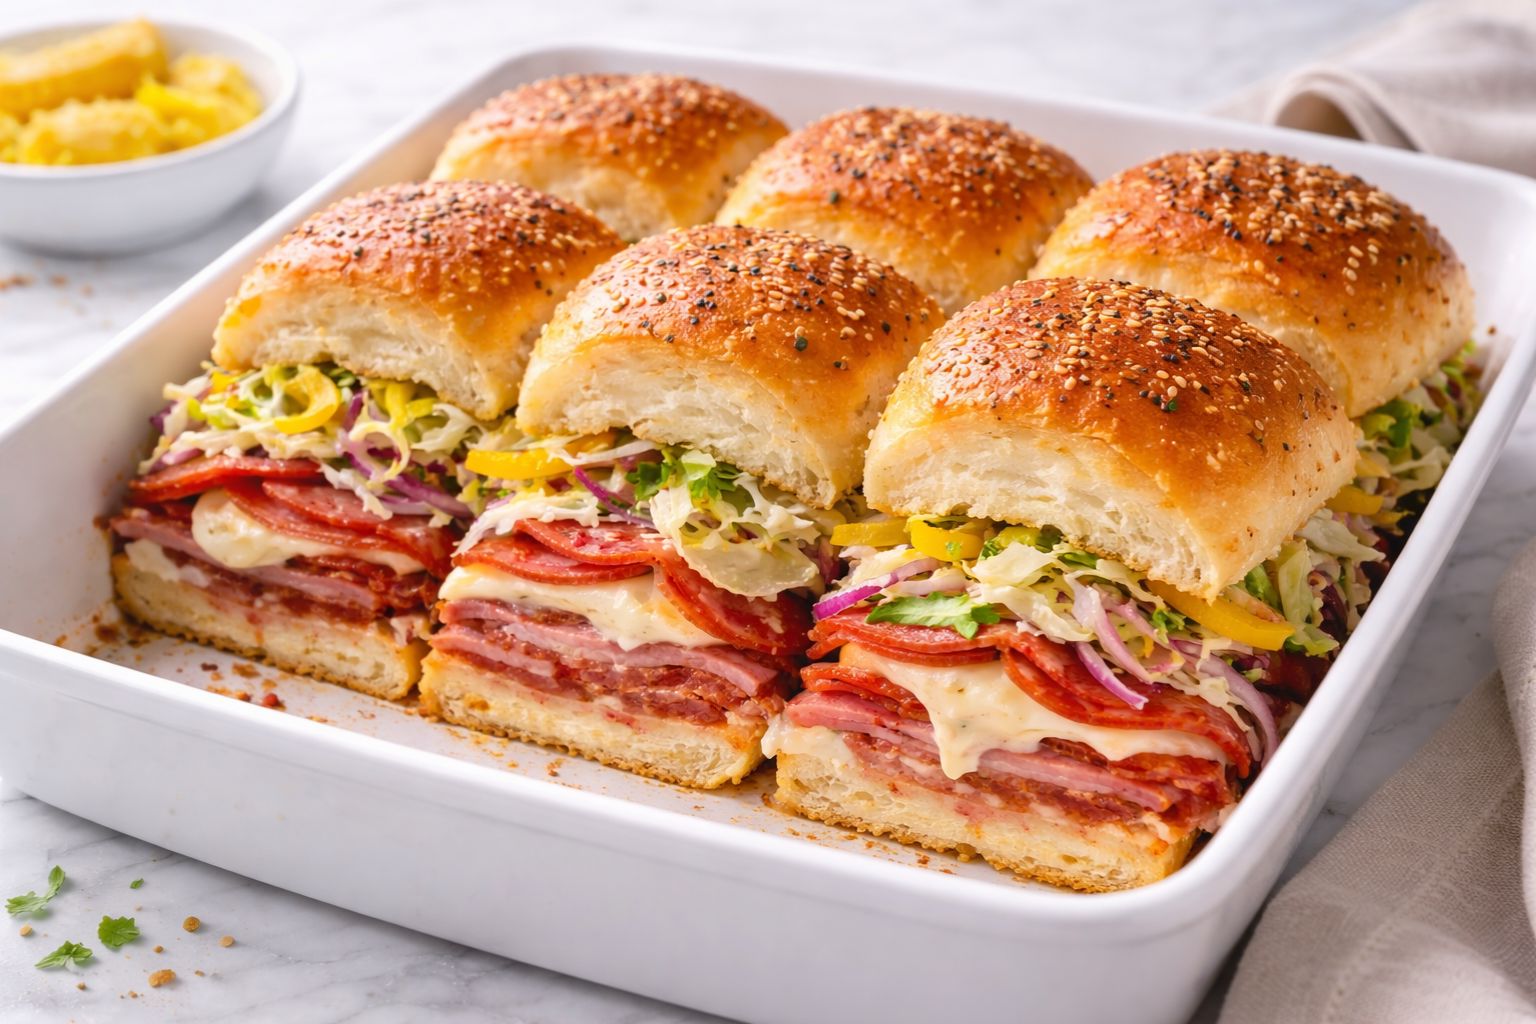
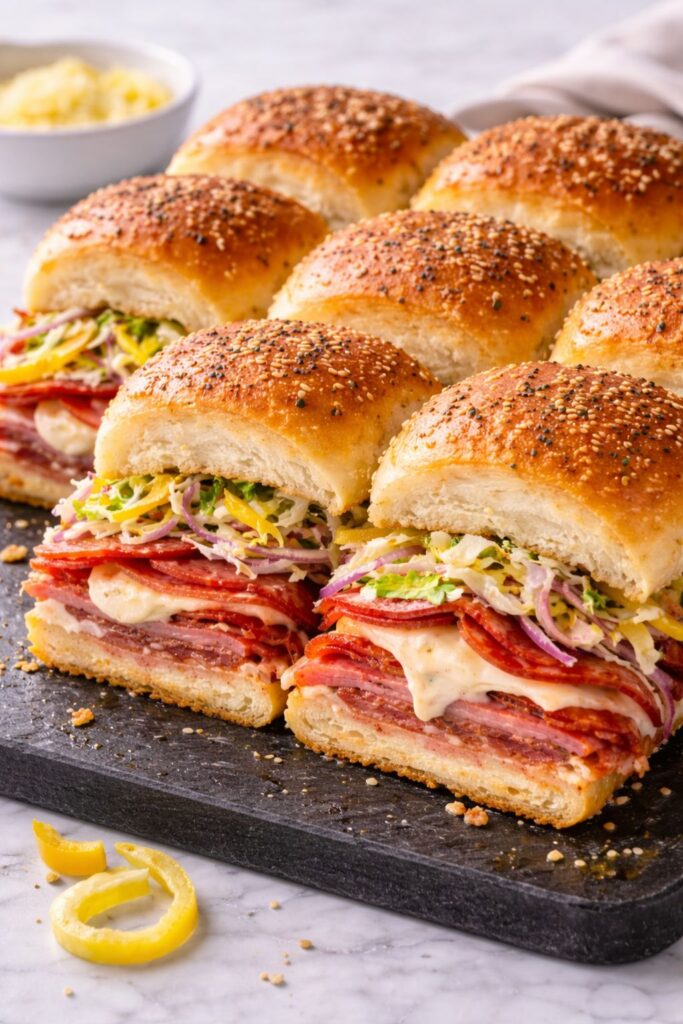
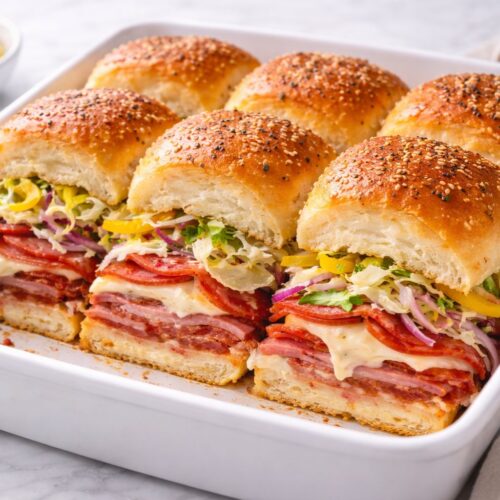
Italian Grinder Sliders Hawaiian Rolls are mini baked sandwiches inspired by a classic Italian grinder (or sub). They’re made using soft Hawaiian sweet rolls, layered with Italian deli meats, cheese, and a signature grinder-style topping, then baked until everything is hot and gooey.
Instead of building individual sandwiches, everything is assembled in one pan and sliced into sliders after baking. This means less work, more flavor, and that irresistible pull-apart texture everyone loves.
What makes them special is the balance. The sweetness of the rolls, the saltiness of the meats, the creaminess of the cheese, and the tangy crunch from the grinder topping all work together perfectly.
Why You’ll Love These Sliders
These sliders check every comfort-food box.
They’re:
- Easy to make
- Crowd-pleasing
- Warm and cheesy
- Perfect for sharing
- Customizable
As a female home chef, I love recipes that feel generous. This is the kind of food you put in the center of the table and let people grab, laugh, and go back for seconds. No fancy plating. No stress. Just good food that makes people happy.
Equipment List
You won’t need anything fancy here.
- 9×13-inch baking dish
- Sharp serrated knife
- Cutting board
- Mixing bowl
- Spoon or spatula
- Aluminum foil
That’s it. Simple and approachable.
Ingredients
This recipe makes about 12 sliders.
For the Sliders
- 1 package Hawaiian rolls (12-count)
- ½ pound sliced ham
- ½ pound sliced salami
- ½ pound sliced pepperoni
- 8 slices provolone cheese
- 4 slices mozzarella cheese
For the Grinder Topping
- 1 cup shredded iceberg lettuce
- ½ cup sliced banana peppers
- ¼ cup thinly sliced red onion
- ¼ cup mayonnaise
- 1 tablespoon red wine vinegar
- 1 tablespoon olive oil
- ½ teaspoon Italian seasoning
- Salt and black pepper, to taste
Optional Butter Topping
- 3 tablespoons melted butter
- ½ teaspoon garlic powder
- ½ teaspoon Italian seasoning
Instructions
Step 1: Prep the Rolls
Preheat your oven to 350°F (175°C).
Using a serrated knife, carefully slice the entire pack of Hawaiian rolls in half horizontally, keeping them connected. Place the bottom half into a greased 9×13-inch baking dish.
Step 2: Layer the Meats and Cheese
Start layering evenly over the bottom rolls:
- Ham
- Salami
- Pepperoni
- Provolone cheese
- Mozzarella cheese
Make sure everything is spread edge to edge so every slider gets a little of everything.
Place the top half of the rolls on for now, just to keep things together.
Step 3: Make the Grinder Topping
In a bowl, mix together the shredded lettuce, banana peppers, red onion, mayonnaise, red wine vinegar, olive oil, Italian seasoning, salt, and pepper.
This mixture should be creamy but tangy, fresh, and crunchy. Taste it and adjust seasoning if needed.
Step 4: Bake the Sliders
Remove the top rolls and loosely cover the dish with foil. Bake the sliders (just the meat and cheese layers) for 12–15 minutes, until the cheese is melted and everything is hot.
Step 5: Add the Grinder Topping
Remove from the oven. Carefully spread the grinder topping evenly over the melted cheese layer. Then place the top rolls back on.
Step 6: Optional Butter Finish
If using the butter topping, mix melted butter with garlic powder and Italian seasoning. Brush lightly over the tops of the rolls.
Return to the oven, uncovered, for another 5–7 minutes until the tops are lightly golden.
Step 7: Slice and Serve
Let the sliders rest for 5 minutes, then slice along the roll lines and serve warm.
Flavor and Texture Breakdown
These sliders are all about contrast.
The rolls are soft and slightly sweet. The meats are salty and savory. The cheese is melty and creamy. And the grinder topping adds crunch, tang, and freshness that keeps everything from feeling too heavy.
Every bite has layers of flavor, and nothing feels overpowering. It’s indulgent without being overwhelming.
Tips for the Best Italian Grinder Sliders Hawaiian Rolls
- Don’t overbake. Hawaiian rolls dry out quickly.
- Drain banana peppers well so the sliders don’t get soggy.
- Layer evenly. This ensures every slider tastes the same.
- Add the grinder topping after baking to keep it fresh and crisp.
- Let them rest before slicing so everything stays together.
Easy Variations
Once you’ve made these once, you’ll start thinking of ways to change them up.
- Swap ham for capicola or mortadella
- Use Swiss or fontina cheese
- Add roasted red peppers
- Make it spicy with hot cherry peppers
- Use turkey for a lighter version
This recipe is flexible and forgiving, which makes it great for entertaining.
Make Them Ahead of Time
You can assemble the meat and cheese layers up to 24 hours in advance. Cover tightly and refrigerate. Bake when ready, then add the grinder topping fresh.
This makes hosting so much easier.
What to Serve With Italian Grinder Sliders
These sliders pair perfectly with simple sides:
- Potato chips
- Pasta salad
- Pickles
- Coleslaw
- Roasted vegetables
They’re also amazing on their own, straight from the pan.
Storage and Reheating
Store leftovers in an airtight container in the fridge for up to 3 days. Reheat in the oven at 325°F until warmed through. Avoid the microwave if possible—it softens the rolls too much.
Why This Recipe Is a Favorite in My Kitchen
As a female chef, I gravitate toward recipes that bring people together. Italian Grinder Sliders Hawaiian Rolls do exactly that. They’re casual, comforting, and meant to be shared. They don’t ask for perfection. They ask for hunger and good company.
Every time I make these, they disappear fast. And every time, someone asks for the recipe. That’s how I know it’s a keeper.
Final Thoughts
If you love classic Italian grinders, soft Hawaiian rolls, and easy crowd-pleasing food, these sliders belong in your recipe rotation. They’re warm, messy, cheesy, and full of flavor—everything comfort food should be.
Make them once, and I promise they’ll become one of those recipes you keep coming back to.
More Recipes:
Italian Grinder Sliders Hawaiian Rolls Recipe
Equipment
- 9×13-inch baking dish
- Sharp serrated knife
- Cutting board
- Mixing bowl
- Spoon or spatula
- Aluminum foil
Ingredients
For the Sliders
- 1 package Hawaiian rolls 12-count
- ½ pound sliced ham
- ½ pound sliced salami
- ½ pound sliced pepperoni
- 8 slices provolone cheese
- 4 slices mozzarella cheese
For the Grinder Topping
- 1 cup shredded iceberg lettuce
- ½ cup sliced banana peppers
- ¼ cup thinly sliced red onion
- ¼ cup mayonnaise
- 1 tablespoon red wine vinegar
- 1 tablespoon olive oil
- ½ teaspoon Italian seasoning
- Salt and black pepper to taste
Optional Butter Topping
- 3 tablespoons melted butter
- ½ teaspoon garlic powder
- ½ teaspoon Italian seasoning
Instructions
Step 1: Prep the Rolls
- Preheat your oven to 350°F (175°C).
- Using a serrated knife, carefully slice the entire pack of Hawaiian rolls in half horizontally, keeping them connected. Place the bottom half into a greased 9×13-inch baking dish.
Step 2: Layer the Meats and Cheese
- Start layering evenly over the bottom rolls:
- Ham
- Salami
- Pepperoni
- Provolone cheese
- Mozzarella cheese
- Make sure everything is spread edge to edge so every slider gets a little of everything.
- Place the top half of the rolls on for now, just to keep things together.
Step 3: Make the Grinder Topping
- In a bowl, mix together the shredded lettuce, banana peppers, red onion, mayonnaise, red wine vinegar, olive oil, Italian seasoning, salt, and pepper.
- This mixture should be creamy but tangy, fresh, and crunchy. Taste it and adjust seasoning if needed.
Step 4: Bake the Sliders
- Remove the top rolls and loosely cover the dish with foil. Bake the sliders (just the meat and cheese layers) for 12–15 minutes, until the cheese is melted and everything is hot.
Step 5: Add the Grinder Topping
- Remove from the oven. Carefully spread the grinder topping evenly over the melted cheese layer. Then place the top rolls back on.
Step 6: Optional Butter Finish
- If using the butter topping, mix melted butter with garlic powder and Italian seasoning. Brush lightly over the tops of the rolls.
- Return to the oven, uncovered, for another 5–7 minutes until the tops are lightly golden.
Step 7: Slice and Serve
- Let the sliders rest for 5 minutes, then slice along the roll lines and serve warm.

Hi, I’m Olivia Brooks! Cooking is my passion, and I love turning everyday ingredients into meals that bring joy to the table. On CulinaryPearl, I share simple recipes, helpful kitchen tips, and inspiration for food lovers everywhere