Intro
Ted’s Montana Grill Pickles Recipe is one of those things I didn’t know I needed in my life until I tasted it—crisp, cool, tangy, with that bold hit of garlic and dill that dances right on the edge of salty and sour.
If you’ve ever sat down at Ted’s Montana Grill and found yourself going through the pickles faster than the server can refill them, trust me, you’re not alone. These pickles have a kind of charm that feels both rustic and restaurant-level, like something old-fashioned but perfected over time.
As a chef who spends an unreasonable amount of time chasing flavors, pickles are one of my favorite rabbit holes. They’re simple, but also emotional.
They carry personality. You can taste the brine and instantly guess whether the maker grew up loving deli pickles in a New York jar, farmhouse barrel pickles from their grandma’s porch, or fast-food sandwich pickles. And Ted’s Montana Grill? Oh, their pickles scream, “We know what we’re doing.”
These pickles didn’t just inspire me—they pushed me straight into obsession territory. And now I’m sharing my home-kitchen version of Ted’s Montana Grill Pickles Recipe with you, with all the flavor notes, tiny details, and personal twists that make it feel like it came right from my cutting board to yours.
What Are Ted’s Montana Grill Pickles?
Ted’s Montana Grill Pickles are crisp refrigerator pickles served as a complimentary appetizer at the restaurant. They’re fresh, cold, tangy, and crunchy, with a flavor profile that leans heavily on garlic, dill, and peppercorns. They’re not the overly sour kind that smack you in the face. They’re more balanced—bright, refreshing, herbal, and surprisingly addictive.
They’re not fermented; they’re quick-pickled. That means no waiting weeks for bubbles and tang to develop. Instead, you get immediate satisfaction. A few hours in the fridge, and you’re already halfway to pickle heaven. Let them sit overnight? Even better. Wait 48 hours? Now you’re speaking my language.
The magic, though, is in the details—the little things that make these pickles feel like a signature dish. A touch of sugar to round the acidity, whole spices instead of powdered, fresh dill instead of dried. Everything is intentional. Everything adds personality.
The Story of My Discovery of This
I discovered Ted’s Montana Grill Pickles during a spontaneous lunch break. I remember being tired, slightly annoyed, and very hungry—the perfect emotional cocktail for comfort food. The server placed a small bowl of pickles on the table “just to start with,” and honestly, I wasn’t expecting much.
But the moment I bit into one? I froze. My inner chef perked up. The crunch was sharp, the dill woke me up, and the garlic hit like a tiny spark. I finished the whole bowl and ordered more. I may or may not have interrogated the server about the ingredients. The moment I got home, I went straight to my kitchen to start recreating them.
Short story, but one that changed my pickle journey forever.
Equipment List
You don’t need fancy tools to make Ted’s Montana Grill Pickles Recipe, but having a few basics will make your life easier:
- 2–3 wide-mouth glass jars (quart size works best)
- A small saucepan for heating the brine
- A cutting board
- A sharp knife
- Measuring cups and spoons
- A ladle or heatproof measuring cup for pouring hot brine
- A mixing bowl (optional but helpful)
That’s it. The beauty of pickling is that it asks for very little but gives you so much.
Ingredients
These ingredients recreate that bright, crisp, herb-packed flavor profile that makes the original so addictive:
For the cucumbers
- 6–8 small pickling cucumbers (kirby cucumbers are ideal)
- 6 cloves garlic, smashed
- 1 medium white onion, sliced (optional but recommended)
- 1 bunch fresh dill (use the stems too!)
- 2 teaspoons black peppercorns
- 1 teaspoon mustard seeds
- ½ teaspoon coriander seeds (optional but lovely)
- A few red pepper flakes (for a gentle heat, not spice)
For the brine
- 3 cups water
- 1 cup white vinegar
- 2 tablespoons kosher salt
- 1 tablespoon sugar (balances the acidity)
- Optional: a splash of rice vinegar for extra brightness
This is a classic quick-pickle brine, but the herb-and-spice combo is what pushes it into Ted’s-style territory.
Instructions
- Prep the cucumbers.
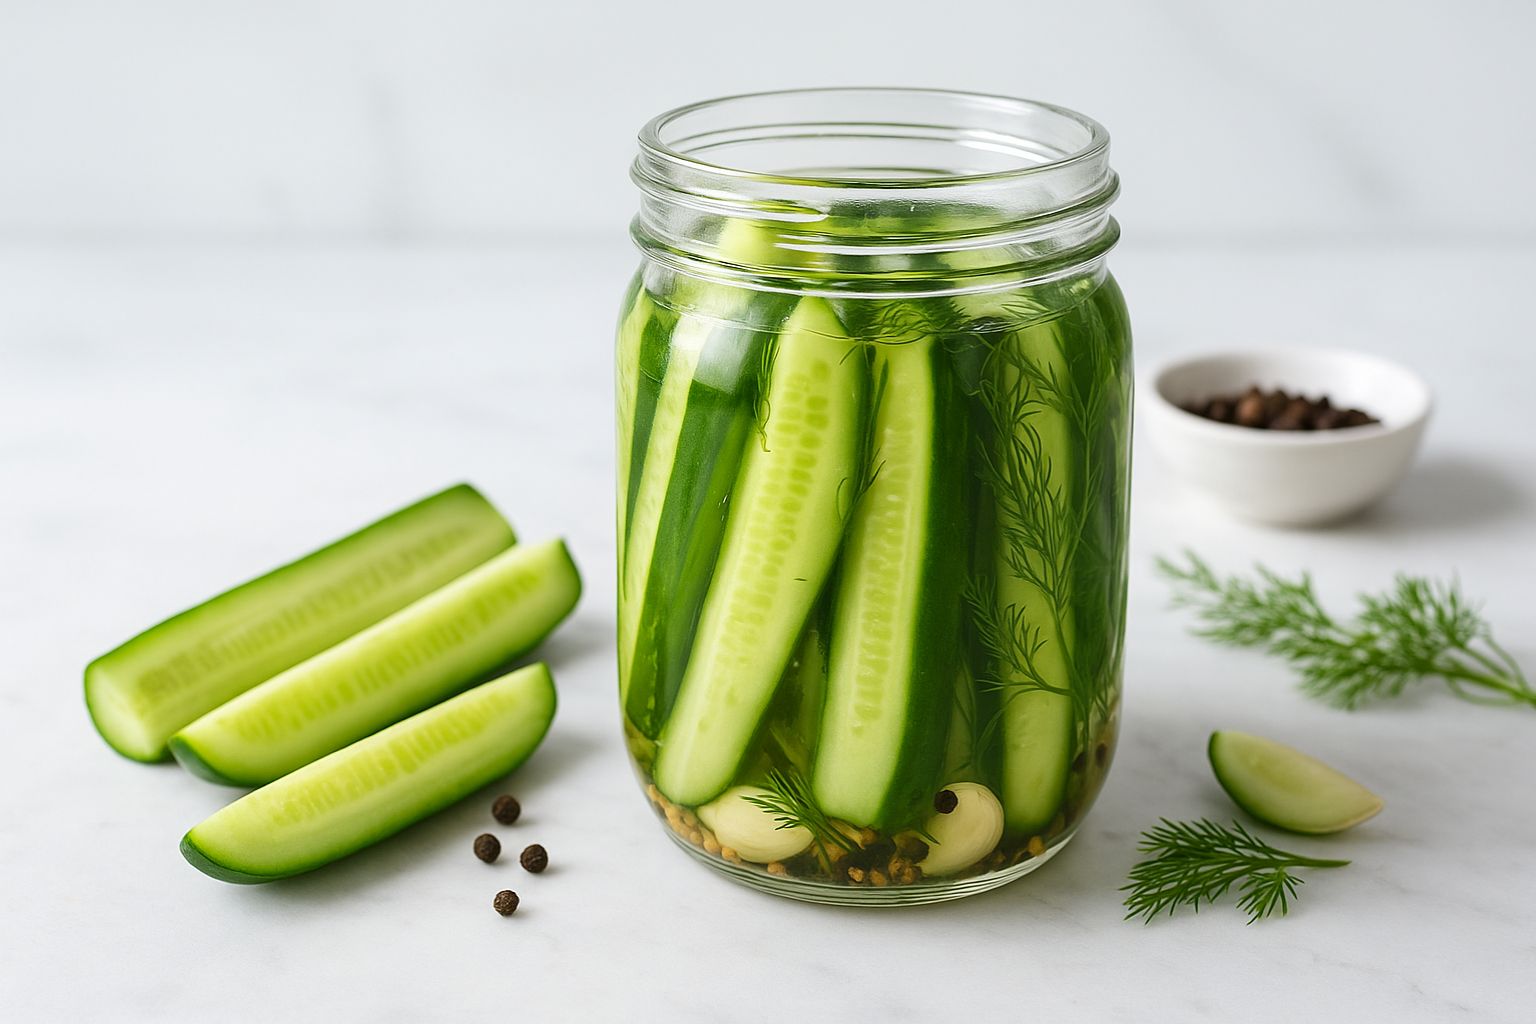
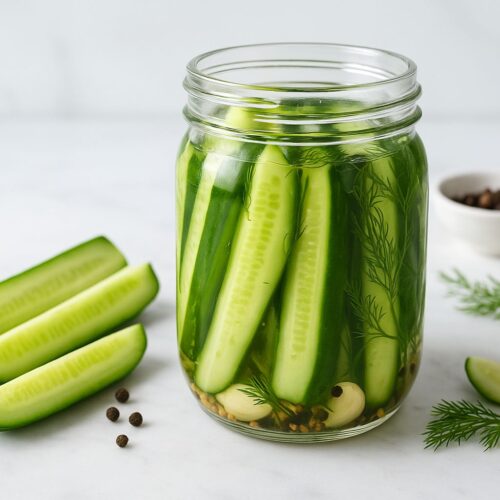
Wash your cucumbers well and cut them however you love. Spears feel most like the restaurant version, but chips work beautifully, too. - Pack the jars.
Add a handful of garlic, dill, peppercorns, spices, and onions to each jar. Don’t be shy with the dill—you want the jars to look like they’ve grown a tiny forest. - Heat the brine.
In a saucepan, bring water, vinegar, salt, and sugar to a gentle simmer. Stir until everything dissolves. No need to boil aggressively. - Pour the brine.
Carefully ladle the hot brine into the jars, covering the cucumbers completely. - Seal and cool.
Let the jars sit on the counter until they reach room temperature. Then pop them into the fridge. - Wait.
Give them at least 6–8 hours before the first taste.
Give them 24 hours, and they’ll taste amazing.
Give them 2 days, and they’ll taste like Ted’s Montana Grill Pickles Recipe in all its glory.
Why This Ted’s Montana Grill Pickles Recipe Works
Ted’s pickles taste so fresh because they’re not cooked. The brine is hot, yes, but the cucumbers themselves never touch heat. That means crunch stays crunch. Also, the spices remain whole, gently releasing flavor instead of overpowering the brine.
The sugar is subtle but essential—it rounds out the vinegar so the final taste isn’t harsh. The dill is generous, giving everything its signature aroma. Garlic brings heat and bite. Peppercorns add dimension. The cucumbers are the crunchy canvas that pulls everything together.

Choosing the Best Cucumbers
If you want restaurant-style crunch, go for:
- Kirby cucumbers
- Persian cucumbers
- Baby cucumbers
Avoid large slicing cucumbers—they get mushy. Pickling cucumbers have thicker skin, fewer seeds, and a firmer texture, making them ideal for a copycat Ted’s Montana Grill Pickles Recipe.
Flavour Variations You Can Play With
Even though the original is perfect as is, pickles are one of those things you can customize endlessly.
1. Spicy Version
- Add more red pepper flakes
- Throw in a sliced jalapeno
- Add a small dried chilli for slow heat
2. Sweet Version
- Add an extra tablespoon of sugar
- Toss in a slice of fresh ginger
3. Extra Garlic Version
- Double the garlic
- Use one clove thinly sliced
4. Herb Upgrade
Try adding:
- Fresh tarragon
- Bay leaves
- A sprig of fresh thyme
These won’t make it taste exactly like the original, but they’ll make it uniquely yours.
Serving Ideas
Pickles are not just a side dish—they’re a lifestyle.
Here are some of my favorite ways to serve these:
- With burgers (classic pairing, obviously)
- Sliced on sandwiches
- Chopped into potato salad
- On a charcuterie board
- As a crunchy snack straight from the jar
- On fish tacos
- With grilled chicken or steak
- With roasted potatoes
The bright acidity cuts through anything rich and savoury. It brings food to life.
Storage Tips
These are refrigerator pickles, so they’re not shelf-stable. But they keep beautifully.
- Store in the fridge
- Keep jars sealed tightly
- They last 2–3 weeks, sometimes longer
- They taste best in the first 7–10 days
The longer they sit, the more intense the flavor becomes.
Troubleshooting for First-Time Picklers
Even though this is a simple recipe, little things can affect the final taste. Here are some tips:
1. Mushy pickles?
- The cucumbers weren’t firm or fresh.
- use slicing cucumbers.
- Brine was boiling too aggressively.
2. Not enough flavor?
- Add more garlic and dill.
- Let the pickles sit longer.
- Increase spices slightly (but not too much).
3. Too salty?
- Reduce the salt by ½ tablespoon next time.
4. Too sour?
- Add a bit more sugar to the brine.
Pickling is forgiving. Adjusting is part of the fun.
Tips From Me as a Chef
Since I’m always tinkering in the kitchen, here are a few chef-level details:
- Cut ends evenly. The blossom end of cucumbers contains enzymes that soften them. Trim both ends—don’t skip this.
- Use filtered water. Hard or treated water can affect flavor.
- Don’t crush peppercorns. Whole spices give a cleaner flavor.
- Layer dill generously. Dill is the soul of this recipe.
- Use garlic with firm cloves. Old garlic releases bitterness.
These tiny things make a real difference.
A Few Fun Facts About Pickles
- Pickling has been around for over 4,000 years.
- Cleopatra claimed pickles helped maintain her beauty. (I mean… who are we to argue?)
- Pickle juice is excellent for hydration.
- Most restaurants make quick pickles for consistency and crunch.
- The word “pickle” actually comes from the Dutch word “pekel,” meaning brine.
So yes, when you’re making your own Ted’s Montana Grill Pickles Recipe, you’re participating in some very old, very delicious history.
Why I Love Sharing This Recipe
Pickles remind me of family kitchens, summer gardens, and the feeling of prepping food for people I love. There’s something wholesome about slicing cucumbers, filling jars, and watching the herbs float through warm brine.
This Ted’s Montana Grill Pickles Recipe isn’t just about recreating a restaurant favourite—it’s about capturing a flavour memory. It’s about the simple joy of opening the fridge, grabbing a cold jar, and crunching into something bright and tangy that you made with your own hands.
Final Thoughts
Ted’s Montana Grill Pickles Recipe has lived rent-free in my mind ever since that first accidental bite during my lunch break. And now, it’s become one of those recipes I love teaching, sharing, gifting, and, honestly, bragging about a little.
Everything about these pickles—
the crunch,
the chill,
the herbs,
the garlic,
the tang—
It just works.
I hope you make these, tweak them, enjoy them, and even hide a jar in the back of the fridge for yourself. (No judgment—I do it too.)
If you love simple recipes with big personality, this one will become a permanent resident in your weekly kitchen rotation.
Happy pickling!
More Recipes:
Ted’s Montana Grill Pickles Recipe
Equipment
- 2–3 wide-mouth glass jars (quart size works best)
- A small saucepan for heating the brine
- A cutting board
- A sharp knife
- Measuring cups and spoons.
- A ladle or heatproof measuring cup for pouring hot brine
- A mixing bowl (optional but helpful)
Ingredients
For the cucumbers
- 6 –8 small pickling cucumbers kirby cucumbers are ideal
- 6 cloves garlic smashed
- 1 medium white onion sliced (optional but recommended)
- 1 bunch fresh dill use the stems too!
- 2 teaspoons black peppercorns
- 1 teaspoon mustard seeds
- ½ teaspoon coriander seeds optional but lovely
- A few red pepper flakes for a gentle heat, not spice
For the brine
- 3 cups water
- 1 cup white vinegar
- 2 tablespoons kosher salt
- 1 tablespoon sugar balances the acidity
- Optional: a splash of rice vinegar for extra brightness
- This is a classic quick-pickle brine but the herb-and-spice combo is what pushes it into Ted’s-style territory.
Instructions
Prep the cucumbers.
- Wash your cucumbers well and cut them however you love. Spears feel most like the restaurant version, but chips work beautifully, too.
Pack the jars.
- Add a handful of garlic, dill, peppercorns, spices, and onions to each jar. Don’t be shy with the dill—you want the jars to look like they’ve grown a tiny forest.
Heat the brine.
- In a saucepan, bring water, vinegar, salt, and sugar to a gentle simmer. Stir until everything dissolves. No need to boil aggressively.
Pour the brine.
- Carefully ladle the hot brine into the jars, covering the cucumbers completely.
Seal and cool.
- Let the jars sit on the counter until they reach room temperature. Then pop them into the fridge.
Wait.
- Give them at least 6–8 hours before the first taste.
- Give them 24 hours, and they’ll taste amazing.
- Give them 2 days, and they’ll taste like Ted’s Montana Grill Pickles Recipe in all its glory.

Hi, I’m Olivia Brooks! Cooking is my passion, and I love turning everyday ingredients into meals that bring joy to the table. On CulinaryPearl, I share simple recipes, helpful kitchen tips, and inspiration for food lovers everywhere