

Personal Introduction
Wegmans Chili Recipe was one of those dinners I started making because I got tired of spending money on takeout chili that honestly never tasted as good the next day.
A few winters ago, I grabbed a container of chili from Wegmans after grocery shopping late one night, and I remember sitting at my kitchen counter thinking, “Okay… this is actually pretty solid.” It had that thick texture, enough spice without being too hot, and a good balance between beef, beans, and tomatoes.
The first time I made this at home, I messed up by adding way too much chili powder. I thought more seasoning would make it taste richer, but it just turned bitter after simmering.
What worked better for me was building the flavor slowly and tasting as I went. Now I make this version at least twice a month during colder weather, especially on Sundays when I know everyone will be digging through the fridge later looking for leftovers.
I also noticed this chili somehow tastes even better after sitting overnight. The flavors settle in and the beans soak up all that smoky tomato flavor. My husband actually started requesting this Wegmans Chili Recipe during football season because it holds up really well in a slow cooker too.
If you like chili that feels hearty without being overly heavy, this recipe hits that middle ground. It’s cozy, filling, and honestly pretty forgiving if you need to swap ingredients around based on what’s in your pantry.
Why This Recipe Works
There are a few practical reasons this chili turns out really good without needing fancy ingredients.
First, the mix of ground beef and beans gives the chili enough texture so it doesn’t feel watery or thin. Some chili recipes lean too much on tomatoes and end up tasting more like soup. This one stays thick and hearty.
The second thing is the layering of flavor. Cooking the onions and peppers before adding spices makes a huge difference. The spices bloom in the oil for about a minute, and you can actually smell the chili getting richer right away.
I also like using diced tomatoes plus tomato sauce instead of only crushed tomatoes. The chunks help give the chili body while the sauce keeps everything smooth.
Another reason this Wegmans Chili Recipe works well is the simmer time. You don’t need hours and hours. About 45 minutes is enough for everything to blend together without turning mushy.
And honestly, it reheats beautifully. Sometimes leftovers taste flat, but chili usually gets deeper and better by the next day.
Equipment Needed
You really don’t need anything fancy for this recipe.
- Large pot or Dutch oven
- Skillet or frying pan
- Wooden spoon or spatula
- Sharp knife
- Cutting board
- Measuring cups and spoons
- Can opener
- Ladle for serving
I usually cook everything in one large pot because I hate washing extra dishes afterward.
Recipe Card
Wegmans Chili Recipe Summary
Prep Time: 15 minutes
Cook Time: 50 minutes
Total Time: 1 hour 5 minutes
Servings: 8 servings
Cuisine: American
Course: Dinner
Calories: Approximately 420 calories per serving

Ingredients
- 2 pounds ground beef (80/20 works best)
- 1 tablespoon olive oil
- 1 large yellow onion, diced
- 1 green bell pepper, diced
- 1 red bell pepper, diced
- 4 garlic cloves, minced
- 2 tablespoons chili powder
- 1 teaspoon smoked paprika
- 1 teaspoon ground cumin
- 1 teaspoon salt
- 1/2 teaspoon black pepper
- 1/4 teaspoon cayenne pepper (optional)
- 1 tablespoon brown sugar
- 2 tablespoons tomato paste
- 1 can (28 oz) diced tomatoes
- 1 can (15 oz) tomato sauce
- 2 cans (15 oz each) kidney beans, drained and rinsed
- 1 can (15 oz) black beans, drained and rinsed
- 2 cups beef broth
- 1 tablespoon Worcestershire sauce
- 1 small jalapeño, finely diced (optional)
Optional Toppings
- Shredded cheddar cheese
- Sour cream
- Green onions
- Crushed tortilla chips
- Sliced avocado
- Oyster crackers
Step-by-Step Instructions
Step 1: Brown the Ground Beef
Start by heating a large pot over medium-high heat. Add the olive oil, then the ground beef. Break the meat apart with a wooden spoon while it cooks. You want the beef browned and crumbly, not gray and steamed.
This usually takes about 8 to 10 minutes. I noticed if the pot gets overcrowded, the meat releases too much liquid and doesn’t brown properly. If that happens, just let it cook a little longer until most of the moisture cooks off.
Once browned, drain some of the grease if there’s a lot sitting in the pot. Leave a little behind though because it adds flavor.
Step 2: Cook the Vegetables
Add the diced onion, green bell pepper, and red bell pepper directly into the pot with the beef. Stir everything together and cook for about 6 to 7 minutes.
The onions should start looking soft and slightly translucent. The peppers soften too, but they should still have a little bite left.
Then add the garlic and jalapeño if using. Cook for another minute until fragrant. Don’t walk away here because garlic burns fast. The first time I made this, I got distracted helping my kid with homework and the garlic turned bitter real quick.
Step 3: Add the Spices
Now stir in the chili powder, smoked paprika, cumin, salt, pepper, cayenne, and brown sugar.
Cook the spices for about 60 seconds before adding liquids. This small step really matters. The spices smell warmer and deeper once they hit the heat directly.
Add the tomato paste and stir it around until everything looks coated and slightly darkened.
Step 4: Add Tomatoes and Broth
Pour in the diced tomatoes, tomato sauce, beef broth, and Worcestershire sauce.
Give everything a good stir, scraping the bottom of the pot so nothing sticks. The chili will look thinner at first, but it thickens while simmering.
Bring the mixture to a gentle boil.
Step 5: Add Beans and Simmer
Once bubbling lightly, add the kidney beans and black beans.
Reduce the heat to low and let the chili simmer uncovered for about 40 to 45 minutes. Stir every 10 minutes or so to prevent sticking.
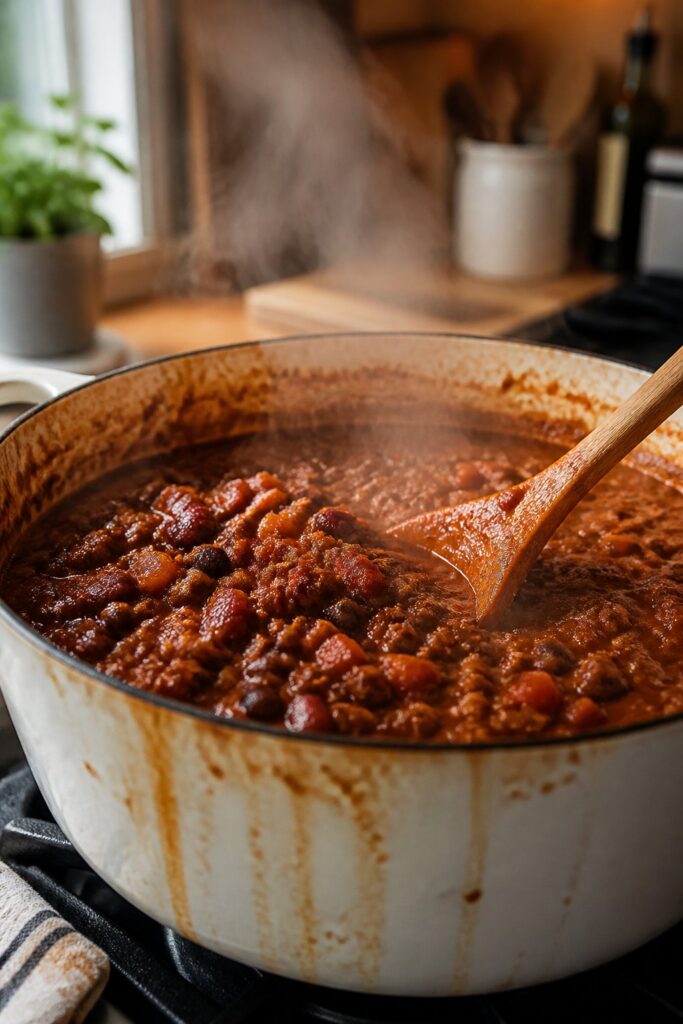
During this time, the chili slowly thickens and the smell gets stronger in the kitchen. I usually know it’s ready when the broth stops looking watery and the top has that slow bubbling texture.
If the chili gets too thick, add a splash of broth. If it seems too thin near the end, just let it simmer another 10 minutes.
Step 6: Taste and Adjust
Before serving, taste the chili and adjust seasoning if needed.
Sometimes I add another small pinch of salt right at the end because beans can dull flavors a little. If you like more heat, add extra cayenne or hot sauce.
Let the chili sit off heat for about 5 minutes before serving. It thickens slightly as it rests.
Common Mistakes to Avoid
Adding Too Much Liquid
One of the most common mistakes is pouring in too much broth. Chili should be thick enough to hold a spoon upright for a second, not runny like soup.
Skipping the Simmer Time
Even though the ingredients are technically cooked earlier, the simmer time helps the flavors blend together. If you rush it, the tomatoes can taste sharp instead of balanced.
Underseasoning the Meat
Ground beef needs enough seasoning because beans absorb flavor quickly. Taste the chili toward the end and adjust if needed.
Burning the Garlic
Garlic cooks very fast once added to hot oil. Keep it moving and only cook for about a minute.
Not Draining Beans
If you dump the canned bean liquid into the pot, the chili can end up tasting starchy or metallic.
Pro Tips
- Use 80/20 ground beef for better flavor. Lean beef works too, but the chili tastes a little drier.
- Let the chili rest for 10 minutes before serving. It thickens naturally.
- A small spoonful of brown sugar balances the acidity from tomatoes.
- If you want deeper flavor, make the chili a day ahead.
- Freeze individual portions for quick lunches later.
- I noticed freshly shredded cheese melts smoother on top compared to pre-shredded bags.

Variations
Turkey Chili Version
Swap the ground beef for ground turkey if you want something lighter. I usually add a little extra olive oil because turkey can dry out quicker.
Spicier Chili
Add extra jalapeños, chipotle peppers in adobo sauce, or more cayenne pepper.
Vegetarian Version
Skip the beef and use extra black beans, pinto beans, and corn.
Slow Cooker Method
Brown the meat and vegetables first, then transfer everything to a slow cooker. Cook on low for 6 to 7 hours.
Extra Smoky Flavor
Try adding a little bacon at the beginning. What worked better for me was cooking chopped bacon first and then browning the beef in the bacon drippings.
Serving Ideas
- Cornbread with butter on the side
- Baked potatoes topped with chili
- Tortilla chips for scooping
- Simple green salad with ranch dressing
- Rice for extra filling portions
- Mac and cheese alongside the chili
- Jalapeño cheddar biscuits
Make-Ahead Tips
This Wegmans Chili Recipe actually works really well for meal prep.
You can make the entire pot up to 2 days ahead and store it in the refrigerator. The flavor gets richer overnight.
If you want to prep ingredients early, chop the onions and peppers ahead of time and store them in airtight containers.
I sometimes cook a double batch and freeze half immediately before everyone starts going back for seconds.
For parties or game days, keep the chili warm in a slow cooker on the low setting. Just stir occasionally.
Storage & Reheating Tips
Store leftover chili in an airtight container in the refrigerator for up to 4 days.
For freezing, let the chili cool completely first. Transfer portions into freezer-safe containers or zip-top bags.
Frozen chili keeps well for about 3 months.
To reheat on the stove, warm over medium-low heat and stir occasionally until hot.
If reheating from frozen, thaw overnight in the refrigerator first if possible.
You can also microwave individual portions in 1-minute intervals, stirring between each round.
I noticed chili thickens a lot after refrigeration, so adding a splash of broth while reheating helps loosen it back up.

FAQs
Can I make this Wegmans Chili Recipe in a slow cooker?
Yes. Brown the meat and vegetables first, then transfer everything into the slow cooker. Cook on low for 6 to 7 hours or high for about 4 hours.
What beans work best in chili?
Kidney beans and black beans hold their texture well during simmering. Pinto beans also work great.
Can I make this chili less spicy?
Definitely. Leave out the cayenne and jalapeño if you want a milder version.
How do I thicken chili if it’s too thin?
Let it simmer uncovered longer so extra liquid evaporates naturally. You can also mash a few beans into the broth.
Is this Wegmans Chili Recipe gluten-free?
Most ingredients are naturally gluten-free, but always double-check labels on broth and Worcestershire sauce.
Can I use fresh tomatoes instead of canned?
You can, but canned tomatoes usually give more consistent flavor and thickness for chili.
Final Thoughts
This Wegmans Chili Recipe has honestly become one of those dependable dinners I fall back on when I don’t feel like overthinking dinner. It’s filling, affordable, and easy to tweak depending on what’s sitting in the pantry.
I like that it tastes homemade without requiring a full afternoon in the kitchen. Plus, leftovers make lunch the next day ridiculously easy.
The first time I made this recipe, I didn’t expect much because chili can sometimes turn out bland or watery pretty easily. But after a few tweaks and way too many test batches over winter, this version finally landed in that comfort-food category my family keeps asking for.
If you end up making this Wegmans Chili Recipe, don’t stress too much about getting every ingredient exact. Chili is one of those meals that forgives small changes. Honestly, some of my best batches happened when I was just using whatever beans were left in the cabinet.
And if your kitchen smells like onions and chili spices for the rest of the evening afterward… yeah, that’s usually a good sign.

Wegmans Chili Recipe

Equipment
- Large pot or Dutch oven
- Skillet or frying pan
- Wooden spoon or spatula
- Sharp knife
- Cutting board
- Measuring cups and spoons.
- Can opener
- Ladle (for serving)
Ingredients
- 2 pounds ground beef 80/20 works best
- 1 tablespoon olive oil
- 1 large yellow onion diced
- 1 green bell pepper diced
- 1 red bell pepper diced
- 4 garlic cloves minced
- 2 tablespoons chili powder
- 1 teaspoon smoked paprika
- 1 teaspoon ground cumin
- 1 teaspoon salt
- 1/2 teaspoon black pepper
- 1/4 teaspoon cayenne pepper optional
- 1 tablespoon brown sugar
- 2 tablespoons tomato paste
- 1 can 28 oz diced tomatoes
- 1 can 15 oz tomato sauce
- 2 cans 15 oz each kidney beans, drained and rinsed
- 1 can 15 oz black beans, drained and rinsed
- 2 cups beef broth
- 1 tablespoon Worcestershire sauce
- 1 small jalapeño finely diced (optional)
Optional Toppings
- Shredded cheddar cheese
- Sour cream
- Green onions
- Crushed tortilla chips
- Sliced avocado
- Oyster crackers
Instructions
Step 1: Brown the Ground Beef
- Start by heating a large pot over medium-high heat. Add the olive oil, then the ground beef. Break the meat apart with a wooden spoon while it cooks. You want the beef browned and crumbly, not gray and steamed.
- This usually takes about 8 to 10 minutes. I noticed if the pot gets overcrowded, the meat releases too much liquid and doesn’t brown properly. If that happens, just let it cook a little longer until most of the moisture cooks off.
- Once browned, drain some of the grease if there’s a lot sitting in the pot. Leave a little behind though because it adds flavor.
Step 2: Cook the Vegetables
- Add the diced onion, green bell pepper, and red bell pepper directly into the pot with the beef. Stir everything together and cook for about 6 to 7 minutes.
- The onions should start looking soft and slightly translucent. The peppers soften too, but they should still have a little bite left.
- Then add the garlic and jalapeño if using. Cook for another minute until fragrant. Don’t walk away here because garlic burns fast. The first time I made this, I got distracted helping my kid with homework and the garlic turned bitter real quick.
Step 3: Add the Spices
- Now stir in the chili powder, smoked paprika, cumin, salt, pepper, cayenne, and brown sugar.
- Cook the spices for about 60 seconds before adding liquids. This small step really matters. The spices smell warmer and deeper once they hit the heat directly.
- Add the tomato paste and stir it around until everything looks coated and slightly darkened.
Step 4: Add Tomatoes and Broth
- Pour in the diced tomatoes, tomato sauce, beef broth, and Worcestershire sauce.
- Give everything a good stir, scraping the bottom of the pot so nothing sticks. The chili will look thinner at first, but it thickens while simmering.
- Bring the mixture to a gentle boil.
Step 5: Add Beans and Simmer
- Once bubbling lightly, add the kidney beans and black beans.
- Reduce the heat to low and let the chili simmer uncovered for about 40 to 45 minutes. Stir every 10 minutes or so to prevent sticking.
- During this time, the chili slowly thickens and the smell gets stronger in the kitchen. I usually know it’s ready when the broth stops looking watery and the top has that slow bubbling texture.
- If the chili gets too thick, add a splash of broth. If it seems too thin near the end, just let it simmer another 10 minutes.
Step 6: Taste and Adjust
- Before serving, taste the chili and adjust seasoning if needed.
- Sometimes I add another small pinch of salt right at the end because beans can dull flavors a little. If you like more heat, add extra cayenne or hot sauce.
- Let the chili sit off heat for about 5 minutes before serving. It thickens slightly as it rests.
Notes
- Use 80/20 ground beef for better flavor. Lean beef works too, but the chili tastes a little drier.
- Let the chili rest for 10 minutes before serving. It thickens naturally.
- A small spoonful of brown sugar balances the acidity from tomatoes.
- If you want deeper flavor, make the chili a day ahead.
- Freeze individual portions for quick lunches later.
- I noticed freshly shredded cheese melts smoother on top compared to pre-shredded bags.
Hi, I’m Olivia Brooks! Cooking is my passion, and I love turning everyday ingredients into meals that bring joy to the table. On CulinaryPearl, I share simple recipes, helpful kitchen tips, and inspiration for food lovers everywhere